
Editing Operations
Provides tools for editing, cropping, transforming, and aligning model content.
Entry: Top editing toolbar, or Menu bar → Edit
Undo and Redo
| Action | Shortcut | Description |
|---|---|---|
| Undo | Ctrl + Z | Reverts the last committed editing operation |
| Redo | Ctrl + Shift + Z | Restores an undone operation |
The corresponding button is disabled when there is nothing to undo or redo. Performing a new operation clears the redo stack.
Delete
Select a model or selection, then press Delete or Backspace. You can also select Edit → Delete.
- Deleting a model requires a second confirmation.
- Deleting a selection runs immediately.
- Delete supports undo and redo.
Add to Selection, Subtract from Selection, and Invert Selection
See Selectors for details about selection operations.
- Add to selection is the default mode. You can continue adding content to an existing selection.
- Hold
Ctrlto temporarily enter subtract mode. - Press
Ctrl+Ito invert the current selection. - Press
Ctrl+Ato select all. - Press
Escto clear the selection or cancel the current drawing.
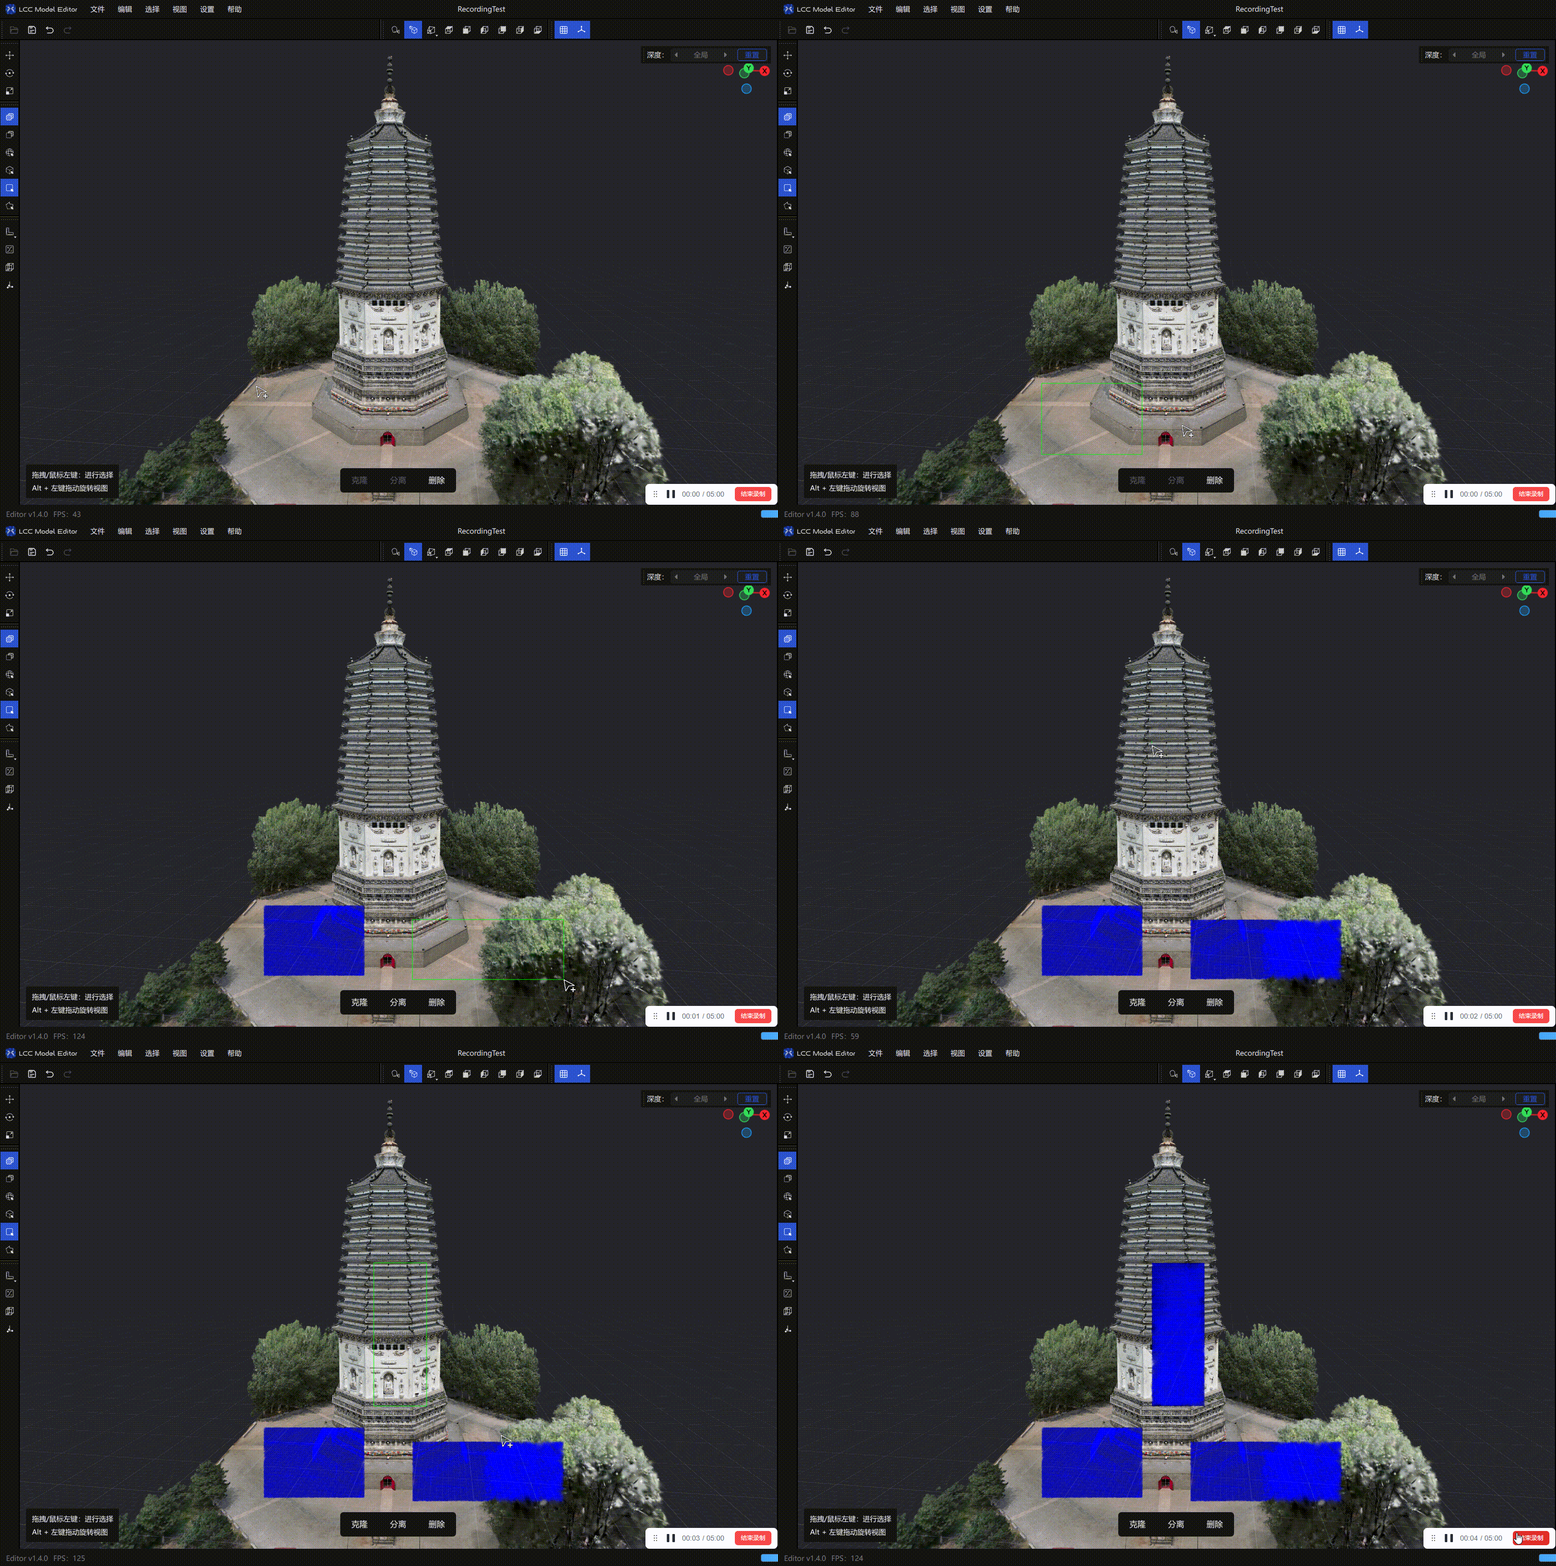
Add to selection
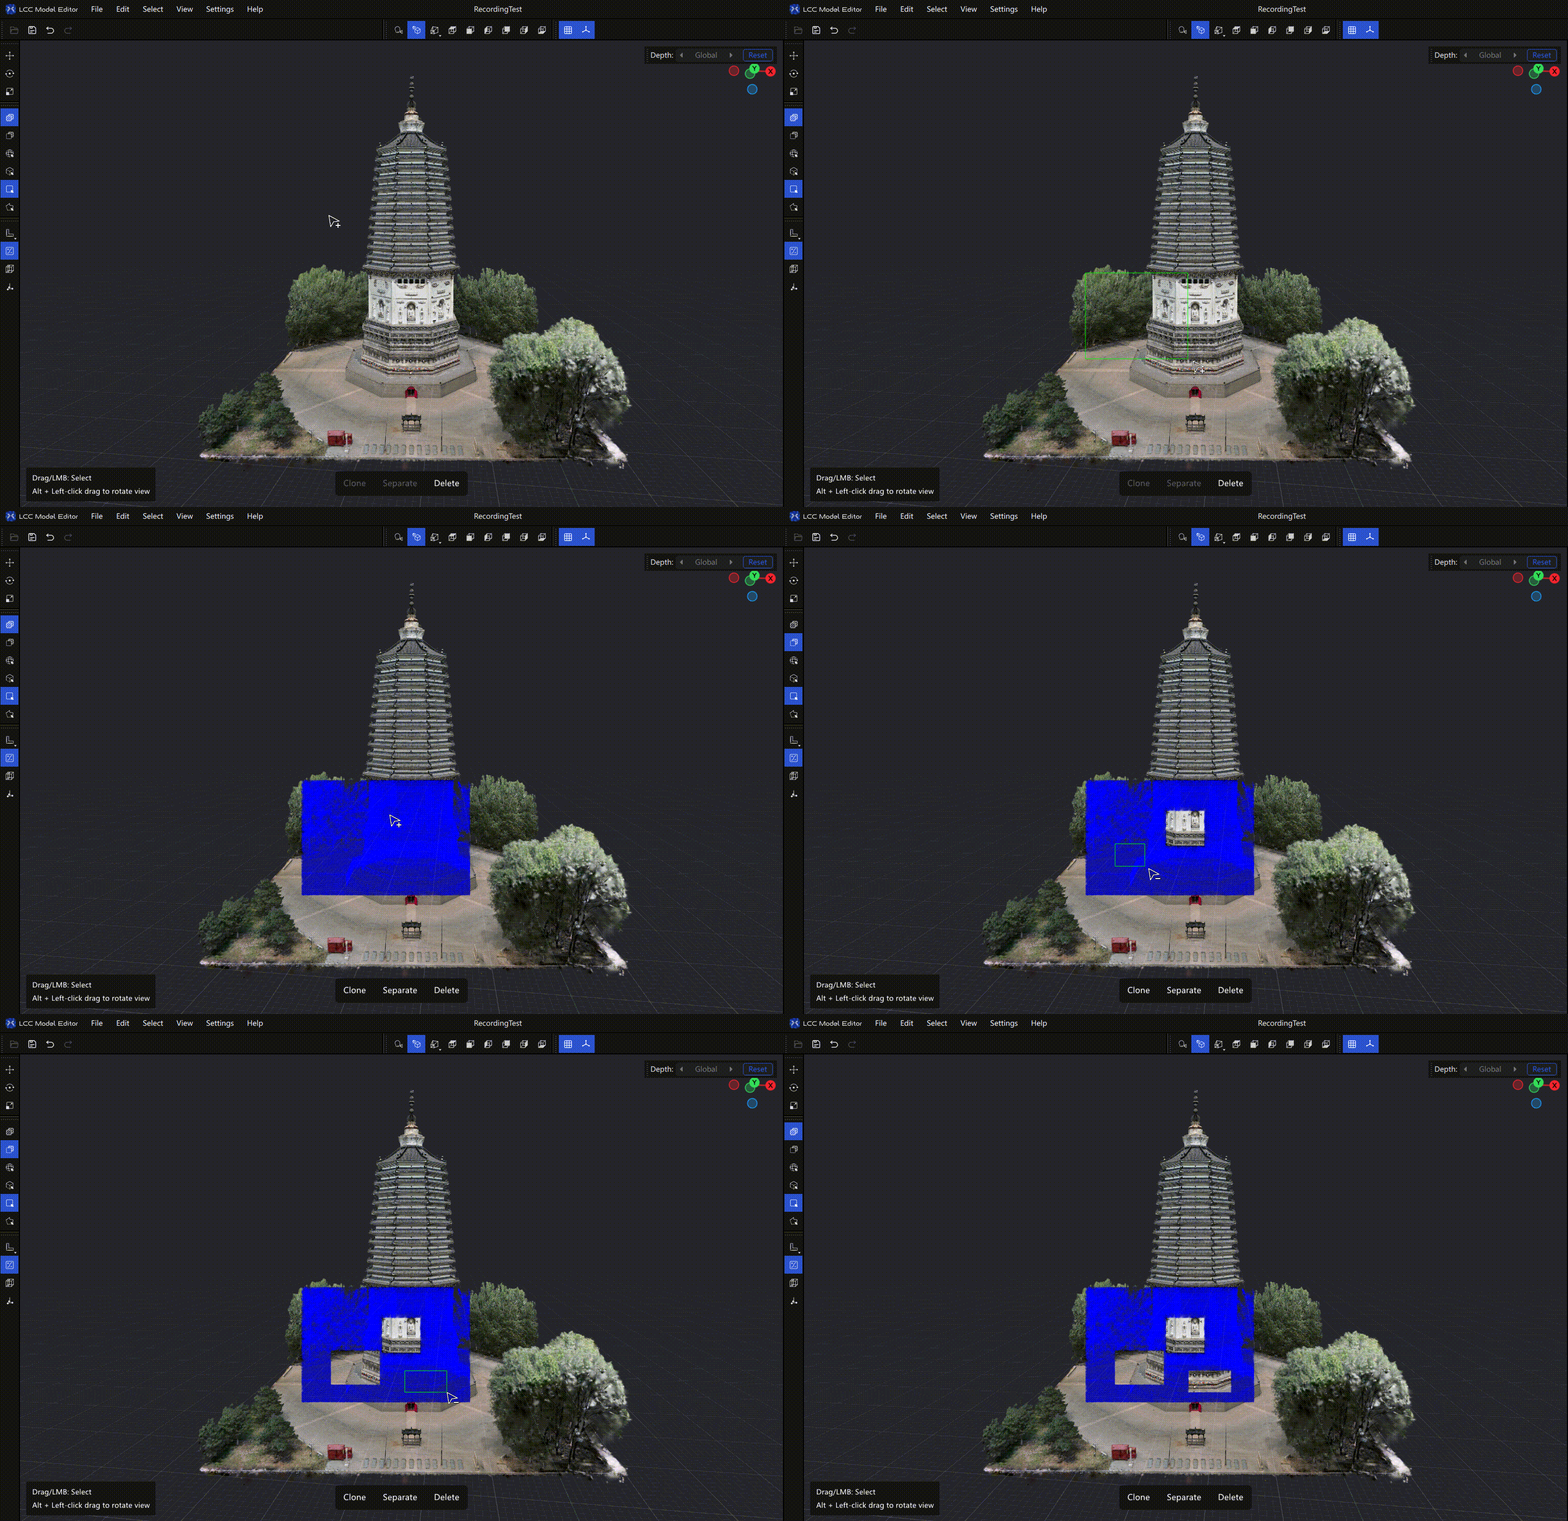
Subtract from selection
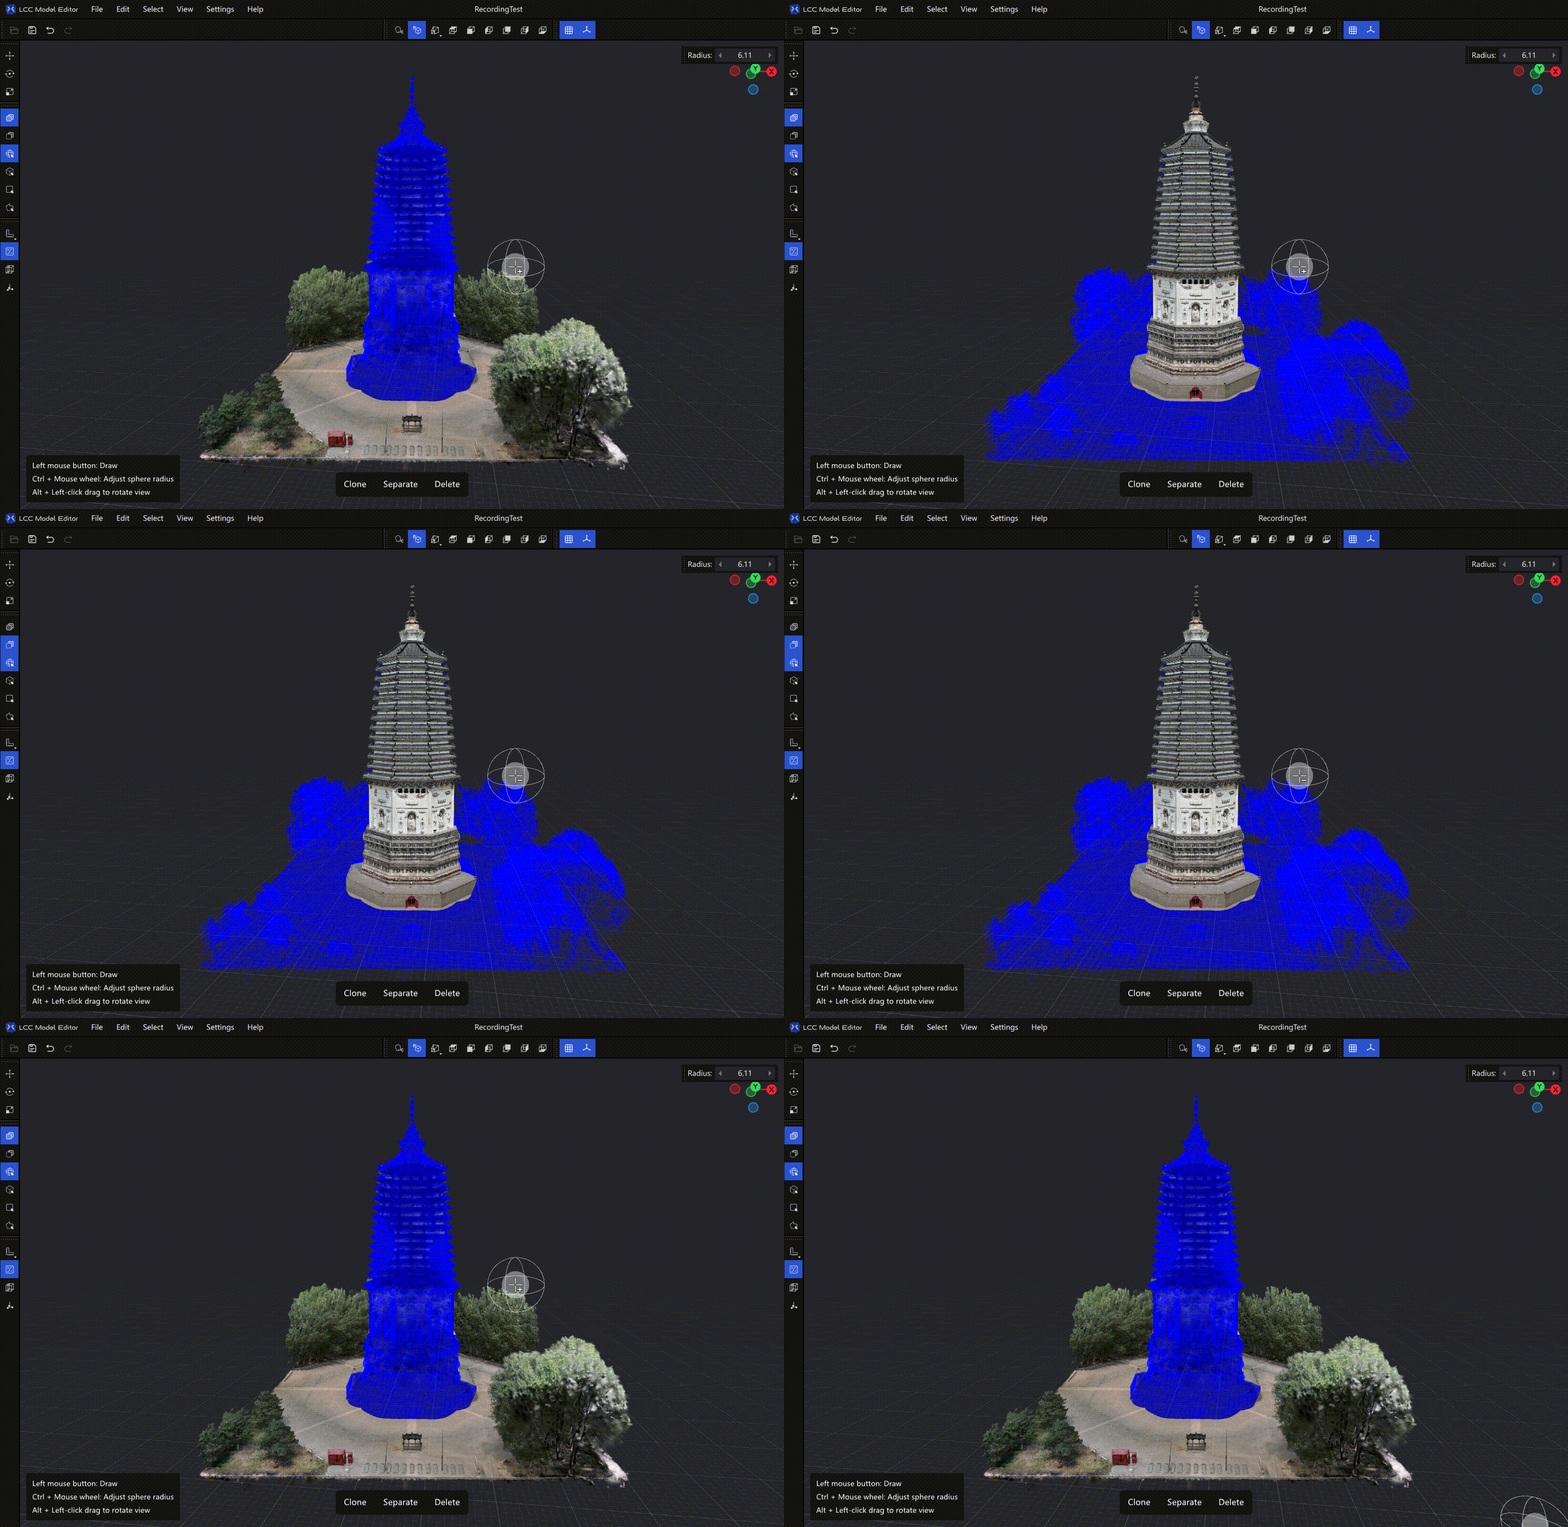
Invert selection
Separate
Separates the selected content from the original model and creates a new independent model. The corresponding content is removed from the original model.
How to use: Select the target region with a selector → select Edit → Separate.
Note: The
Ctrl+Shift+Dshortcut is not enabled in the current version. Use the menu or button to separate content.
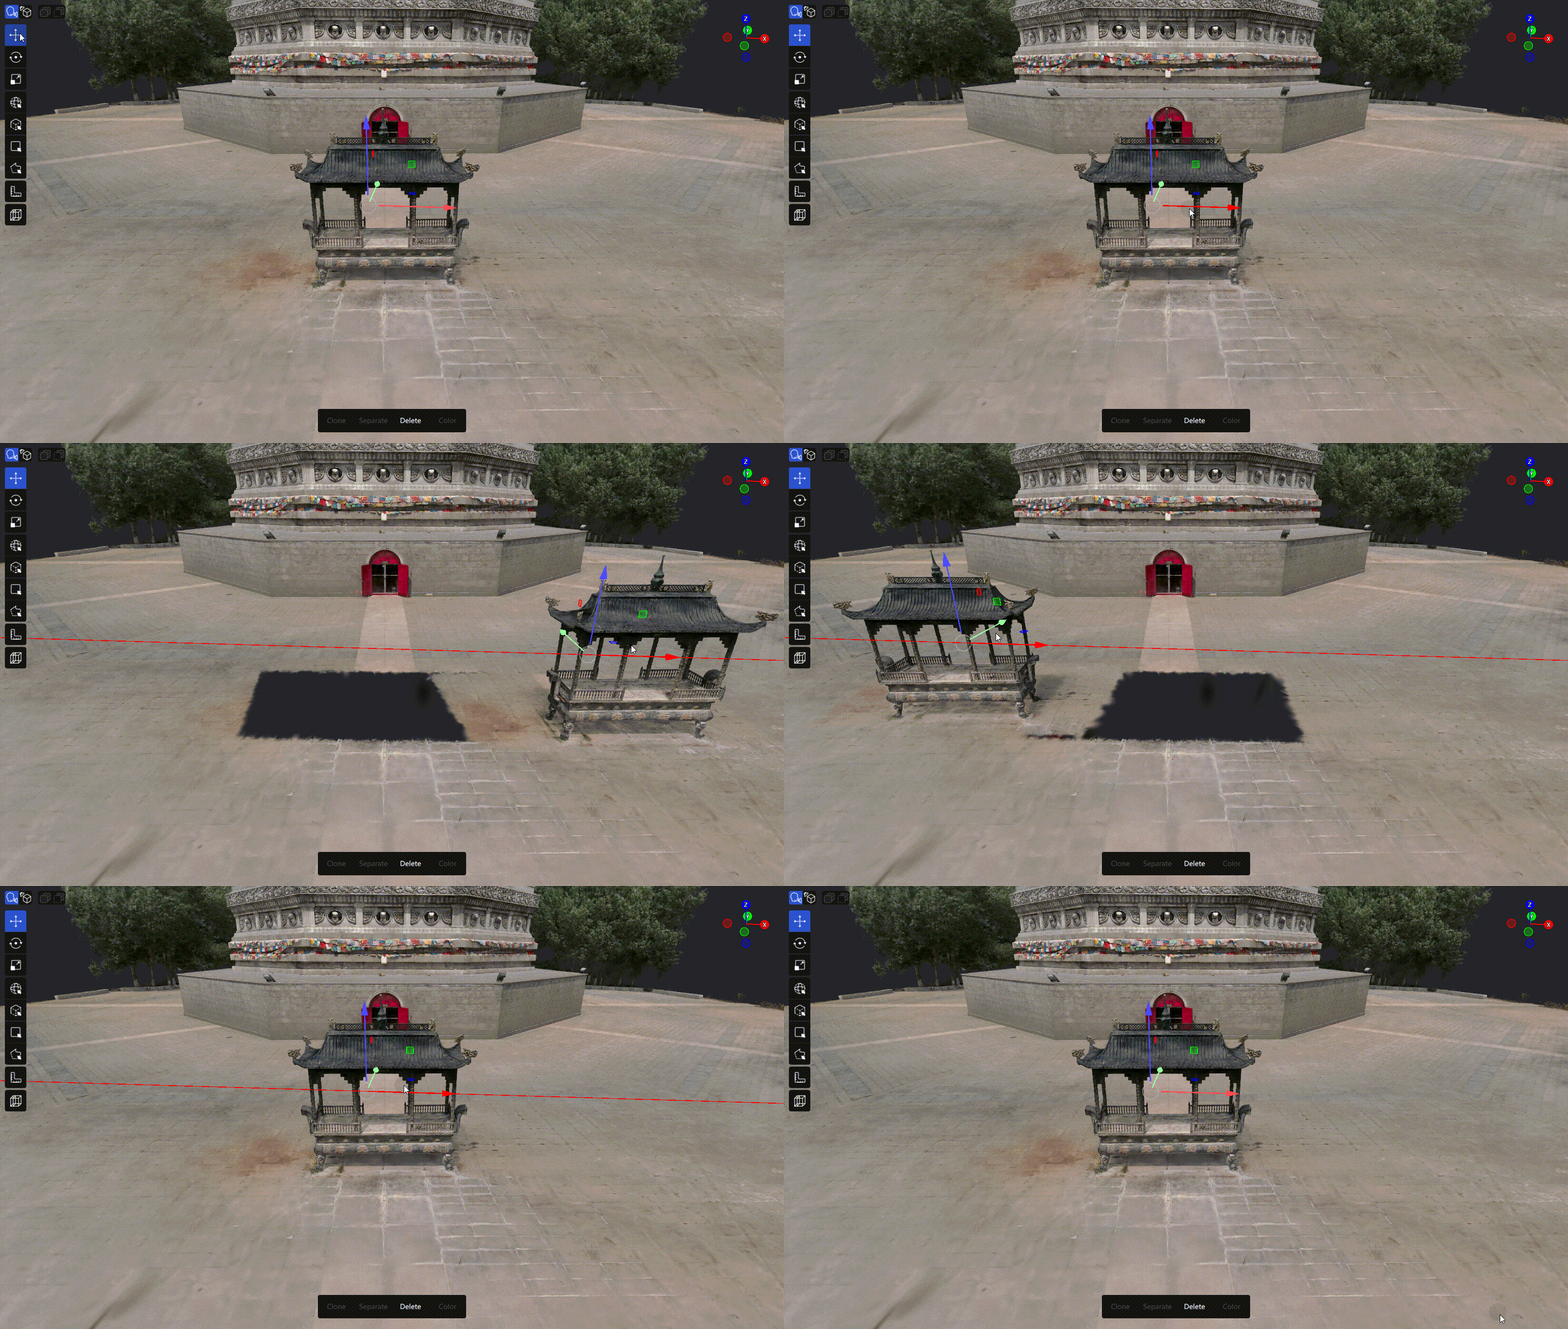
Separate operation
Clone
Copies the selected content into a new independent model while leaving the original model unchanged.
How to use: Select the target region with a selector → select Edit → Clone.
Note: The
Ctrl+Dshortcut is not enabled in the current version. Use the menu or button to clone content.
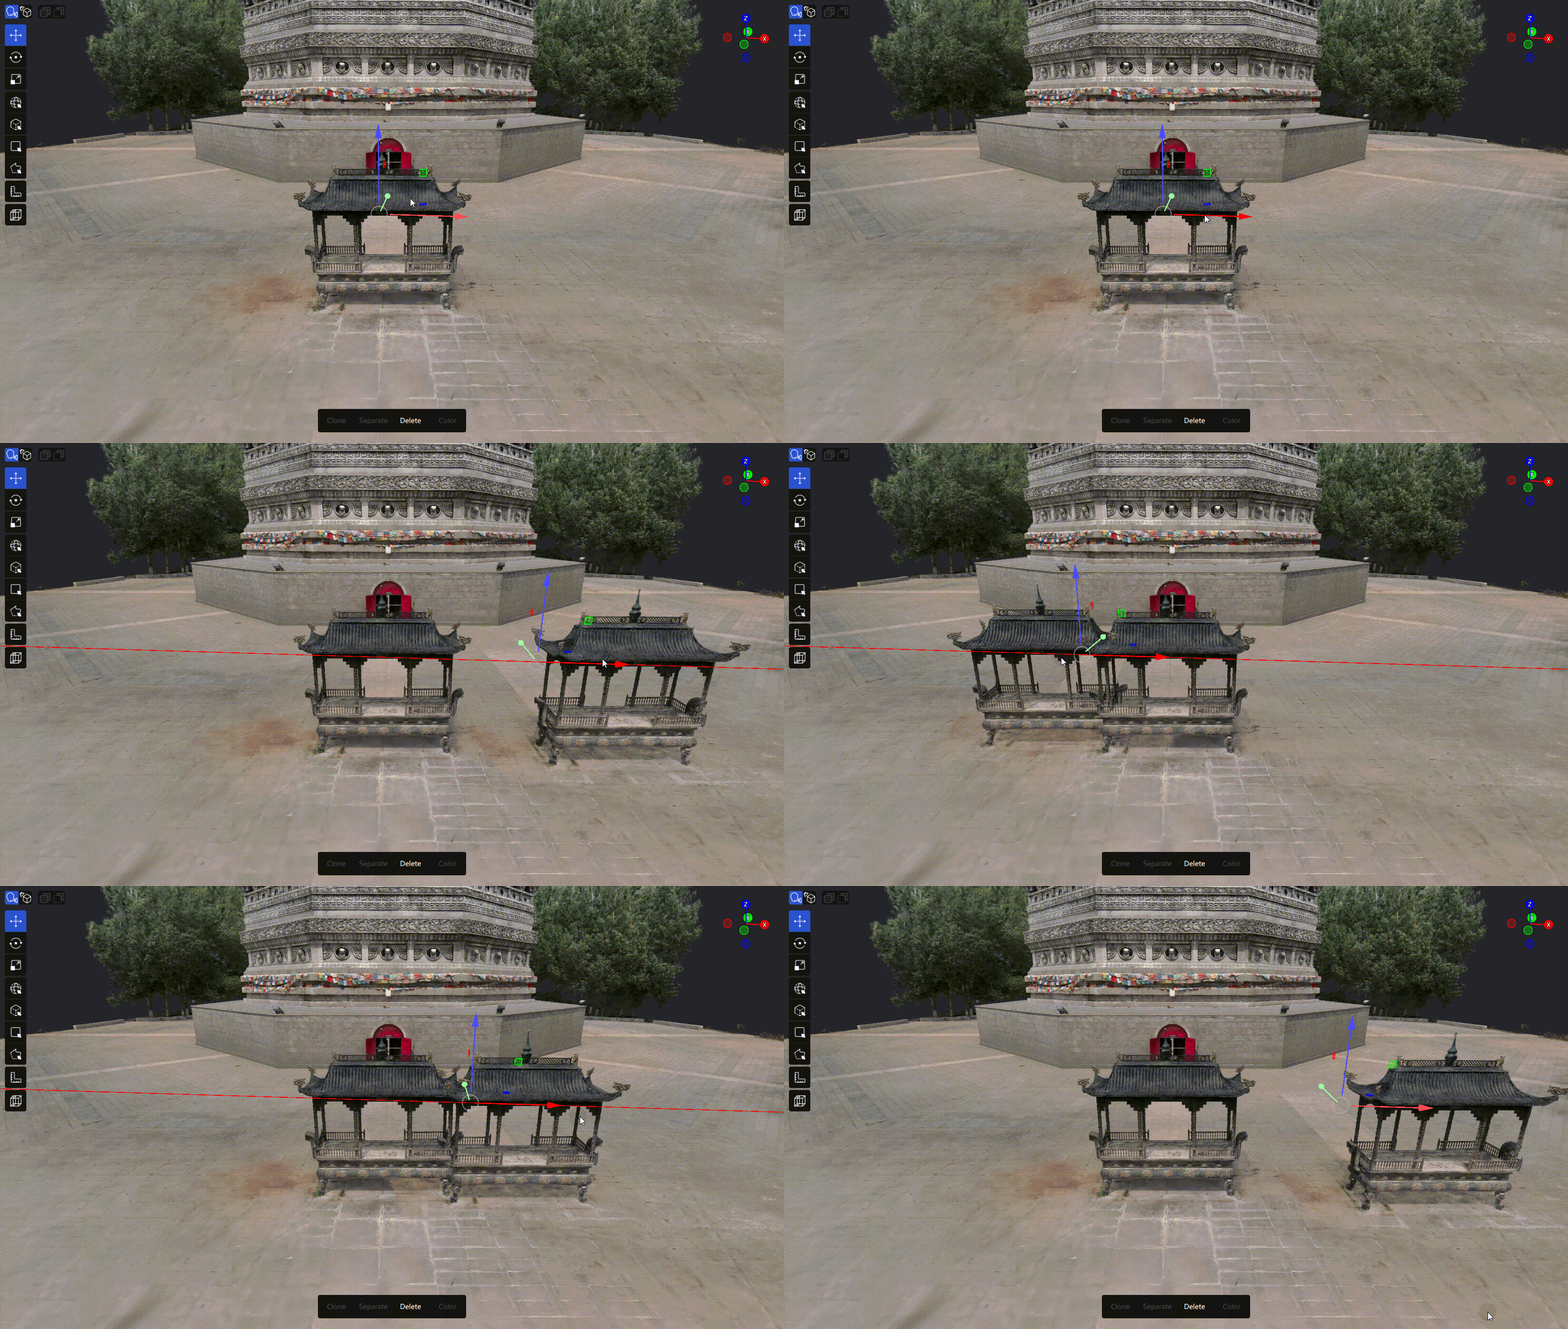
Clone operation
Move, Rotate, and Scale
After selecting a model, choose the corresponding Gizmo tool in the top editing toolbar:
| Tool | Description |
|---|---|
| Move | Translate the model along the X, Y, and Z axes |
| Rotate | Rotate the model around the X, Y, and Z axes |
| Scale | Scale the model |
Only one of the three tools can be active at a time. Batch transformations are supported for multiple editable models. Locked models are not transformed.
Crop
Cropping keeps or removes a specified region of a model. Cropping does not modify the source file. After cropping, select File → Export → Export Model to create a new model file.
How to Use
- Confirm that you are in Edit mode and that the scene contains a model.
- Click Crop in the top editing toolbar.
- Use the crop box to adjust the spatial area to process.
- Set the crop mode and keep option as needed.
- Preview the result and confirm the crop.
- Select File → Export → Export Model to save the processed model.
Crop Tool Options
- Box: Uses a box to define the spatial range.
- Razor: Cuts the model according to the crop box.
- Keep Inside: Keeps the content inside the crop box.
- Scale Gizmo: Uses the Scale Gizmo to resize the crop box.
- Show Box: Shows or hides the crop box.
- Box Color: Changes the display color of the crop box.
- Depth Occlusion: Controls depth occlusion while the crop box is displayed.
Notes
- Adjust the crop box and perform cropping in Edit mode.
- Locked models cannot be crop targets.
- To keep the original model after cropping, save a copy of the project first, then export a new model file.
- If the result is not as expected, use Undo to restore the state before cropping.
Three-Point Alignment
Three-Point Alignment uses three points selected on a model surface to create a reference plane and adjust the model orientation.
How to Use
- Confirm that you are in Edit mode and that a model is imported in the scene.
- Click Three-Point Alignment in the top editing toolbar.
- Click three points on the model surface in sequence to create the reference plane.
- In the alignment panel, select the Target model to process.
- Select the direction to which the reference plane should align:
- XY: Aligns the reference plane with the XY plane.
- XZ: Aligns the reference plane with the XZ plane.
- YZ: Aligns the reference plane with the YZ plane.
- Enable Align to Origin if you want to move the center of the reference plane to the world origin.
- Click Apply to apply the alignment result.
- Click Exit to exit the Three-Point Alignment tool.
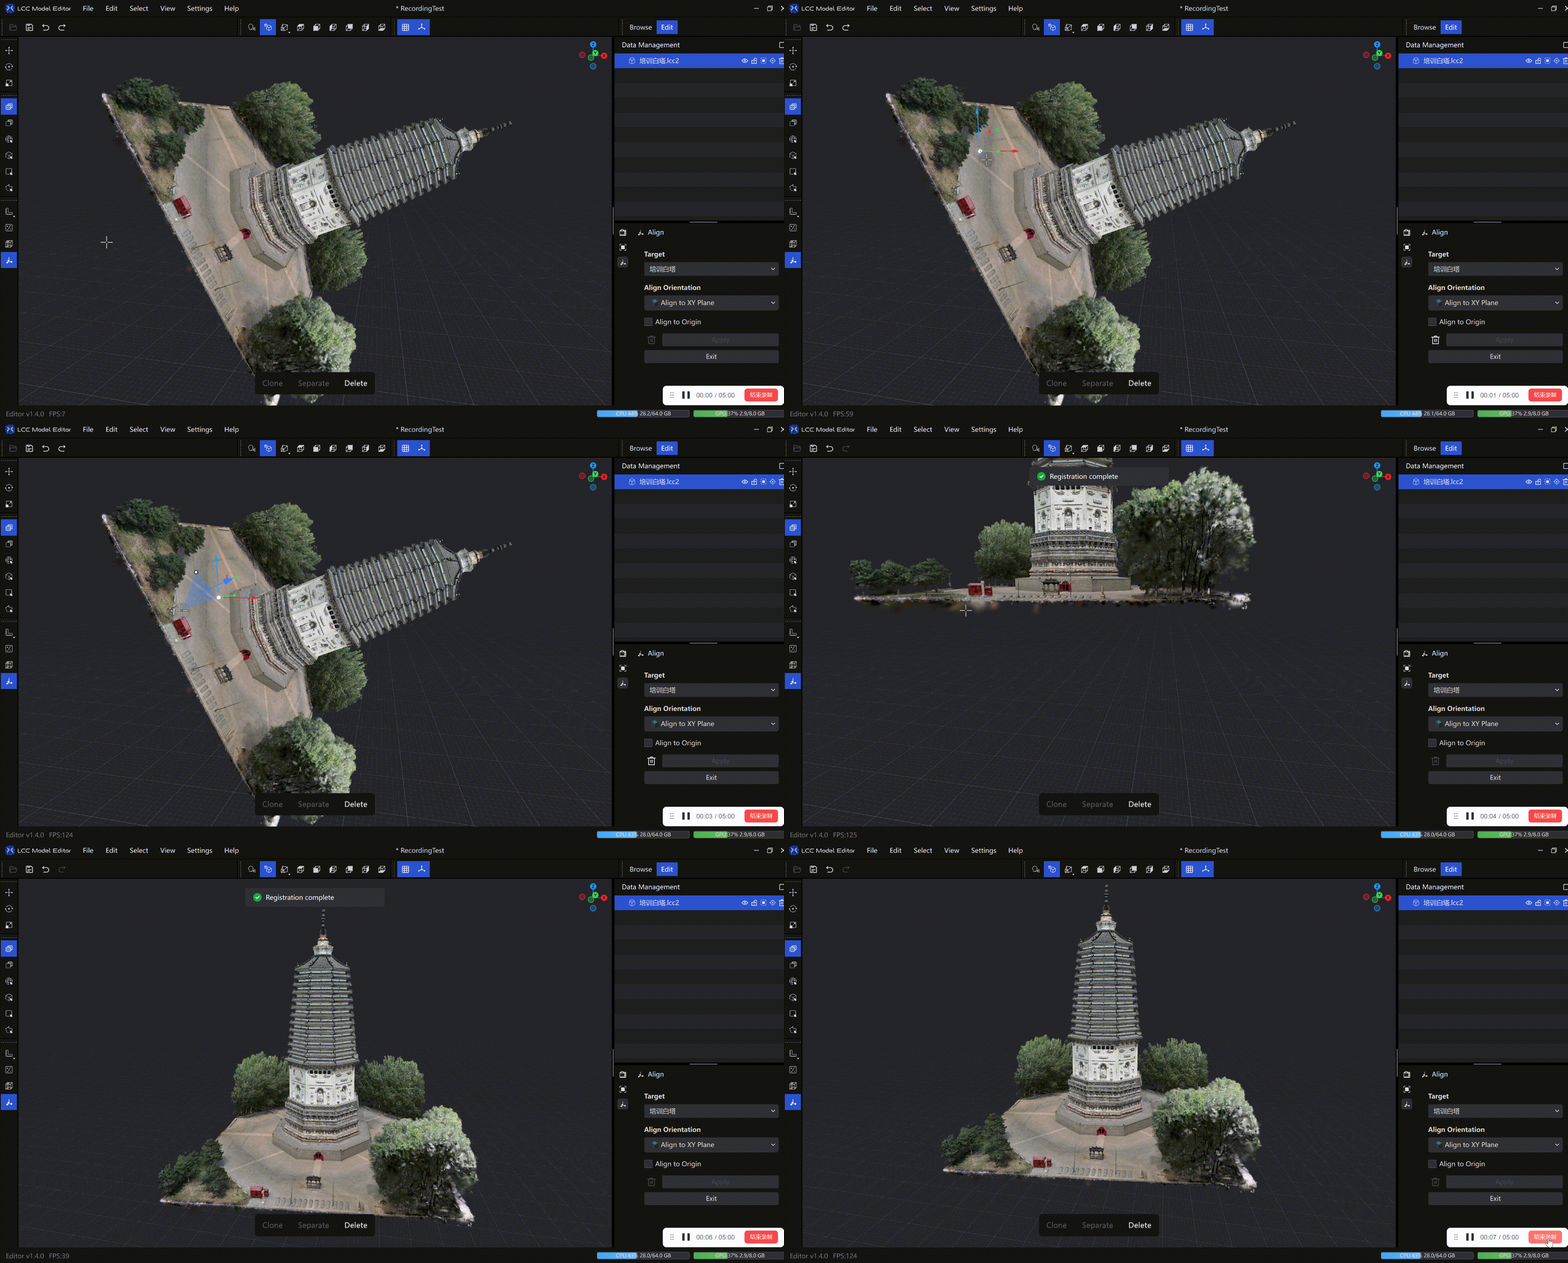
Three-Point Alignment operation
Managing Reference Points
- Press Delete during point selection to delete the current reference point.
- Activate the Three-Point Alignment tool again when you need to select the points again.
- Apply is disabled until all three points are selected and a Target model is selected.
- Click Exit or press
Escto exit the current tool. - Alignment changes the model transform in the current project and supports Undo.
Editing Tool Restrictions
- When you click an editing tool in View mode, the system first asks you to enter Edit mode. The selected tool activates automatically after you enter.
- In an empty scene, editing tools such as measurement, color grading, cropping, and Three-Point Alignment are unavailable.
- Locked models are excluded from deletion, color grading, cropping, and transformation.