
FAQ
1. How to upgrade the L2 Pro firmware?
Please ensure the device battery level is above 70%. This upgrade process applies to all L2 Pro firmware versions. Older firmware versions require multiple sequential upgrades: below 2.4.1→2.4.1→3.0.2→3.1.1→3.2.1...... Direct version skipping is not supported.
- Download the L2 Pro firmware file from the official website on your computer. Do not extract the firmware file after downloading.
- Turn on the device and ensure it is connected to your phone (Lixel GO). Enable "USB Mode" in settings.
- Connect the device to your computer using a USB cable. Locate the USB drive root directory in your file manager and drag the firmware file (keep it as a compressed package) directly to the root directory.
- Safely eject the USB device from your computer, or disable "USB Mode" in Lixel GO settings.
- Turn off the device and restart it. The device will enter firmware upgrade mode, indicated by alternating red and green flashing lights.
- Wait patiently for the upgrade to complete. Once successful, the indicator light will change to a steady green. Do not power off the device or remove the battery during the upgrade process.
- Connect the device using the app to confirm the firmware version.
2. The L2 Pro connected to the computer shows USB Mode enabled but the light did not turn blue, and data cannot be read?
If the phone is connected to the device via USB cable, the device needs to be restarted before USB Mode can be activated.
3. The L2 Pro did not enter the alternating red-green flashing state after restart, or the firmware version did not change after the update?
Possible causes:
- Verify the pre-upgrade version number and device SN. Ensure no skip-level upgrade is performed. L2 Pro versions below 2.4.1 must first be upgraded to 2.4.1, then 2.4.1→3.0.2→3.1.1→3.2.1...... Direct version skipping is not supported.
- The firmware package was extracted, renamed, or the system automatically appended characters like "(1)" to the filename. Do not make any modifications after downloading from the official website.
- USB Mode must be enabled (use the app, or press the power button once to get white light, then press again). The firmware must be placed at the same level as the model folder, outside the folder rather than inside it.
- Battery must be above 70%. The battery button indicator should show at least 3 green bars.
- If the USB-TypeC cable is damaged, the copied firmware package may be smaller in size. Try a different cable.
If the issue persists, please contact official technical support.
4. How to perform a proper scan with the L2 Pro?
Please refer to the "Capture Guidelines" document for the corresponding product on the official website download page. Key points are as follows:
Initialization phase:
- Avoid shaking the device. Place it on a flat surface and let it start while stationary. Wait at least 10 seconds after the point cloud appears on the phone screen before picking up the device.
- During initialization, the operator should avoid blocking the LiDAR. The device LiDAR should face an area with abundant features.
Scanning process:
- Walk at a normal pace and avoid making large, fast turns or sudden stops.
- Tilt the device slightly forward by approximately 15 degrees for a more complete field of view. Generally, do not tilt beyond 20 degrees.
- Maintain a distance of at least 0.5 meters from the scan target.
- When scanning outdoors with heavy pedestrian or vehicle traffic, avoid pointing the LiDAR at dynamic objects for extended periods.
- When scanning multiple rooms or floors indoors, open all doors in advance. Pass through doorways slowly and pause briefly at the doorway.
5. Does the L2 Pro support resuming a scan from a breakpoint?
No, it does not.
6. Can the reflective target paper used for LixelStudio accuracy verification be replaced with a different shape or size?
No. You must use the circular reflective target paper provided in the device case (original size is 4 cm). Otherwise, the software accuracy verification function cannot perform automatic recognition.
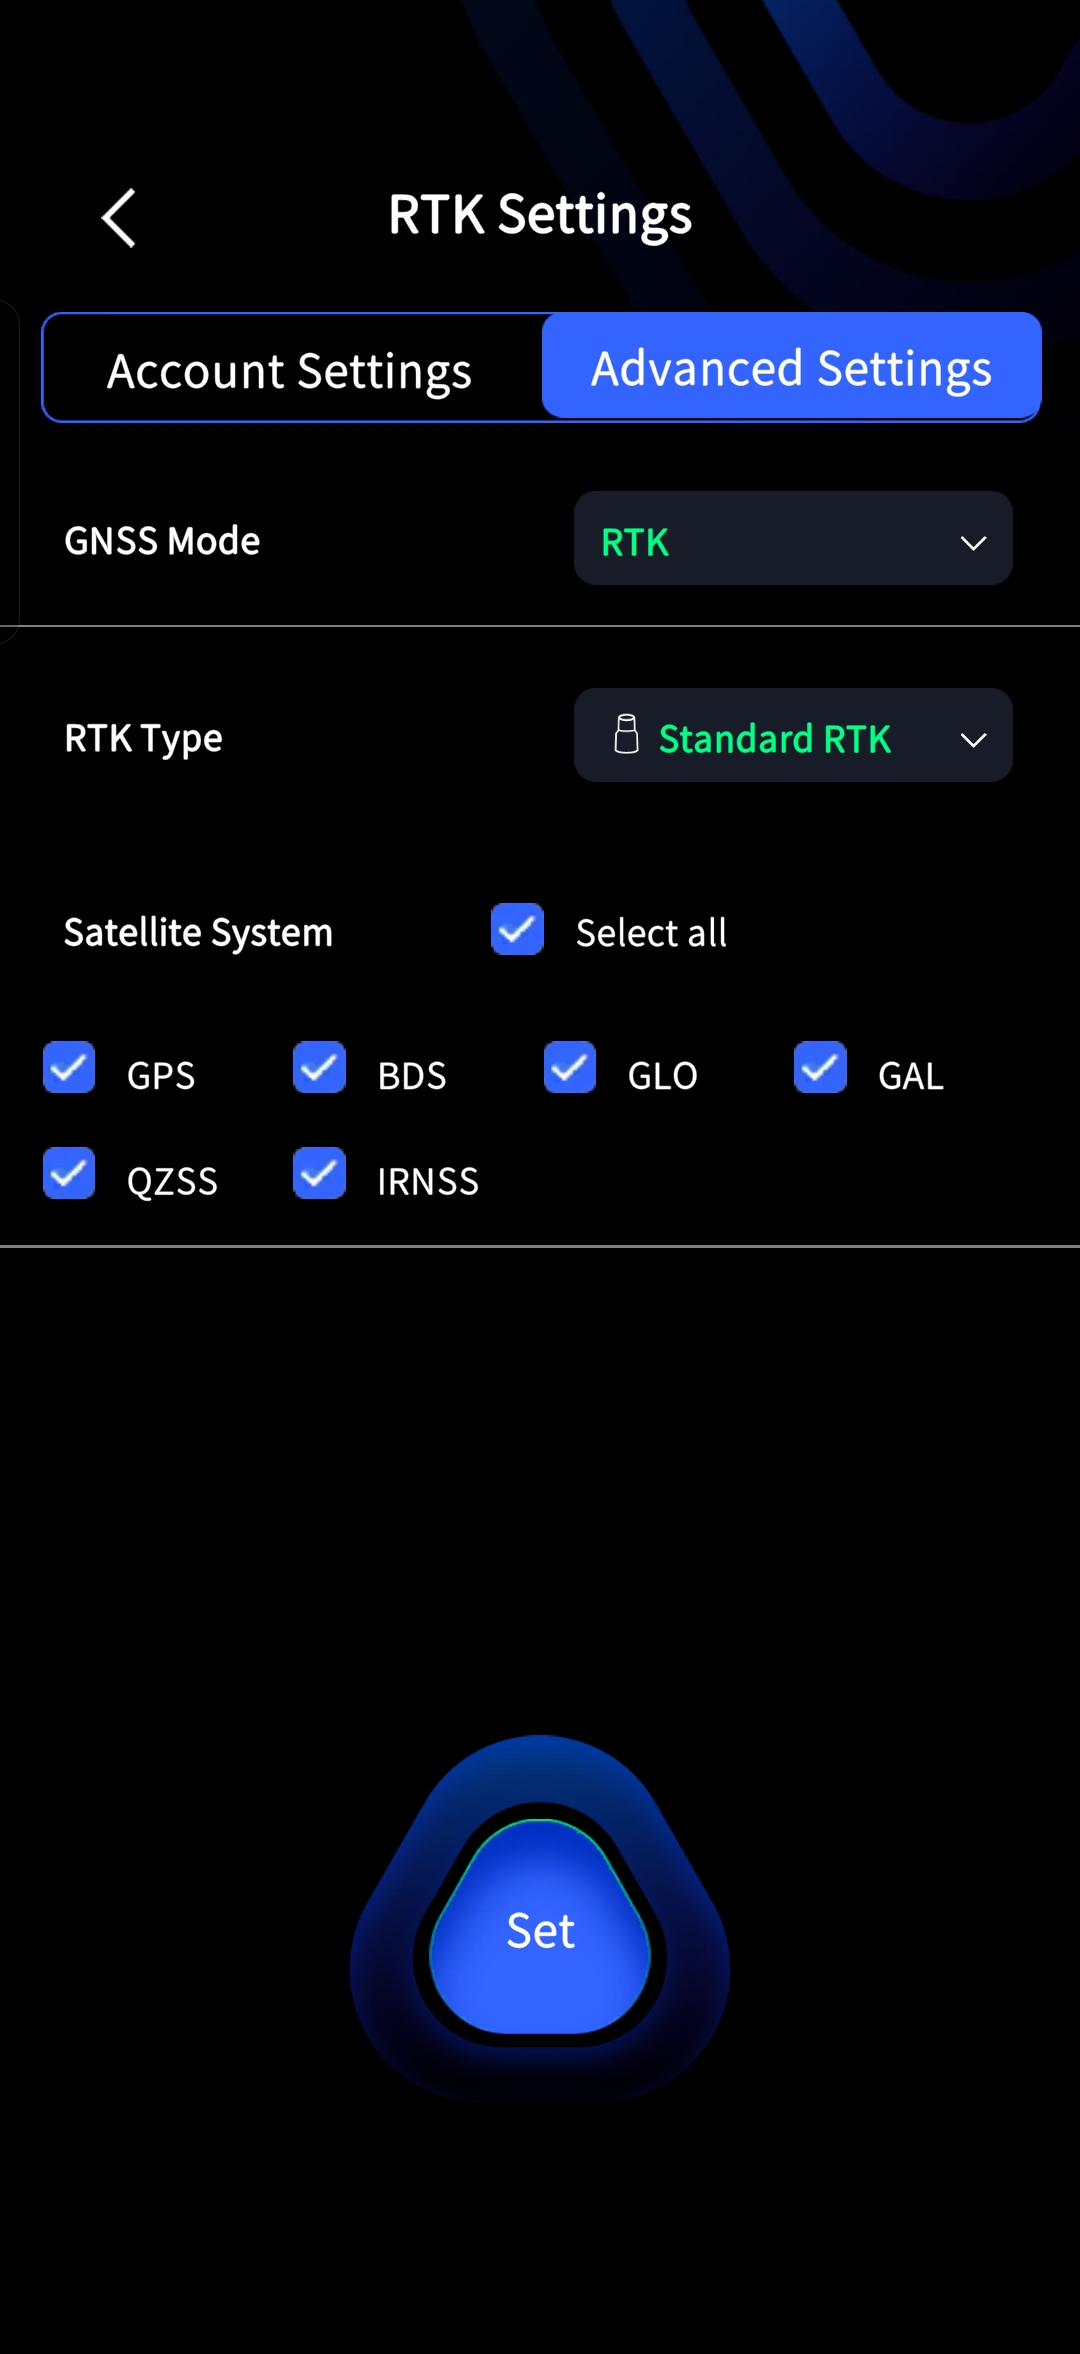
7. When do I need to change the RTK advanced settings?
After connecting the device via the app, go to the advanced settings page:
- GNSS Mode: Set according to your recording requirements. For example, if you need PPK mode, change the GNSS mode to PPK.
- RTK Type: Switch according to the actual RTK model installed.
- After making changes, remember to tap the button below to confirm the settings.
8. Does XGRIDS RTK support 1+1 mode?
No, it does not.
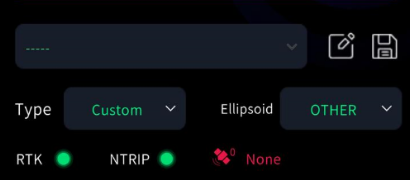
9. How to troubleshoot abnormal RTK indicator lights on the app?
Troubleshoot based on the RTK and NTRIP indicator light status in the app:
Both RTK and NTRIP show red: The RTK module is not properly connected to the device. It is recommended to power off, remove and reconnect the RTK module, then restart the device.
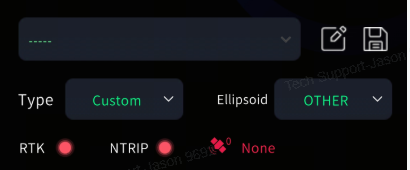
RTK red, NTRIP green: The device is in quick-connect mode and the RTK module is not properly connected. Follow the same steps as above.
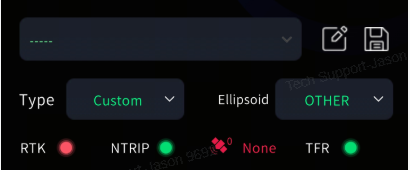
RTK green, NTRIP red: The NTRIP network is not connected. Check whether the phone has internet access, or try switching to a different CORS account.
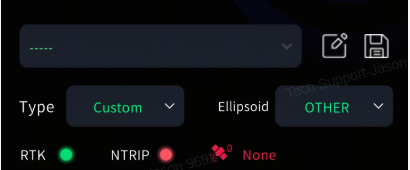
Both RTK and NTRIP are green, but satellite count is 0: RTK hardware failure. It is recommended to power off and ensure the RTK module is securely installed, then retry. If another RTK module is available, cross-test to determine whether a factory repair is needed.
10. How to clean dust from the L2 Pro LiDAR?
Use the non-woven cloth provided in the device case, and gently wipe in one direction.
11. What are the storage precautions for the L2 Pro handle battery?
- After daily use, charge the battery to full promptly.
- Batteries that are fully charged but unused for a long period must be recharged at least once every 3 months.
- Batteries with very low or completely depleted charge must be recharged within 3 days.
Battery damage caused by not following the above requirements cannot be repaired and is not covered under warranty.
12. What is the lifespan of the L2 Pro handle battery?
After 300-500 charge-discharge cycles, the battery capacity will decrease to 70%-80% of its initial value, at which point the battery is considered to have reached the end of its lifespan. Please charge it fully after each use, store it in a cool and dry environment, and recharge it periodically if not used for extended periods.
13. How does the L2 Pro output panoramic photos for Coloring and Mesh?
When performing Project Processing in LixelStudio, check the "Output Panoramic Photos" option. After processing is complete, the photos will be saved in the output directory. Both Coloring and Mesh features require this option to be enabled.
14. How long should L2 Pro data collection last to ensure good Coloring results?
The scanning session must last at least 2 minutes, and you must keep moving during collection. Do not keep the scanner stationary in one position. Pay attention to how you hold the device and avoid blocking the panoramic camera or having objects on one or both sides of the camera for extended periods.
15. Can the L2 Pro export video from its built-in cameras?
No. You need to use LixelStudio for Project Processing and check the "Output Panoramic Photos" option.
16. What is the L2 Pro operating temperature range?
The operating temperature range is -20 to 50 degrees Celsius. Exceeding this range may affect normal device operation.
17. What happens when the L2 Pro battery is critically low?
A pop-up warning will appear when the remaining battery level reaches 10%. At this point, you should save your data and stop scanning to prevent the device from shutting down automatically before data is properly saved. Ignoring the warning and continuing to scan is considered improper operation, and there is no guarantee that data will be fully saved or processed correctly afterward.
18. What to do if the L2 Pro project folder date does not match the actual scan time (folder date shows 2021)?
- Provide the device SN number to technical support to check whether the device has a rechargeable RTC version.
- If it is a rechargeable version, connect the handle battery to charge the RTC battery. It requires continuous standby or at least a cumulative 10 hours of use to fully charge. Once the RTC is fully charged, it can maintain standby for approximately 100 days. If the device is not used for a long time, it is recommended to power it on regularly every two weeks for at least one and a half hours.
- Upgrade firmware to version 2.2.1 or above, and app to version 1.1.1 or above. Use the app to re-sync the device time.
19. What do the differential status values in the L2 Pro GNSS file mean?
- 0: Invalid positioning (indicator light red).
- 1: Single point solution (indicator light blue).
- 2: Pseudorange differential solution (indicator light blue).
- 4: Fixed solution (indicator light green).
- 5: Float solution (indicator light blue).
20. Does the L2 Pro support explosion-proof operation?
The device does not currently support explosion-proof operation.
21. What to do when the model folder is abnormal after connecting the L2 Pro to a computer (two model folders appear / cannot find the latest data / model becomes a shortcut)?
This is usually caused by a USB worm virus on the computer. The virus hides the real folders and creates shortcuts with the same name to trick you into clicking them. The data itself is not lost, just hidden.
Steps to resolve:
- Open the device's USB root directory, type
cmdin the File Explorer address bar and press Enter to open Command Prompt. - Type
attrib -s -h -r /s /d *.*and press Enter. This command recursively removes the system, hidden, and read-only attributes of all files and subfolders, making the hidden real data visible again. - Both the real and fake model folders will now appear. The real one has a normal folder icon; the fake one is a shortcut with an arrow (.lnk file). Delete the shortcut.
- After confirming the data is intact, copy it out, then format the device disk using the app.
- It is recommended to run a full antivirus scan on the computer to avoid reinfection the next time the device is connected.
- If the above does not resolve the issue, please contact XGRIDS technical support.
22. What is the scanning coverage of the L2 Pro drone-mount kit?
In real-world testing, an L2 Pro mounted on a drone flying at 3 m/s for 20 minutes, with a flight line spacing (overlap) of 60 m, can cover approximately 3 × 60 × 20 × 60 = 216,000 square meters.
23. What are the maximum flight height and speed for the drone-mounted L2 Pro?
- Recommended flight height: 30 m.
- Recommended flight speed: 3 m/s.
- Under extreme conditions it can reach up to 50 m and 5-7 m/s, with an accuracy of about 5-10 cm (limited by the DJI RTK accuracy).
24. Which drone models does the L2 Pro drone-mount kit support?
DJI M300 and DJI M350 are supported.
25. How are power supply and RTK ensured for the drone-mounted L2 Pro?
Power is supplied through the DJI SkyPort, which also forwards the drone's RTK data for the device to use.
26. What happens if the drone-mounted mode is not selected correctly during L2 Pro collection?
RTK cannot be recorded, and post-processing cannot automatically recognize the drone-mounted mode.
27. Can drone-mounted L2 Pro scan data be fused with ground scan data in LixelStudio?
Map Fusion is not supported. However, manual registration + ICP registration is possible, provided the two datasets share a feature-rich overlapping area of about 50%.
28. What is the correct setup procedure for drone-mounted L2 Pro scanning?
Connect the Lixel GO app, set the scanning mode to Drone, and change the RTK type to DJI mode. Only then will the drone's RTK GNSS data be properly recorded to the gnss.csv file in the raw project data. If gnss.csv contains no RTK information, the drone-mounted mode was not set correctly.
29. How can I tell whether drone-mounted L2 Pro data drifted during collection?
Because the device has no built-in 4G module, the live view cannot be checked during scanning. Drift can only be determined after post-processing.
30. When a drone-mounted L2 Pro scans at 120 m and 300 m, the resulting point cloud ranges look almost the same. How is the 300 m range defined?
The 300 m range refers to the sensor's raw data range, which is only retained where the area is sufficiently scanned. Because the point cloud becomes very sparse at long distances, and drone-mounted rotational scanning moves faster than handheld operation, distant areas are effectively under-scanned. These points are treated as noise and removed, so the actual point cloud range looks similar to 120 m.
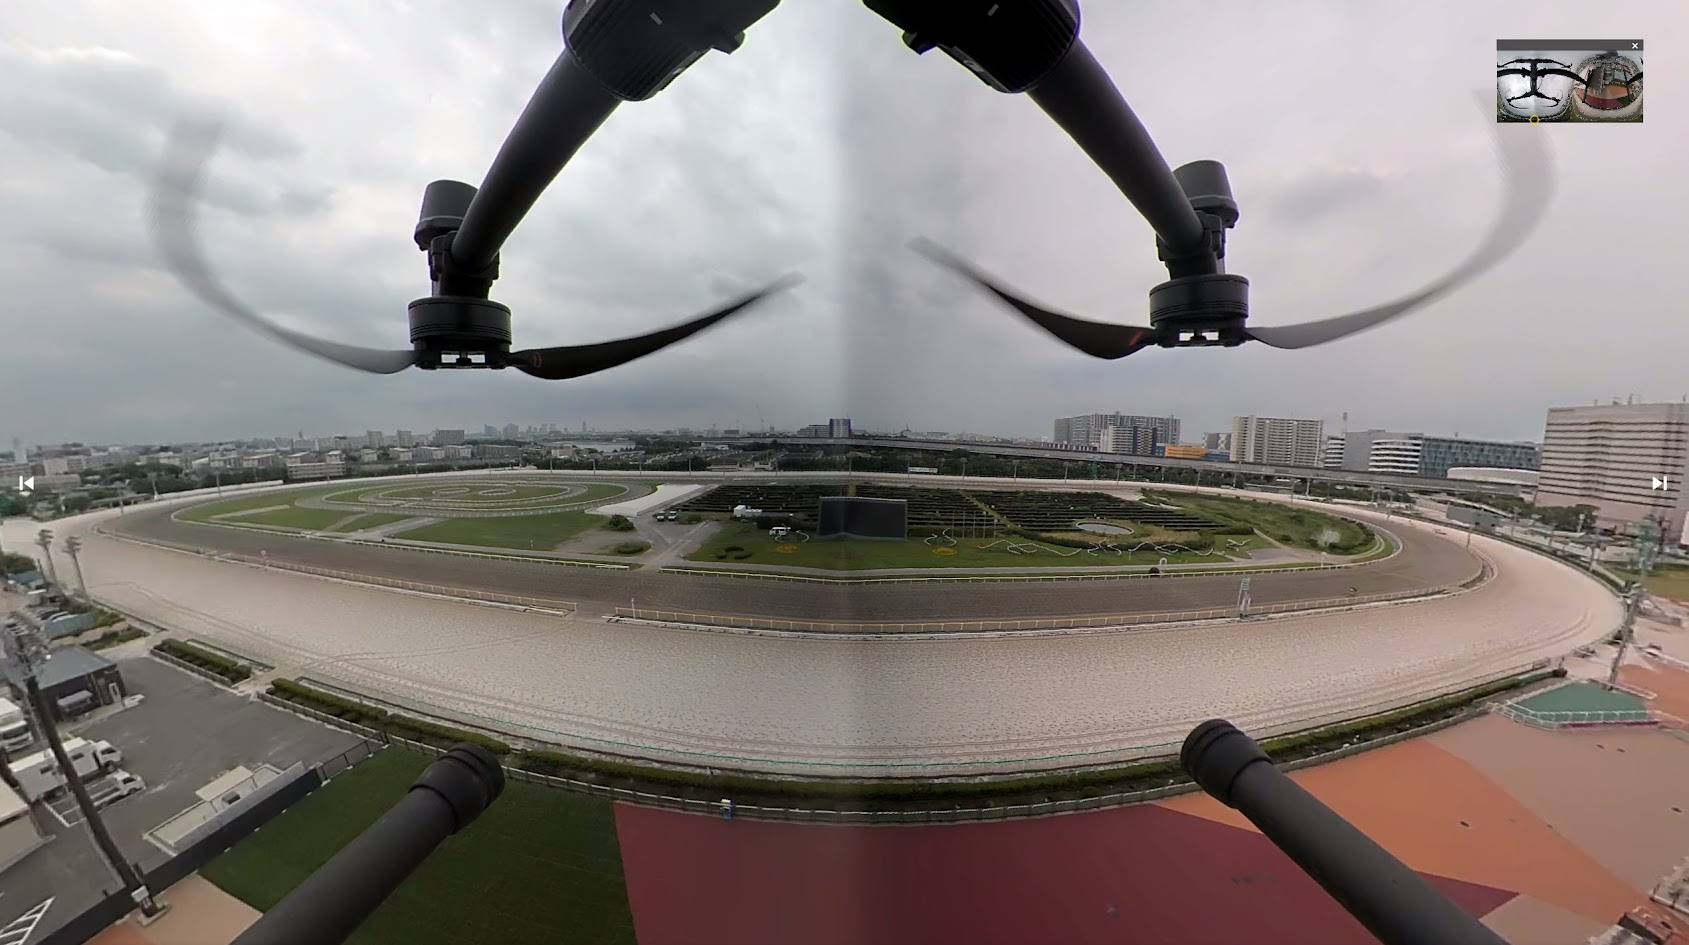
31. Why are panoramic photos taken in drone-mounted mode asymmetric, and can this be improved?
The device is mounted below the drone and is not rigidly fixed at the exact center of the drone's bottom. This offset from the center causes the panoramic photos to be asymmetric. Panoramic imaging for drone-mounted mode has not yet been specifically optimized and will continue to be improved.
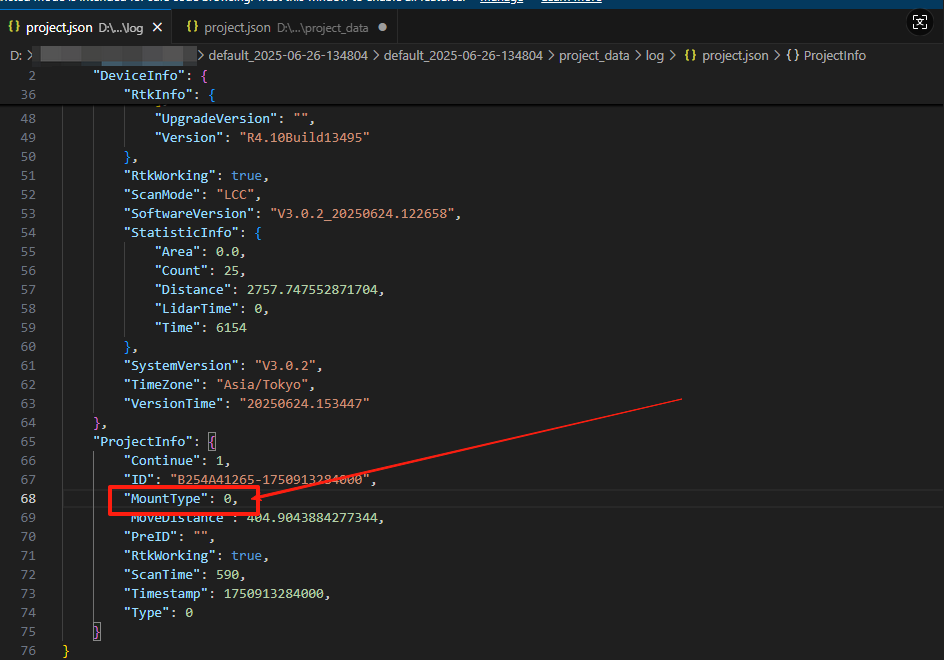
32. How can I tell from the L2 Pro raw data whether it was handheld, vehicle-mounted, drone-mounted, or backpack mode?
Check the mount type field in the project json. The values mean:
- 0: Handheld.
- 1: Vehicle-mounted.
- 2: Drone-mounted.
- 3: Backpack.
33. What are the speed limits for the vehicle-mounted L2 Pro, and can accuracy be guaranteed?
- Recommended driving speed: 20-30 km/h.
- Maximum driving speed: 40 km/h.
The lower the speed, the closer the result is to handheld operation. Exceeding the speed limit affects point cloud registration accuracy.
34. Will vehicle occlusion appear when collecting data with the L2 Pro vehicle-mount kit?
When the official L2 Pro vehicle mount is used correctly and installed at the center of the vehicle's rear, vehicle occlusion will not occur.
35. Besides the L2 Pro, do other devices support vehicle-mounted or drone-mounted modes?
Currently only the L2 Pro supports vehicle-mounted and drone-mounted modes.
36. How does selecting the "Vehicle-mounted" option in Lixel GO affect data collection?
It only affects the masking module, which removes the vehicle body during Coloring in LixelStudio post-processing.
37. Does the vehicle-mounted L2 Pro have an external power interface?
The vehicle-mount kit offers two power options: a V-mount vehicle battery and the handle battery. For long field sessions, the V-mount battery is recommended.
38. Does the vehicle-mounted L2 Pro support RTK? Are both Standard and Survey Grade supported?
Both are supported. Standard RTK and Survey Grade RTK can both be used.
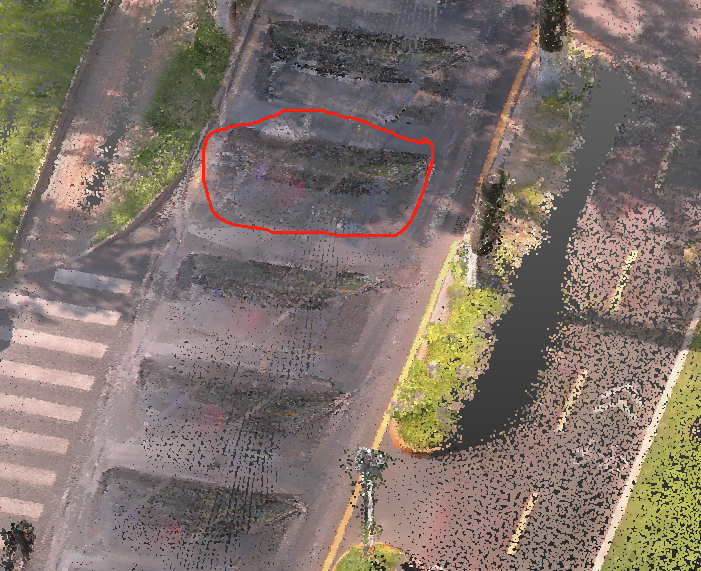
39. Why does the vehicle-mounted L2 Pro point cloud show noticeable misalignment after post-processing?
In vehicle-mounted scenarios, fast movement causes distortion and misalignment in the processed data, which is expected. High speed affects point cloud registration accuracy, so the overall result cannot be fully guaranteed. Reduce the driving speed during collection; the slower the speed, the closer the result is to handheld operation.
40. What items are included in the L2 Pro vehicle-mount kit (electric suction cup) packing list?
The vehicle-mount kit packing list is as follows:
| Item | Image |
|---|---|
| Main bracket (with battery mounting plate) | 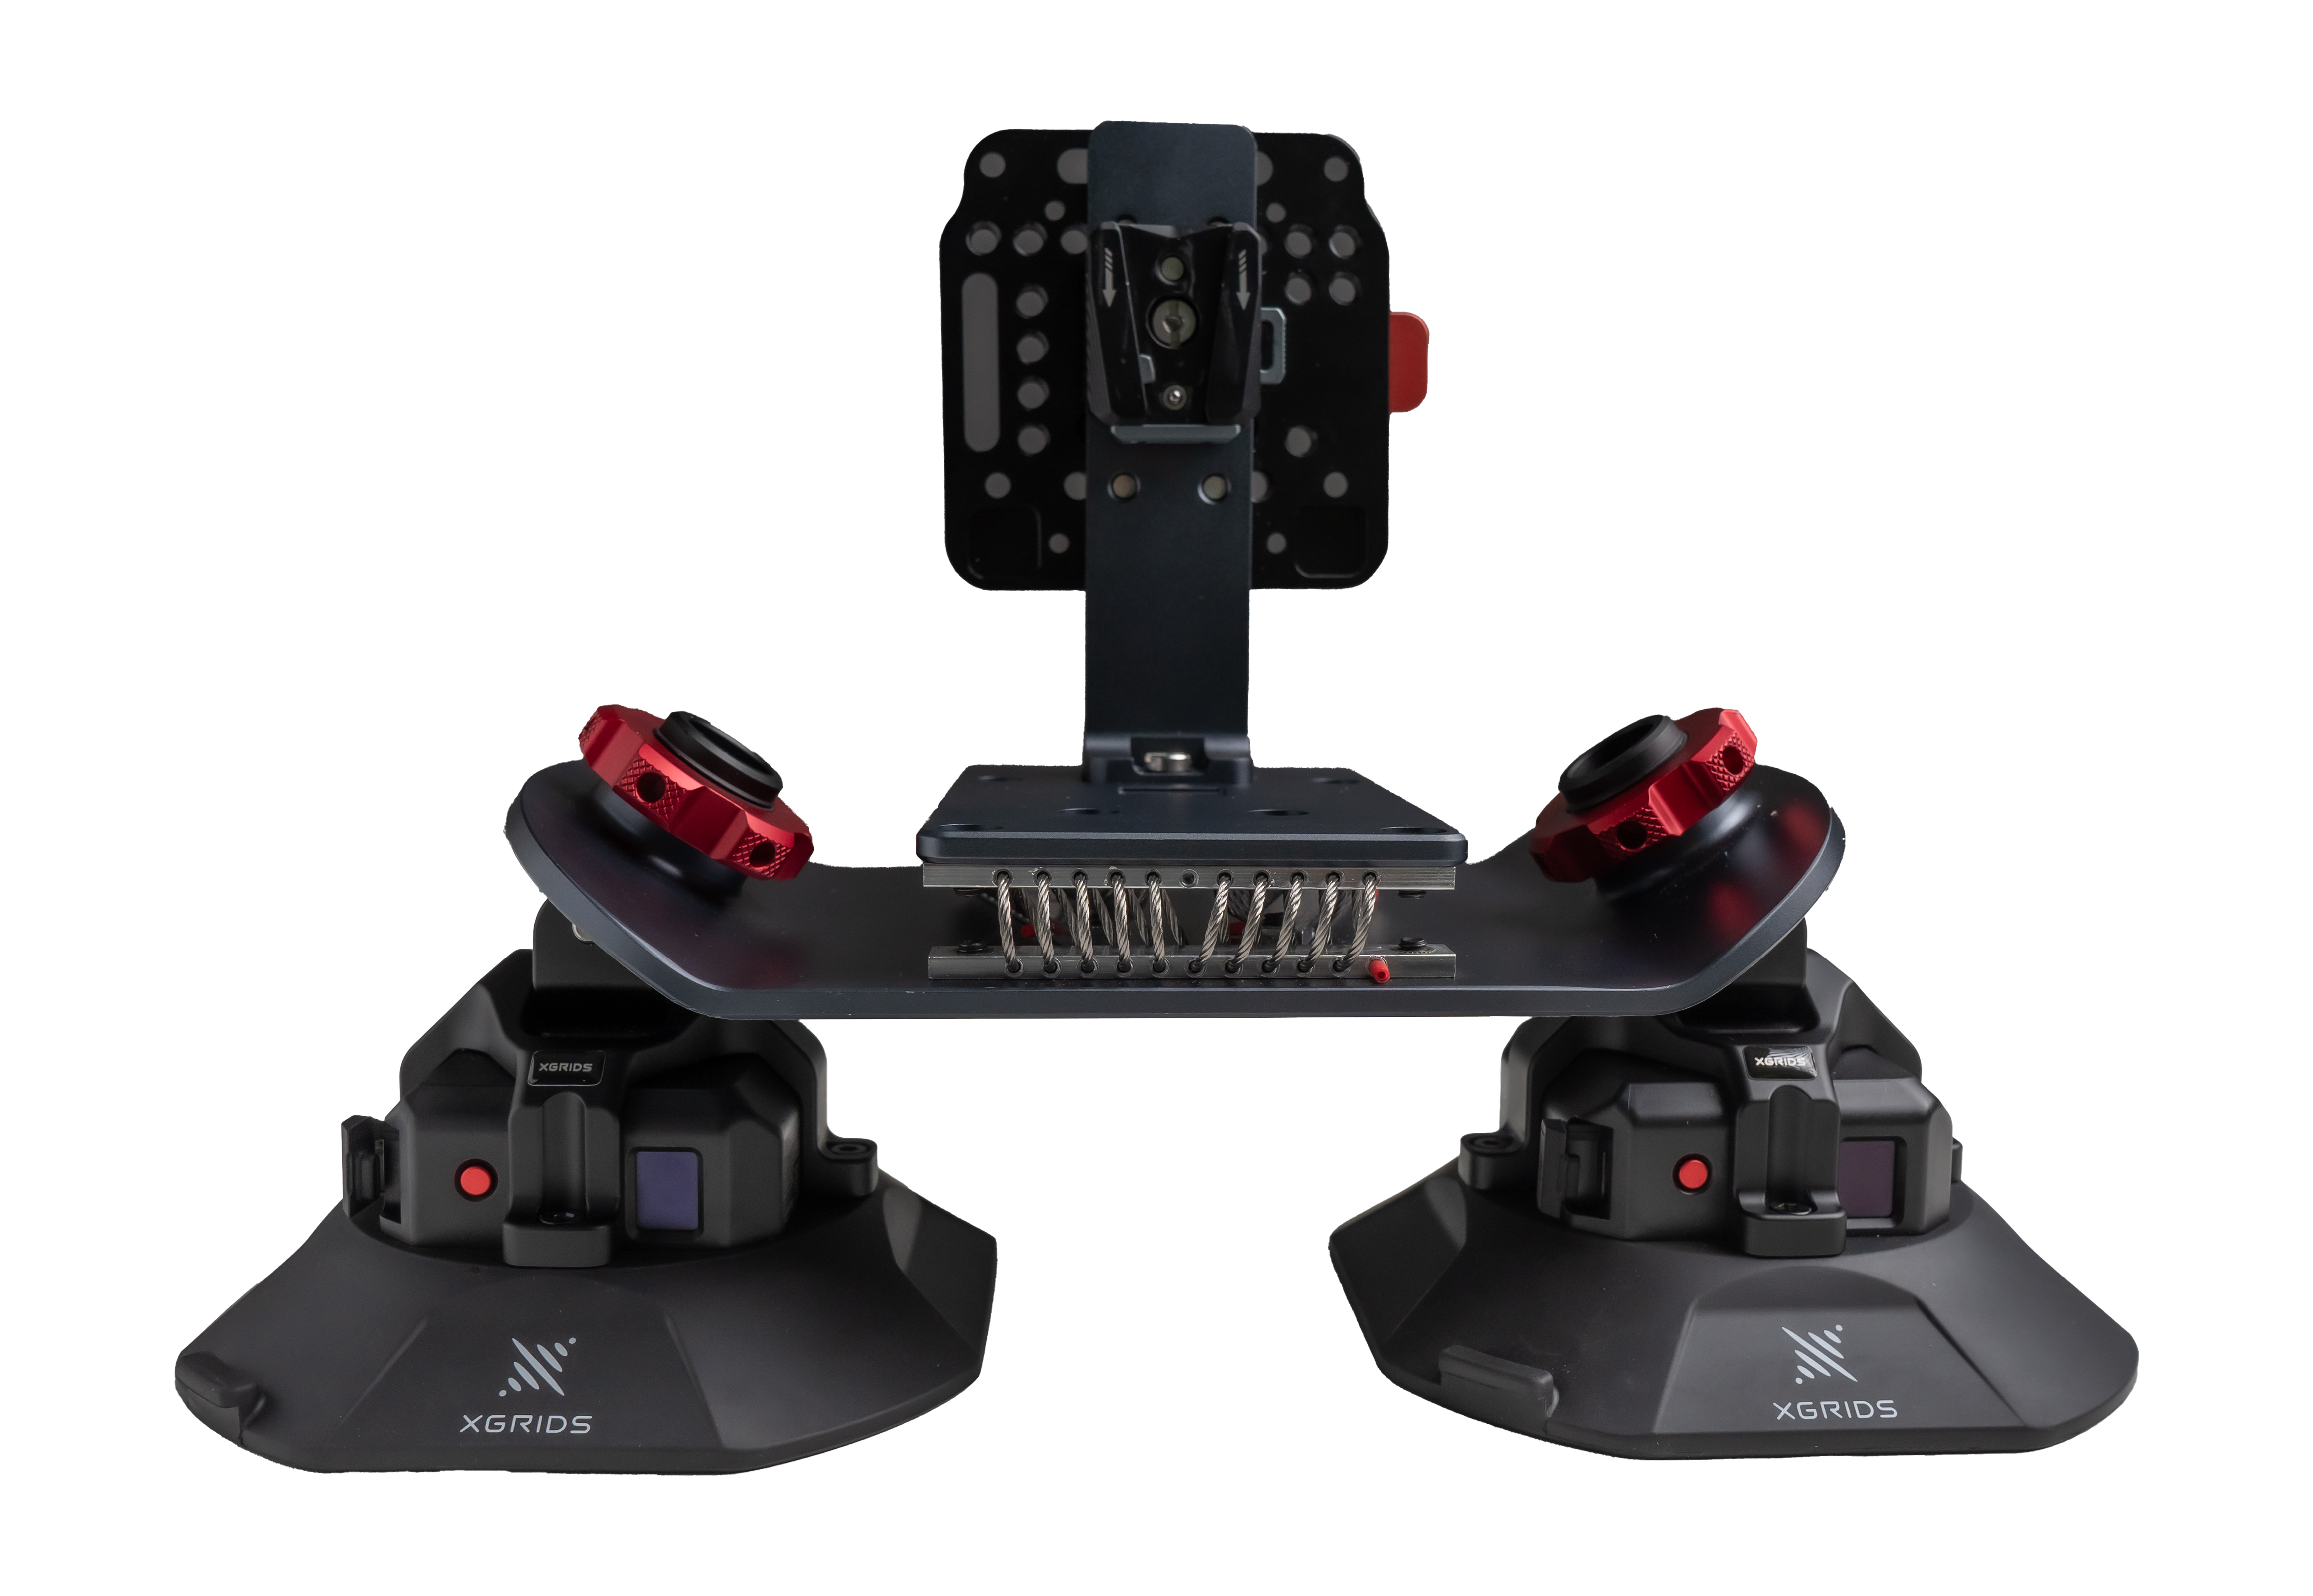 |
| Quick-release bracket | 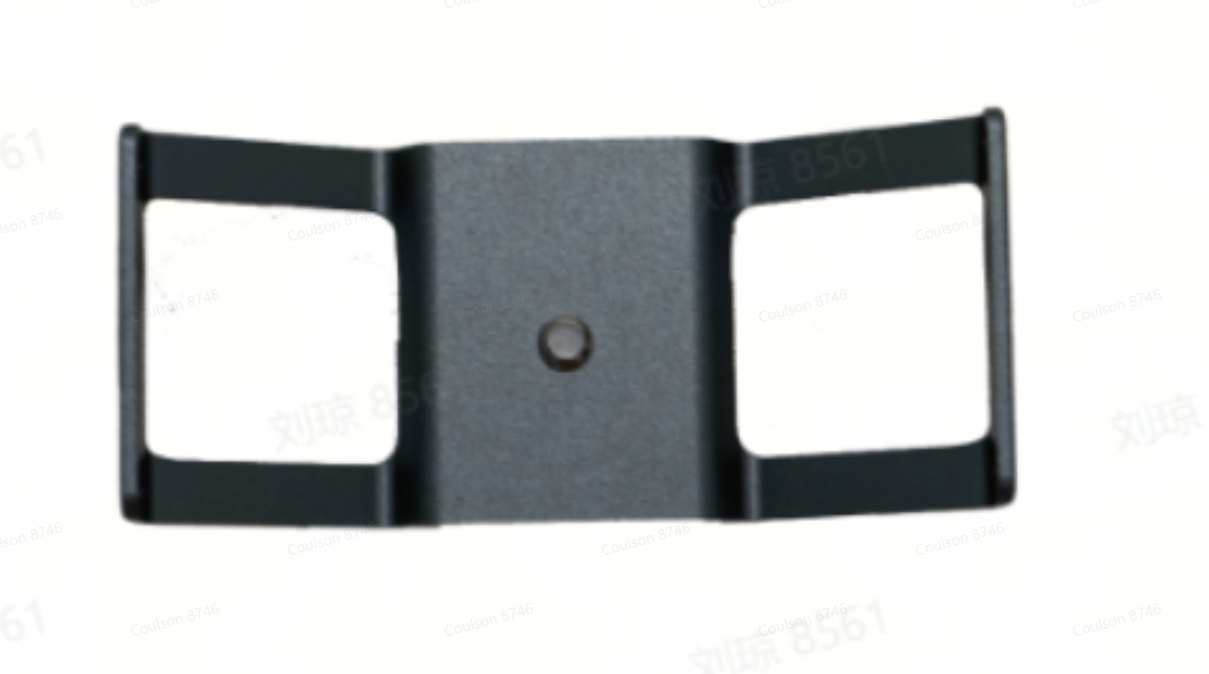 |
| Electric suction cup wireless monitoring module | 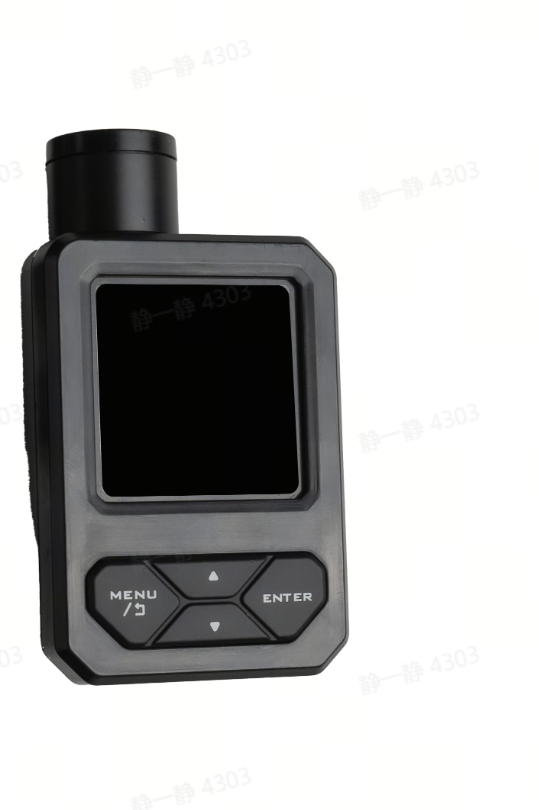 |
| Vehicle battery (V-mount) | 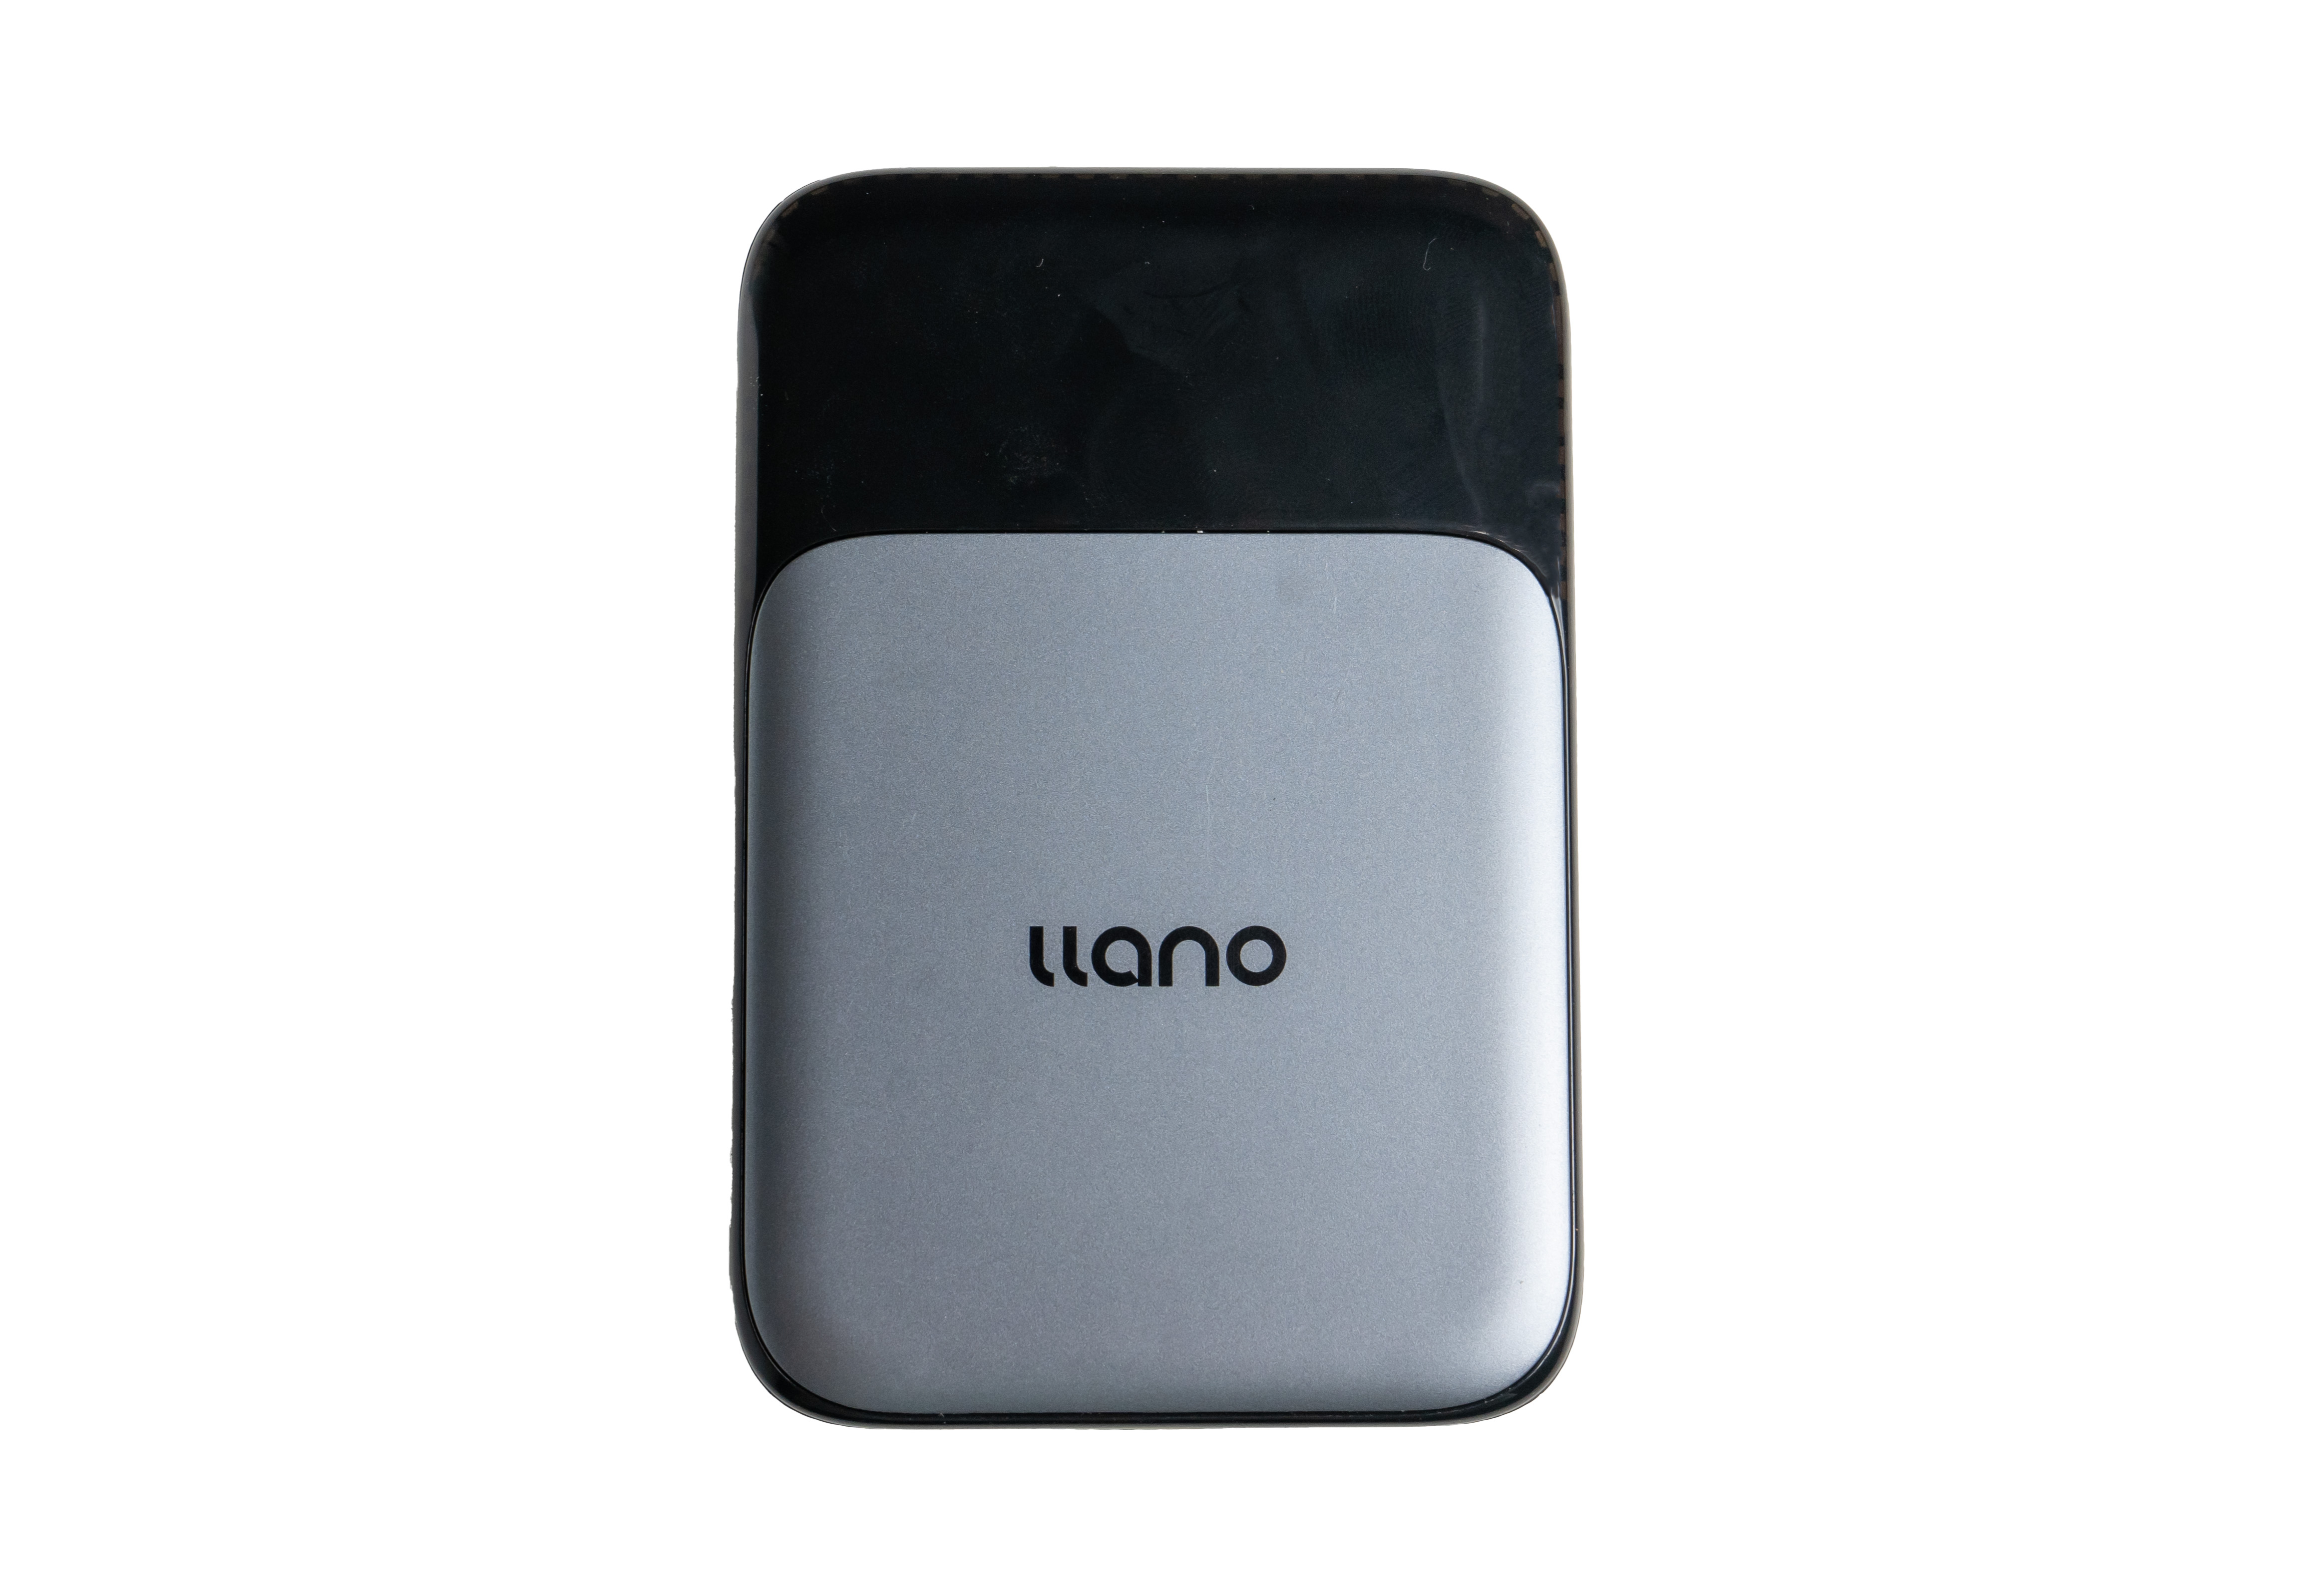 |
| Device power cable | 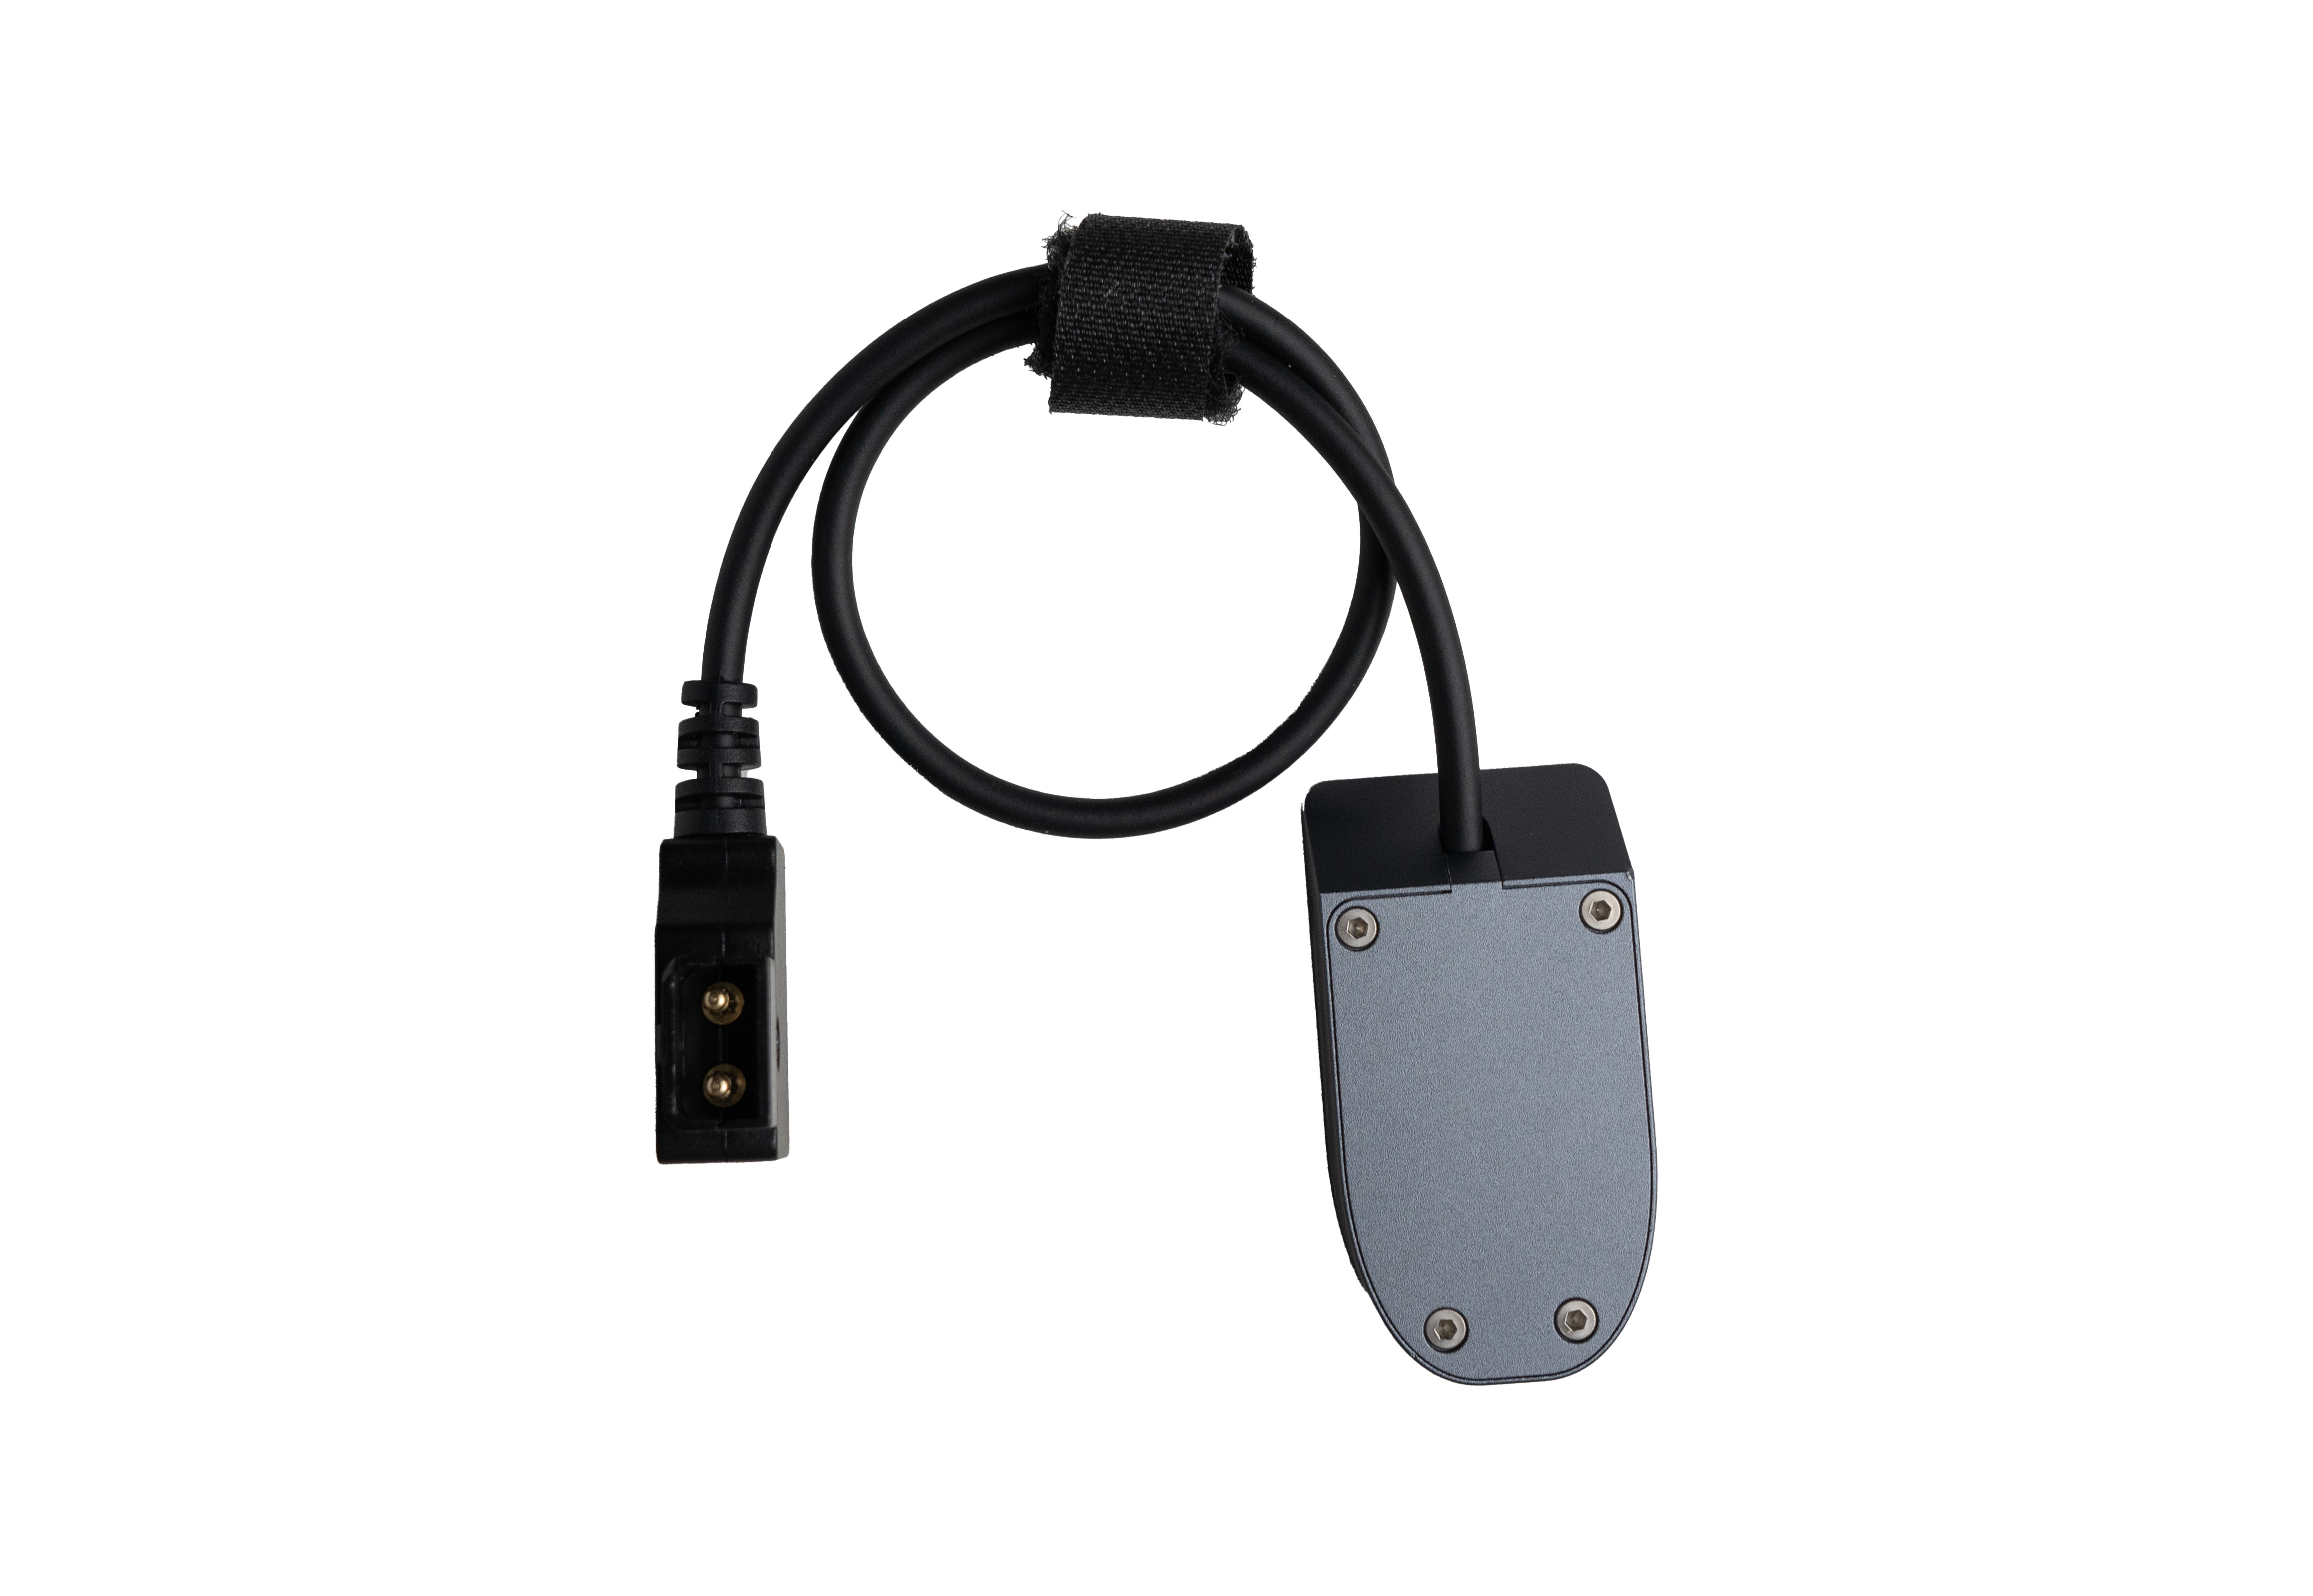 |
| 3-in-1 charging cable | 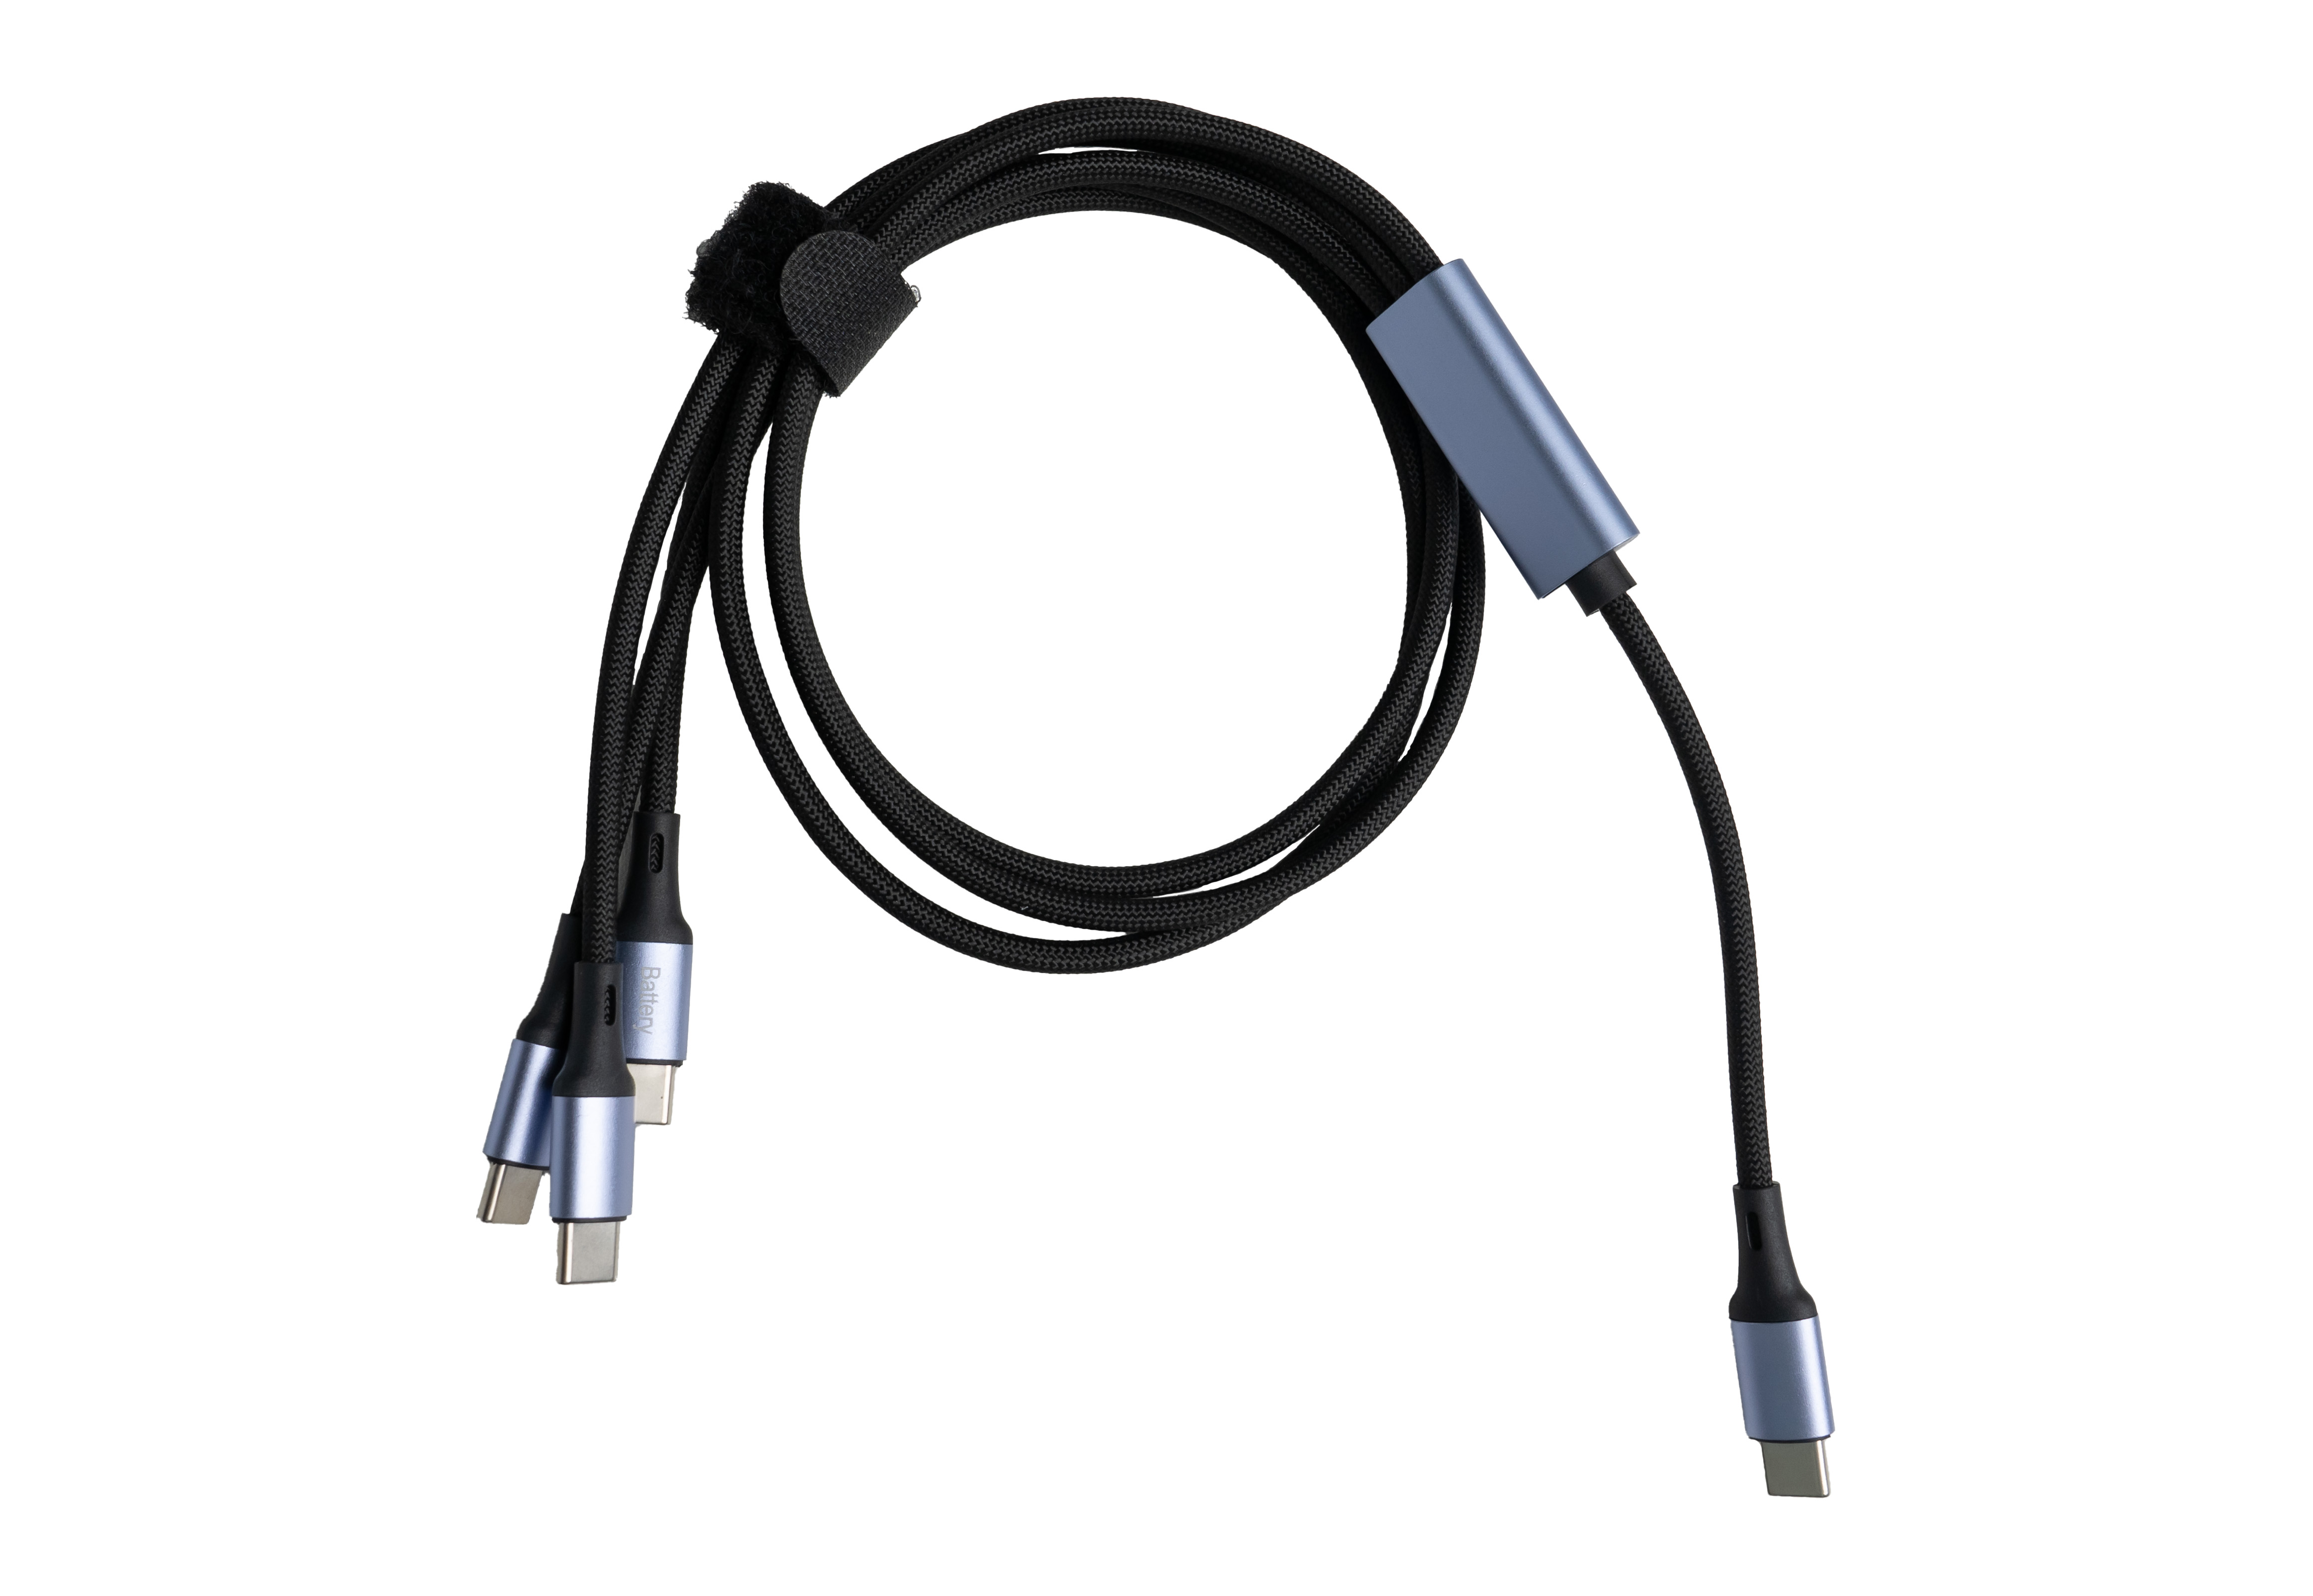 |
| Wireless monitoring module Type-C charging cable | 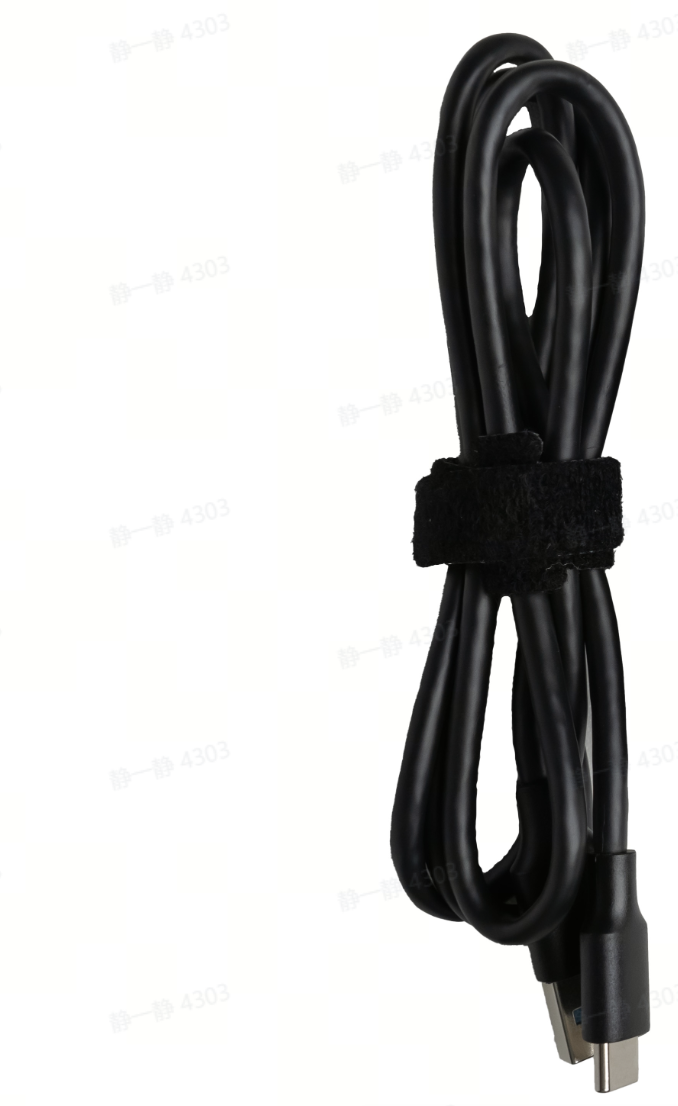 |
| Charger plug | 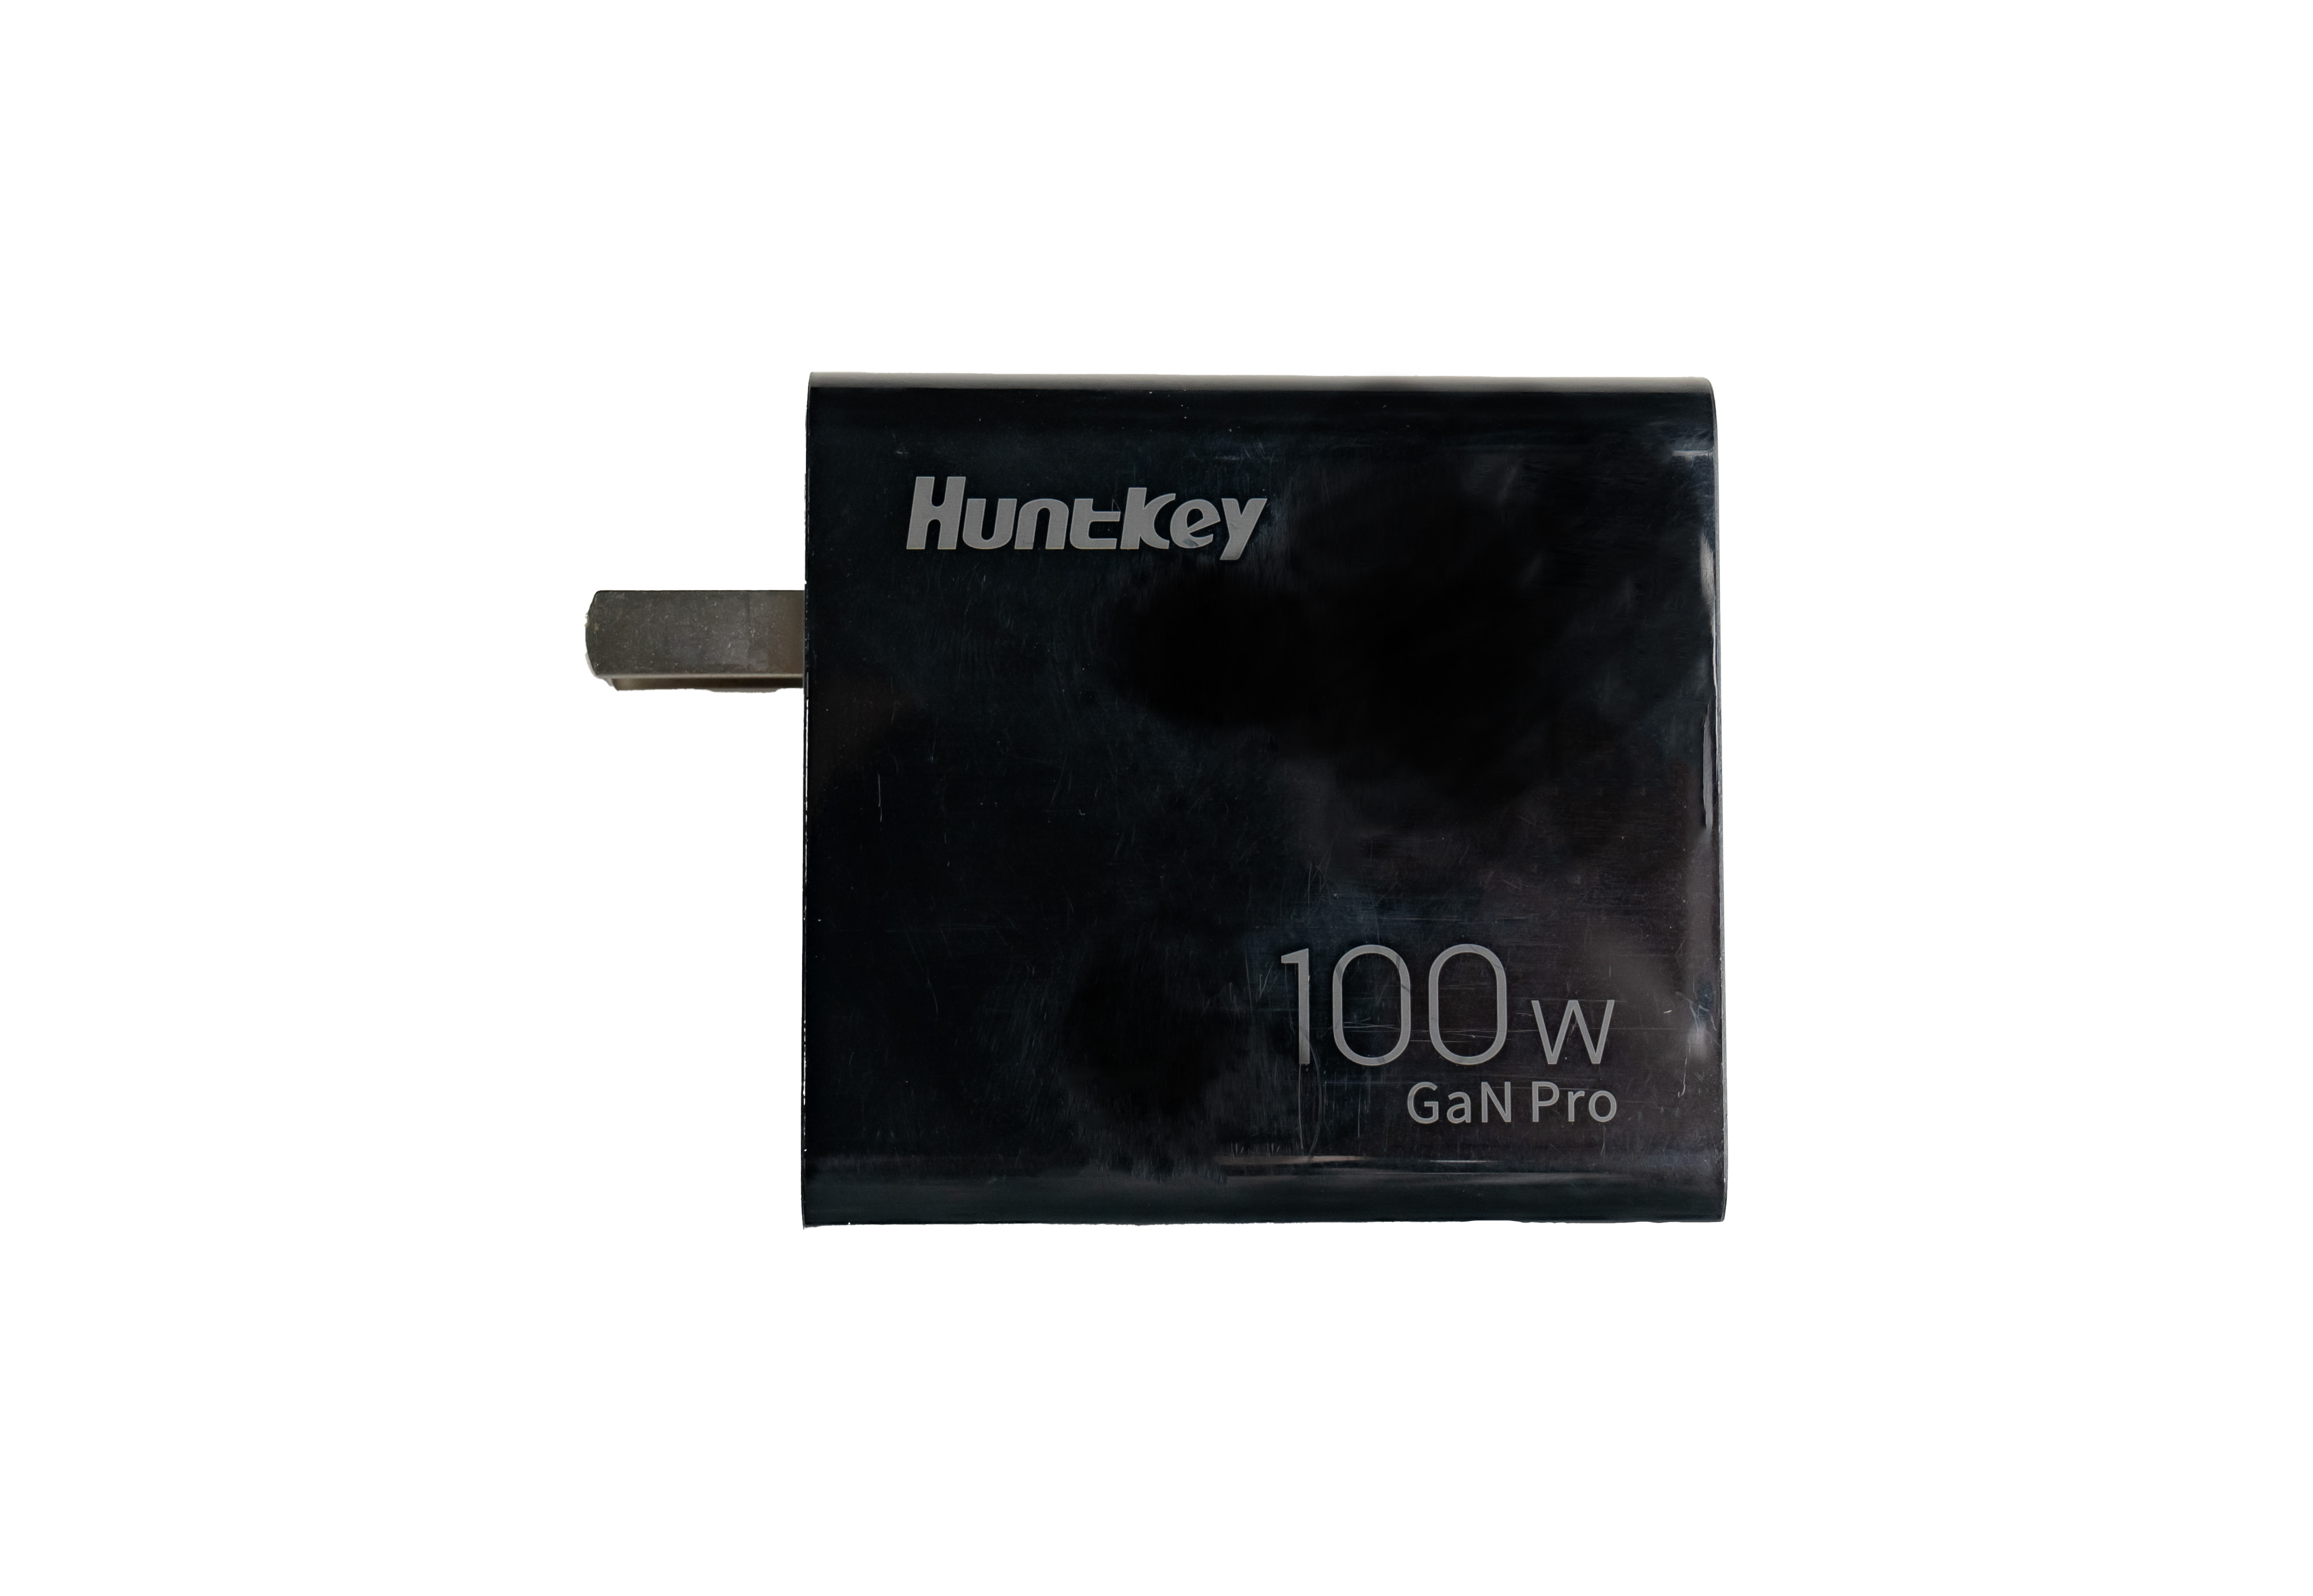 |
| Toolkit | 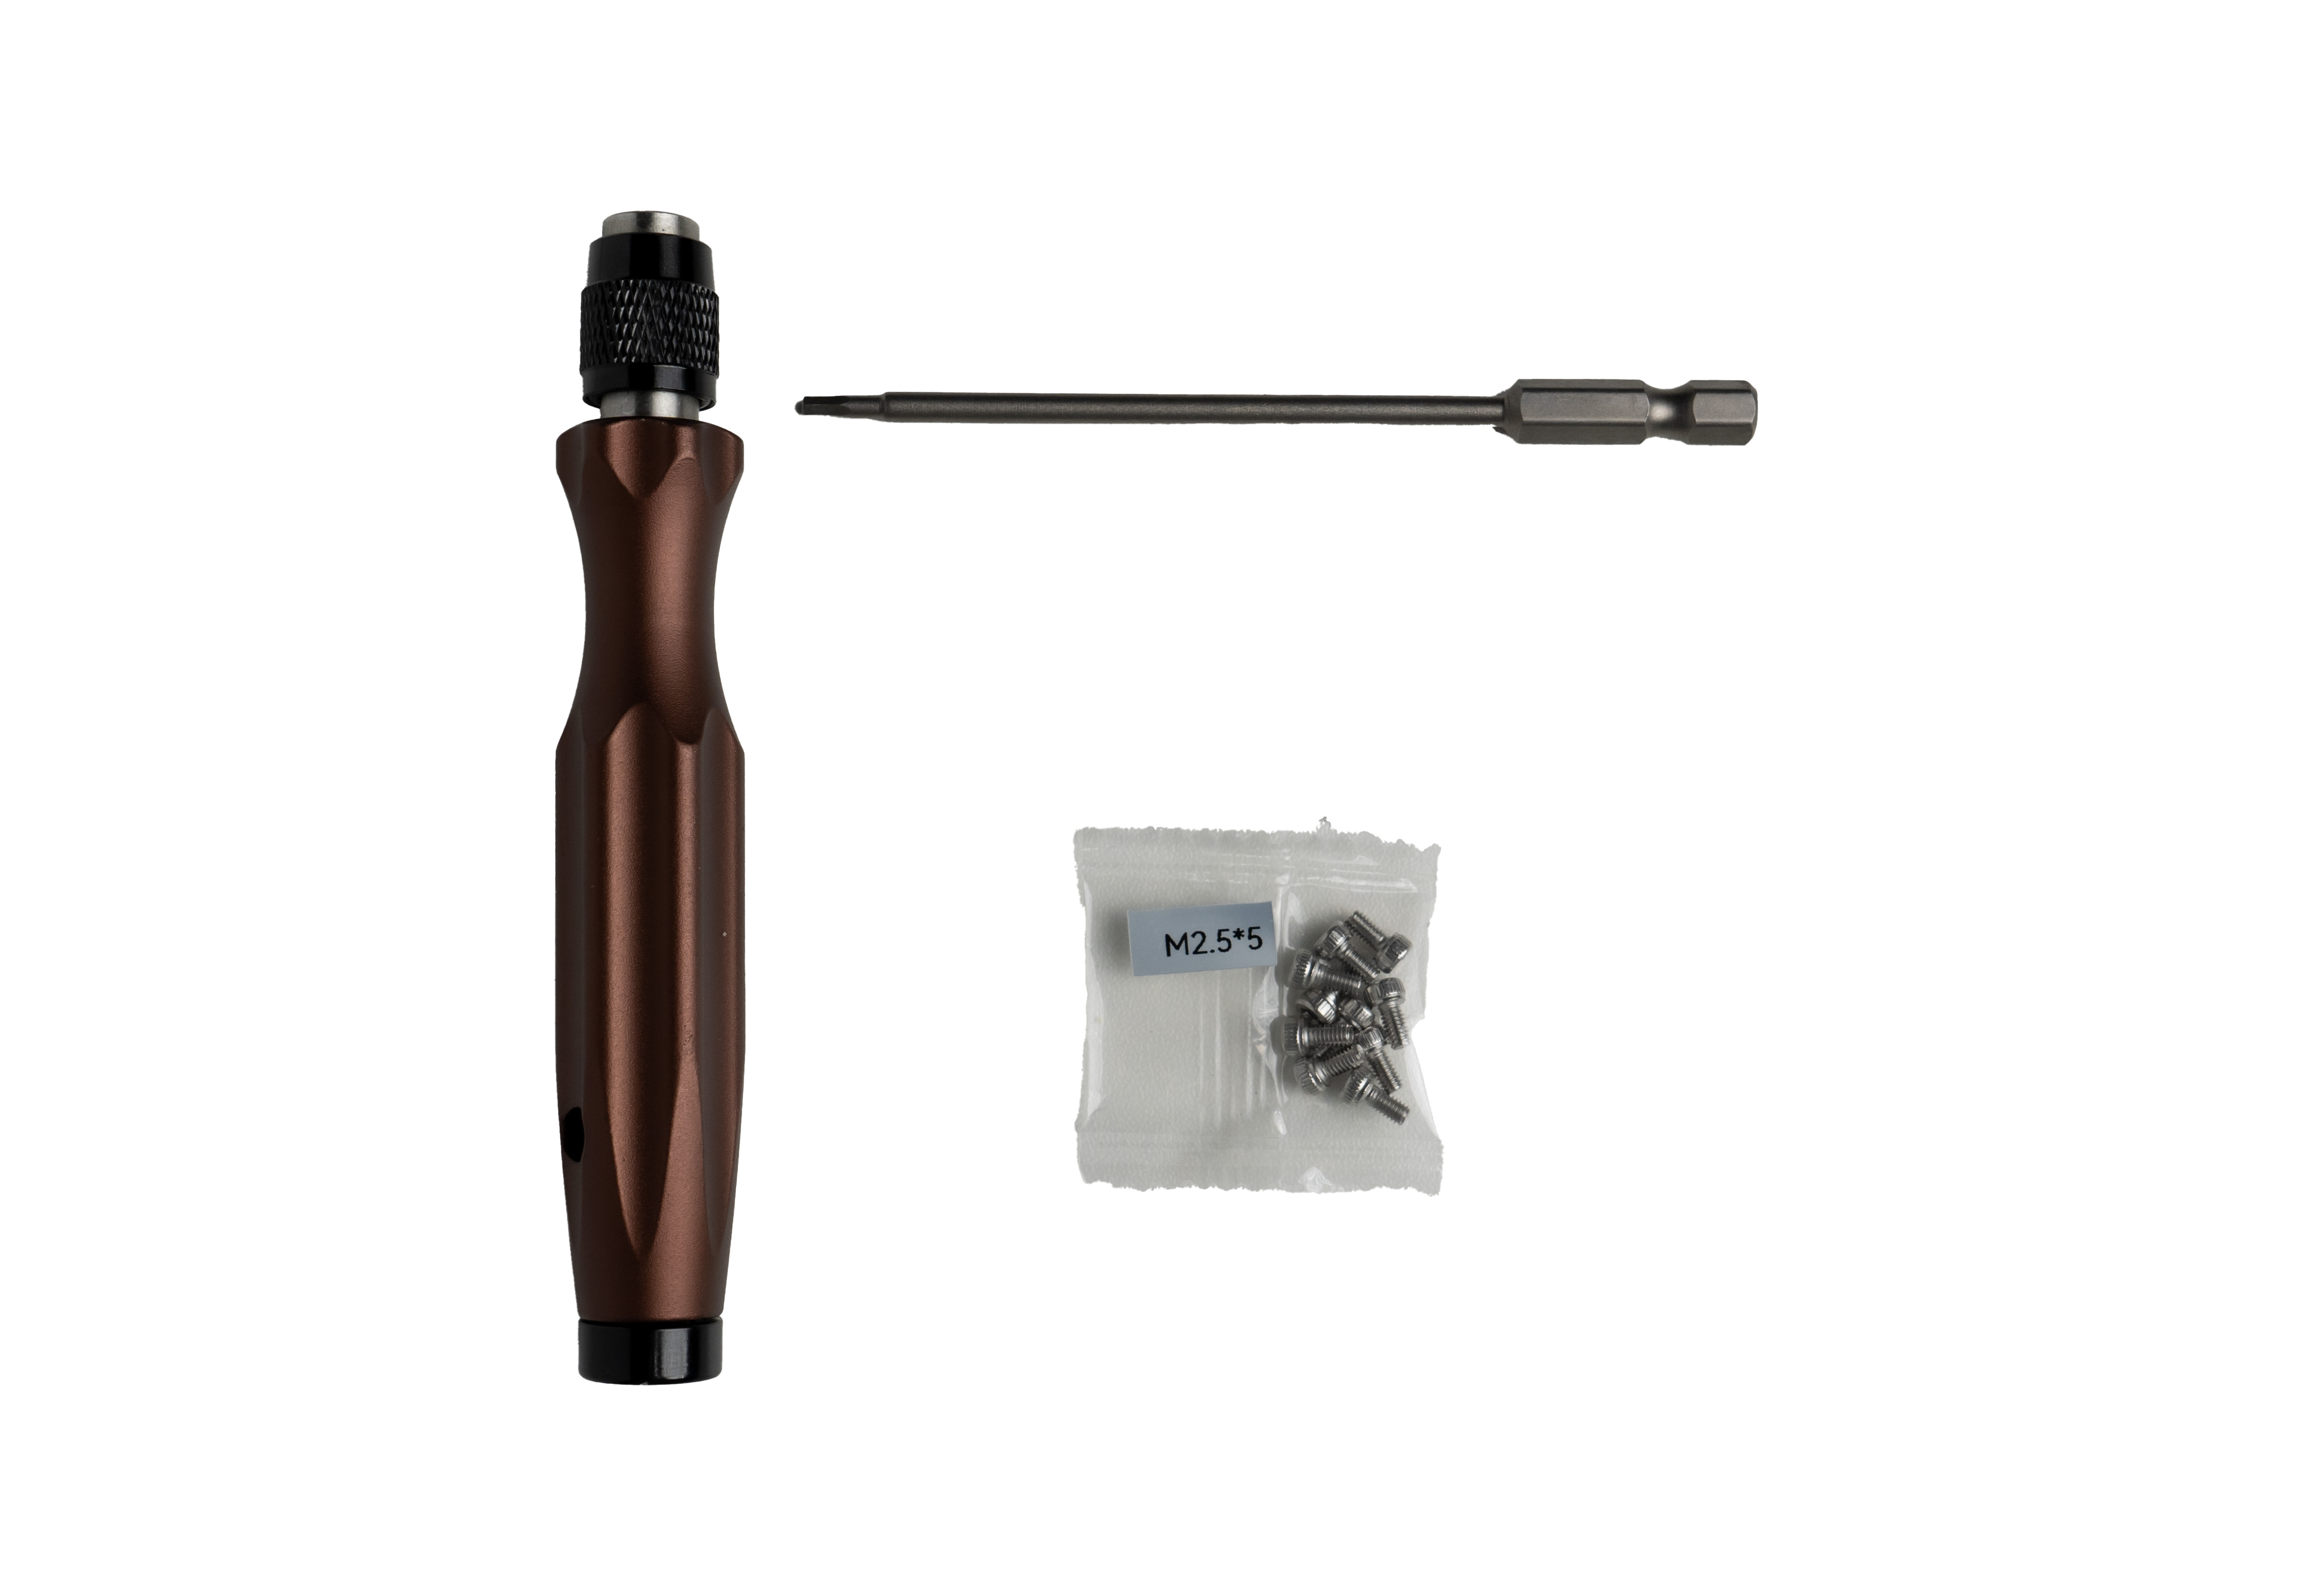 |
| User manual |  |
The bilingual user manuals are available online:
41. Does the vehicle-mounted L2 Pro support Map Fusion?
Neither vehicle-mounted nor drone-mounted mode supports Map Fusion.
The basic specifications of the L2 Pro vehicle-mount kit are as follows:
| Specification | L2 Pro Vehicle-Mounted |
|---|---|
| Absolute accuracy | Within recommended speed and RTK disconnection distance under 100 m: Horizontal RMSE 3 cm, Vertical RMSE 5 cm |
| Relative accuracy | 2 cm |
| Repeatability | 3 cm |
| Point cloud thickness | 1 cm |
| Operating time | Vehicle battery 3 hours / handle battery 1.5 hours |
| Coloring | Supported |
| 3DGS | Not supported |
| Point Cloud Enhancement | Not supported |
| Map Fusion | Not supported |
| Bracket weight | Bracket 1,964 g / bracket + battery 2,562.7 g / bracket + battery + L2 Pro 4,413 g |
| Battery charger specs | Input 100-240V~50/60Hz 2A, output power 100W Max |
| RTK (RMS) | Horizontal 0.8 cm + 1 ppm, Vertical 1.5 cm + 1 ppm |
| Recommended usage | Recommended speed 20-30 km/h, maximum speed 40 km/h |
42. How long does the L2 Pro vehicle-mount electric suction cup last per use? Why do the two suction cups drain at different rates?
The electric suction cup has a built-in 2000 mAh battery, providing 8-12 hours of battery life under normal use.
Actual battery life varies with the flatness of the mounting surface, ambient temperature, load weight, and vehicle motion. When there is slight air leakage at the suction surface or during high-speed motion, the device automatically re-pressurizes, increasing power consumption. This is why the two suction cups may drain at different rates.
For safe use, it is recommended to:
- Install on a flat, clean, oil-free surface.
- Use a safety strap for redundant fastening in high-speed or dynamic scenarios.
- Regularly check the suction status during extended outdoor use in high temperatures.
43. Does the L2 Pro electric suction cup support external power?
Yes. The device supports 5V/1A USB-C external power and can operate while charging, meeting the needs of long continuous operations.
44. What to do if the L2 Pro vehicle mount is abnormally loose (can be moved easily without force)?
Record a video showing the loose mount and contact technical support to confirm the degree of looseness before handling.
45. How to troubleshoot the L2 Pro electric suction cup when it keeps pumping, the vacuum cannot reach 100%, or it does not hold firmly?
The vehicle-mount kit works as follows: the motor starts, the vacuum pump extracts air, negative pressure forms, suction occurs, and it is then maintained or released. Therefore, troubleshoot from the four aspects of power, control, vacuum, and sealing.
If the motor stays ON, there is a constant pumping sound, the negative pressure cannot reach 100%, or suction is unstable, troubleshoot in the following order:
- Check whether the sealing ring is damaged or leaking.
- Clean the suction surface and keep it flat and dry.
- Apply pressure while the suction cup is attached and observe whether the negative pressure reaches 100%.
- Confirm whether you are in a high-altitude area (above 600 m). After ruling out product faults and installation/usage issues, consider the high-altitude factor.
If the issue persists, please contact technical support.
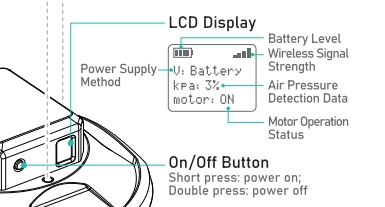
46. What to do when the L2 Pro electric suction cup keeps restarting and switches repeatedly between the boot and standby screens?
Cause: When the suction cup has power, charging it and then unplugging the power cable followed by immediately powering on triggers the upgrade mode, causing the screen to switch repeatedly between the boot and standby screens. This is an upgrade mode reserved for software updates.
Solution:
- Power off, wait 30 seconds, then power on again.
- Confirm whether the issue is resolved.