
3DGS Image Parameter Tuning
This document has three parts: the common parameters work on both pipelines, and the parameters unique to each pipeline follow. Pipeline-specific parameters are not shown in the Details panel of the other pipeline.
Common Parameters
Render Mode
3D Gaussian Splatting (default)
Renders as 2D Gaussian ellipses with full color and transparency.
LCCComponent->SetRenderMode(ERenderMode::Splatting);
Point Cloud
Renders every splat as a single colored point, suited to overviews or performance-constrained scenes.
LCCComponent->SetRenderMode(ERenderMode::PointCloud);
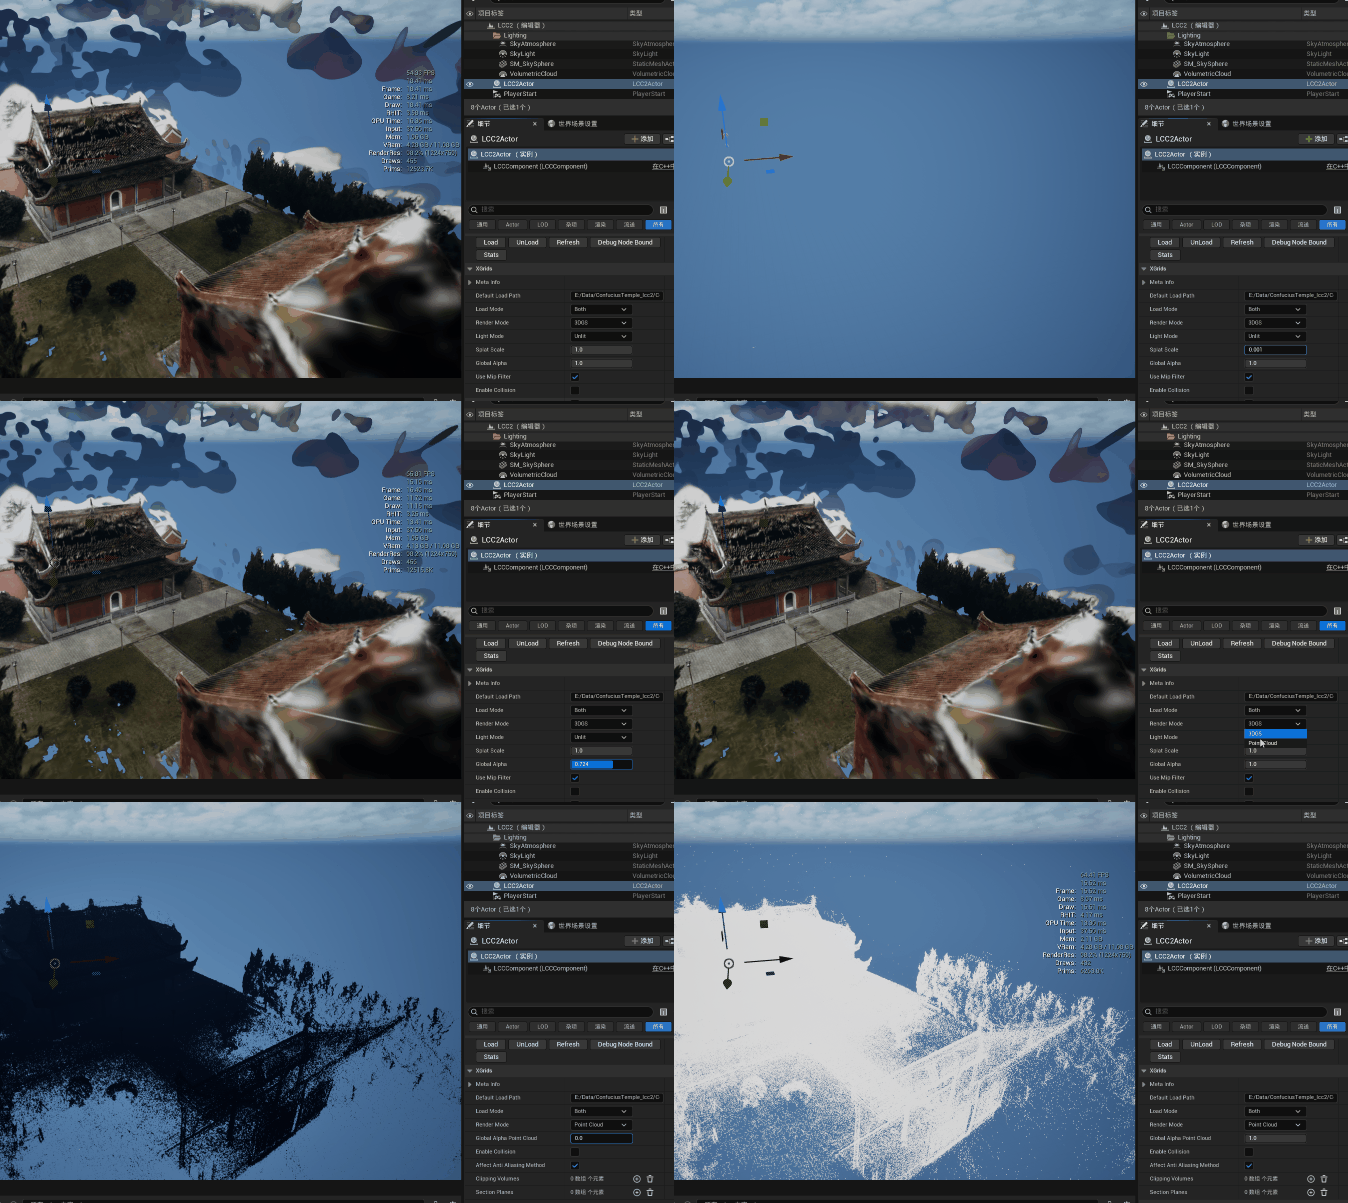
Switching between the 3DGS and point cloud render modes
Point cloud mode supports elevation coloring:
ElevationColorBottom— color at the lowest elevationElevationColorTop— color at the highest elevation
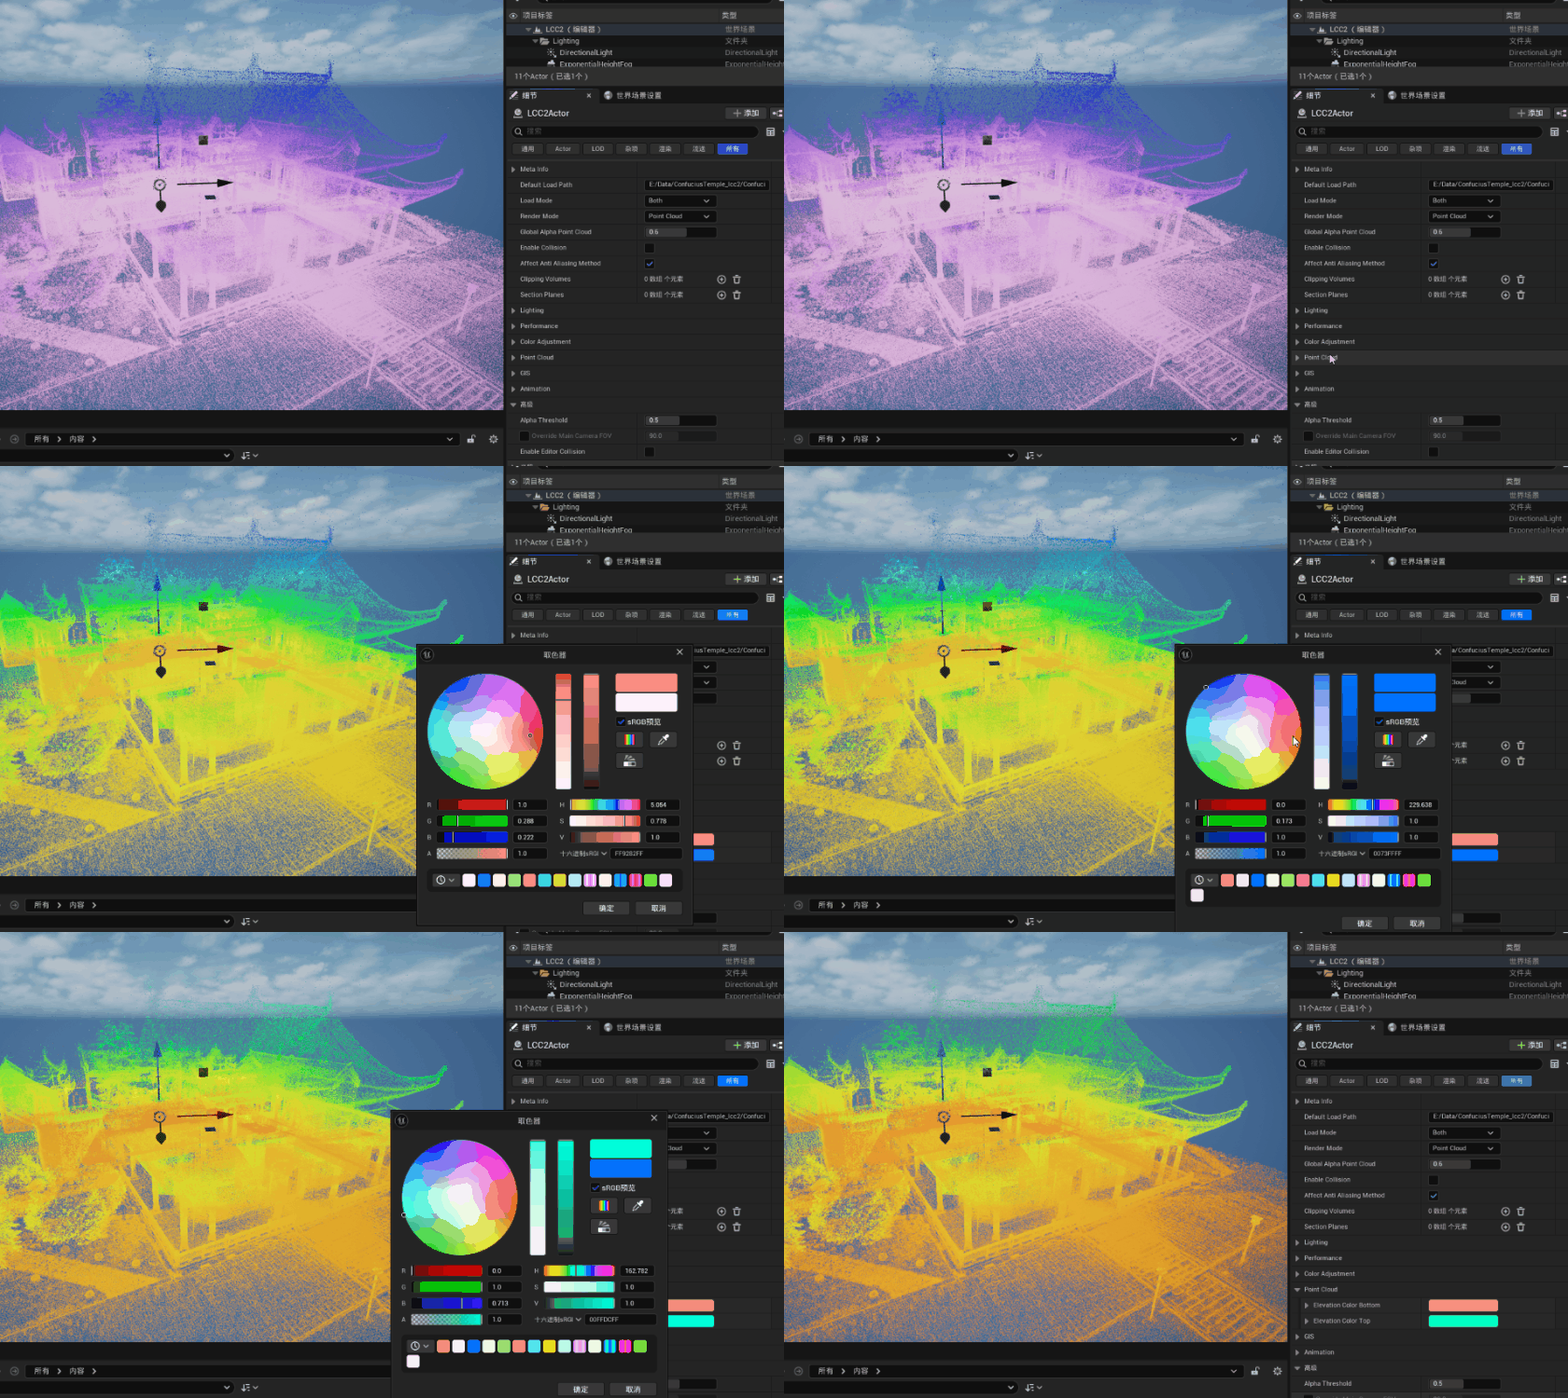
Elevation coloring in point cloud mode
Load Mode
The data is split into a main part and an environment part, and LoadMode controls which part is rendered:
| Mode | Description |
|---|---|
| Both | Renders the main part and the environment (default) |
| OnlyMain | Renders the main part only |
| OnlyEnvironment | Renders the environment only |
| None | Renders nothing, data stays loaded |
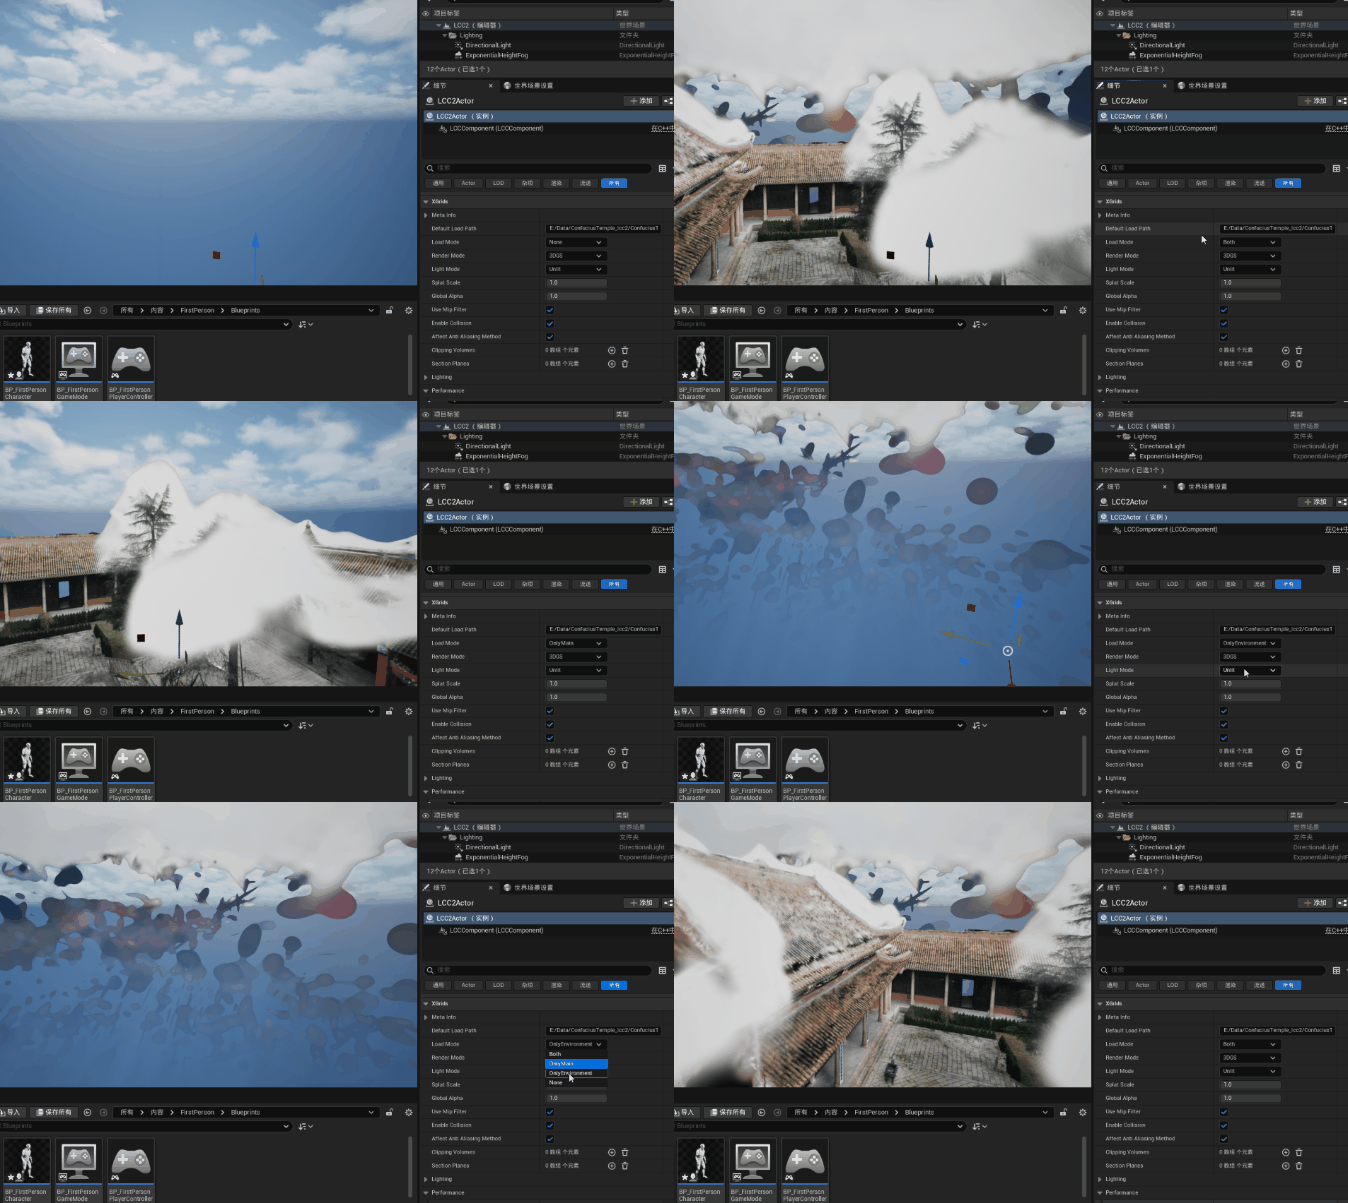
Switching the main and environment render scope with LoadMode
Note:
Noneonly stops rendering, and the data still occupies video memory. CallUnLoad()to release the resources.
Light Mode
Unlit (default)
Uses only the color of the Gaussians themselves, with no interaction with scene lights.
Lit
Enables deferred lighting so the 3DGS scene can be affected by directional lights, point lights, and others. Requires depth and normal information.
LCCComponent->SetLightMode(ELightMode::Lit);
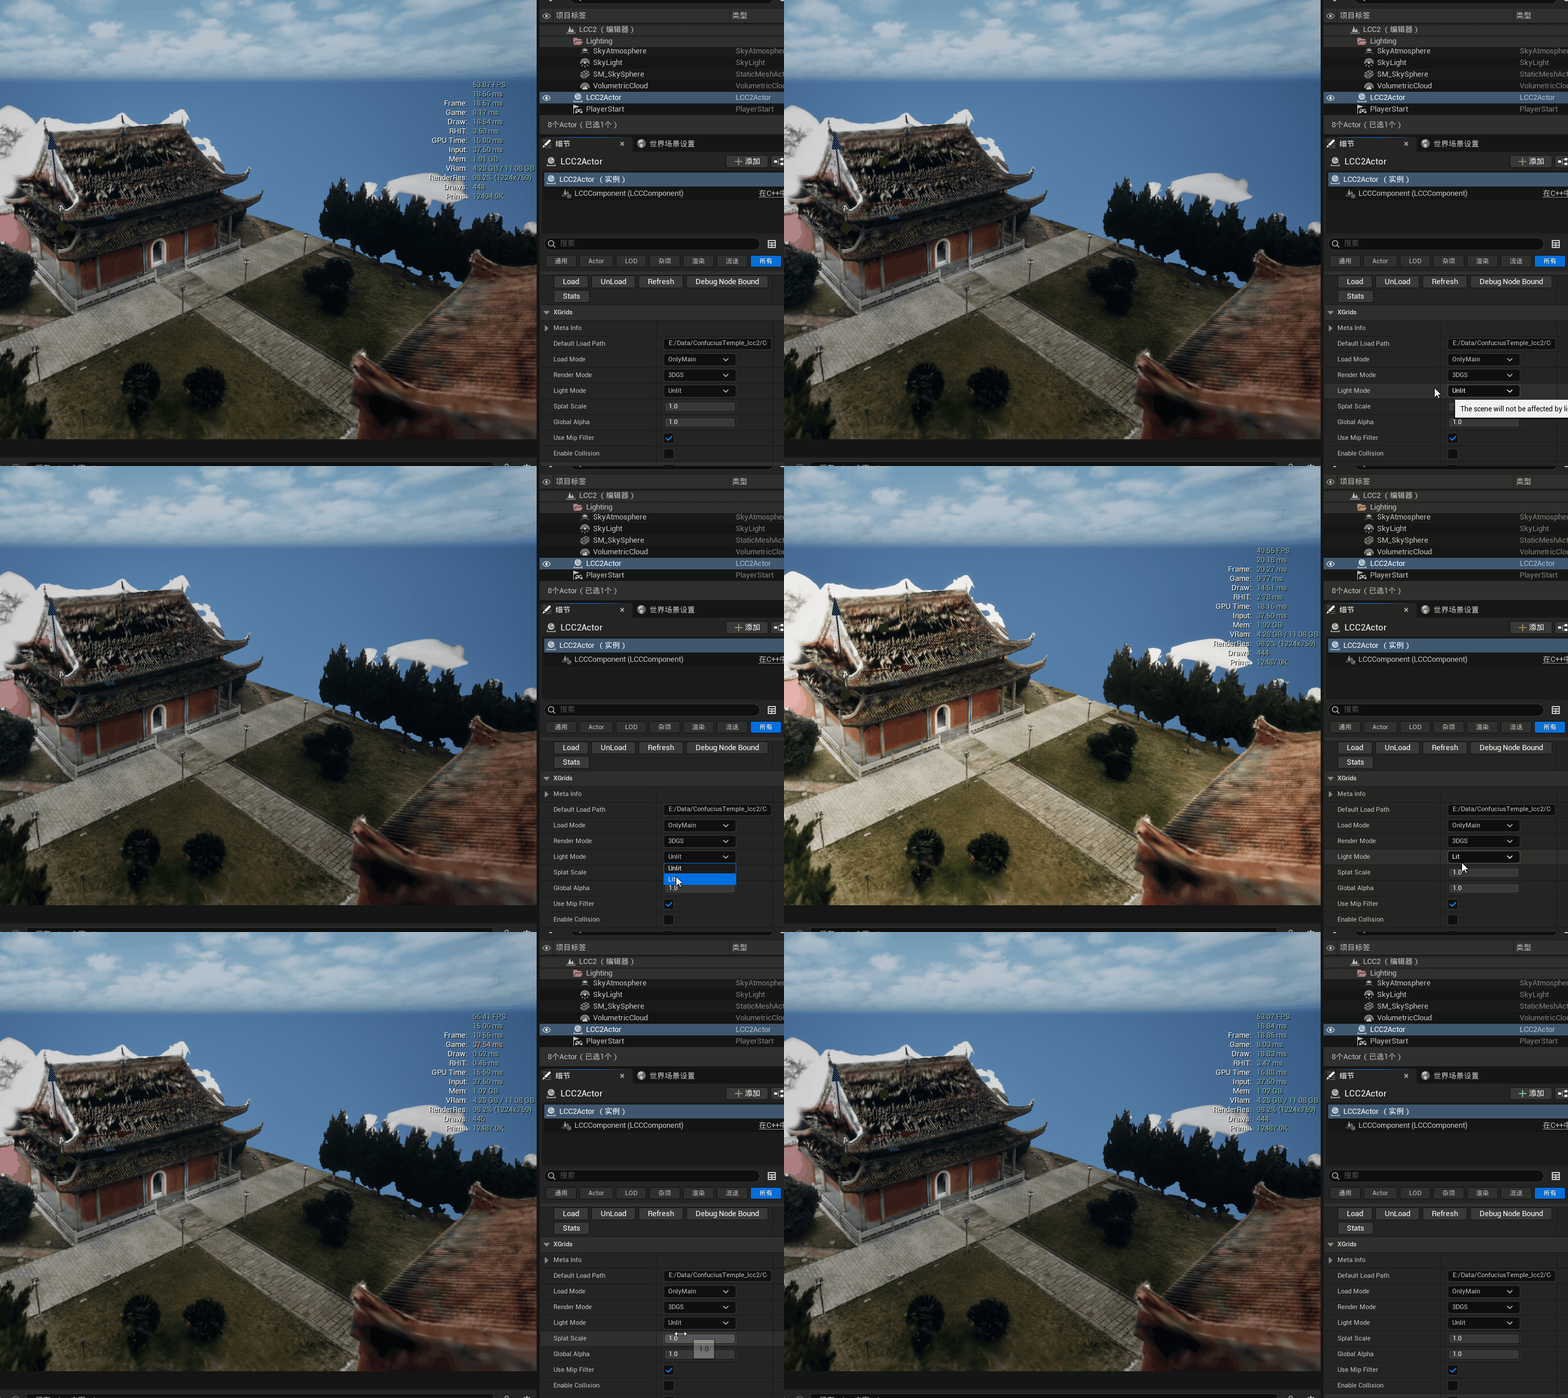
Switching between the Unlit and Lit light modes
Mip Filter
When enabled, applies a 2D low-pass filter together with opacity compensation to reduce flickering at different scales.
The default value depends on the data format:
| Format | Default |
|---|---|
.lcc2 / .lcc | Enabled |
.ply / .spz / .sog | Disabled |
Single-file formats disable it by default to preserve the original sharp look of the data. Enable it manually when flickering appears:
LCCComponent->SetUseMipFilter(true);
Spherical Harmonics (SH)
Provides view-dependent color variation and improves lighting fidelity.
LCCComponent->SetUseShcoef(true);
Requirements:
- The render mode is 3DGS
- The data itself contains SH coefficients
Whether the data contains SH coefficients depends on the format:
| Format | How it is determined |
|---|---|
.lcc2 / .lcc | Determined by the file type of the data: the Quality type contains SH, the Portable type does not |
.ply / .spz / .sog | No file type marker, so it depends on whether SH coefficients were actually written into the file |
When the data contains no SH coefficients, this switch is disabled in the Details panel.
SplatScale
Controls the size of each splat quad, from 0.001 to 1.0.
Lowering it reduces the screen area a single splat covers, which reduces semi-transparent overlap and lowers the pixel fill cost. Lowering it too far makes surfaces show holes or look noticeably thin. It is also one of the performance tuning options; see Performance Guide.
LCCComponent->SetSplatScale(1.0f);
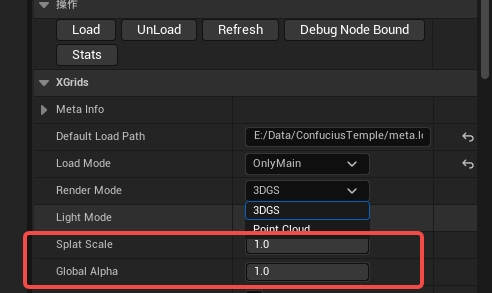
Setting the splat scale and the 3DGS global alpha
Global Alpha
Each render mode has its own global alpha property, both from 0.0 to 1.0:
| Property | Applies to |
|---|---|
| GlobalAlpha | 3DGS |
| GlobalAlpha_PointCloud | Point cloud |
LCCComponent->SetGlobalAlpha(1.0f);
LCCComponent->SetGlobalAlpha_PointCloud(1.0f);
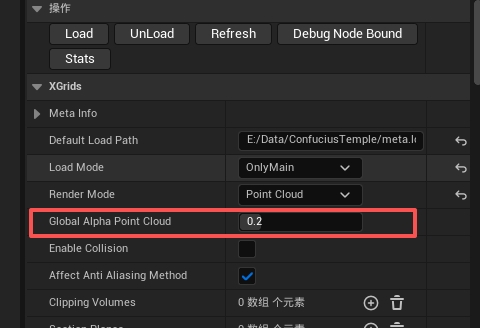
Setting the global alpha of point cloud mode
Color Adjustment
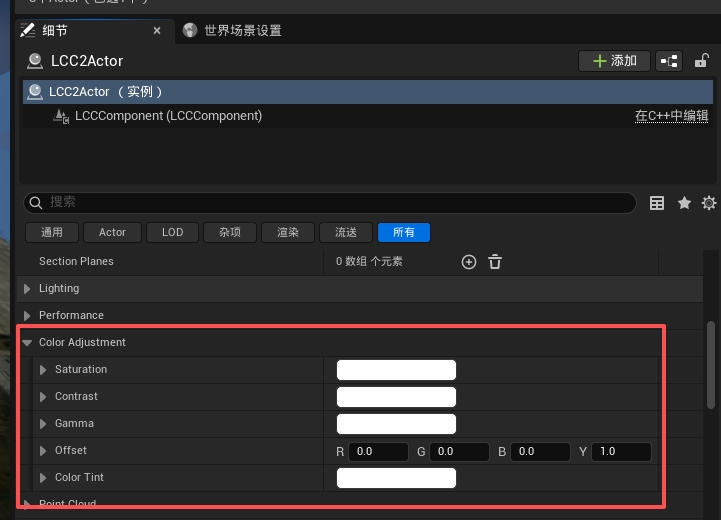
Configuring the LCC saturation, contrast, and tint parameters
Runtime changes are supported:
| Property | Range | Description |
|---|---|---|
| Saturation | 0.0~2.0 | Per-channel saturation |
| Contrast | 0.0~2.0 | Per-channel contrast |
| Gamma | 0.0~2.0 | Per-channel gamma correction |
| Offset | -1.0~1.0 | Additive color offset |
| ColorTint | LinearColor | Multiplicative tint |
LCCComponent->SetSaturation(FVector4(1.2, 1.2, 1.2, 1.0));
LCCComponent->SetColorTint(FLinearColor::White);
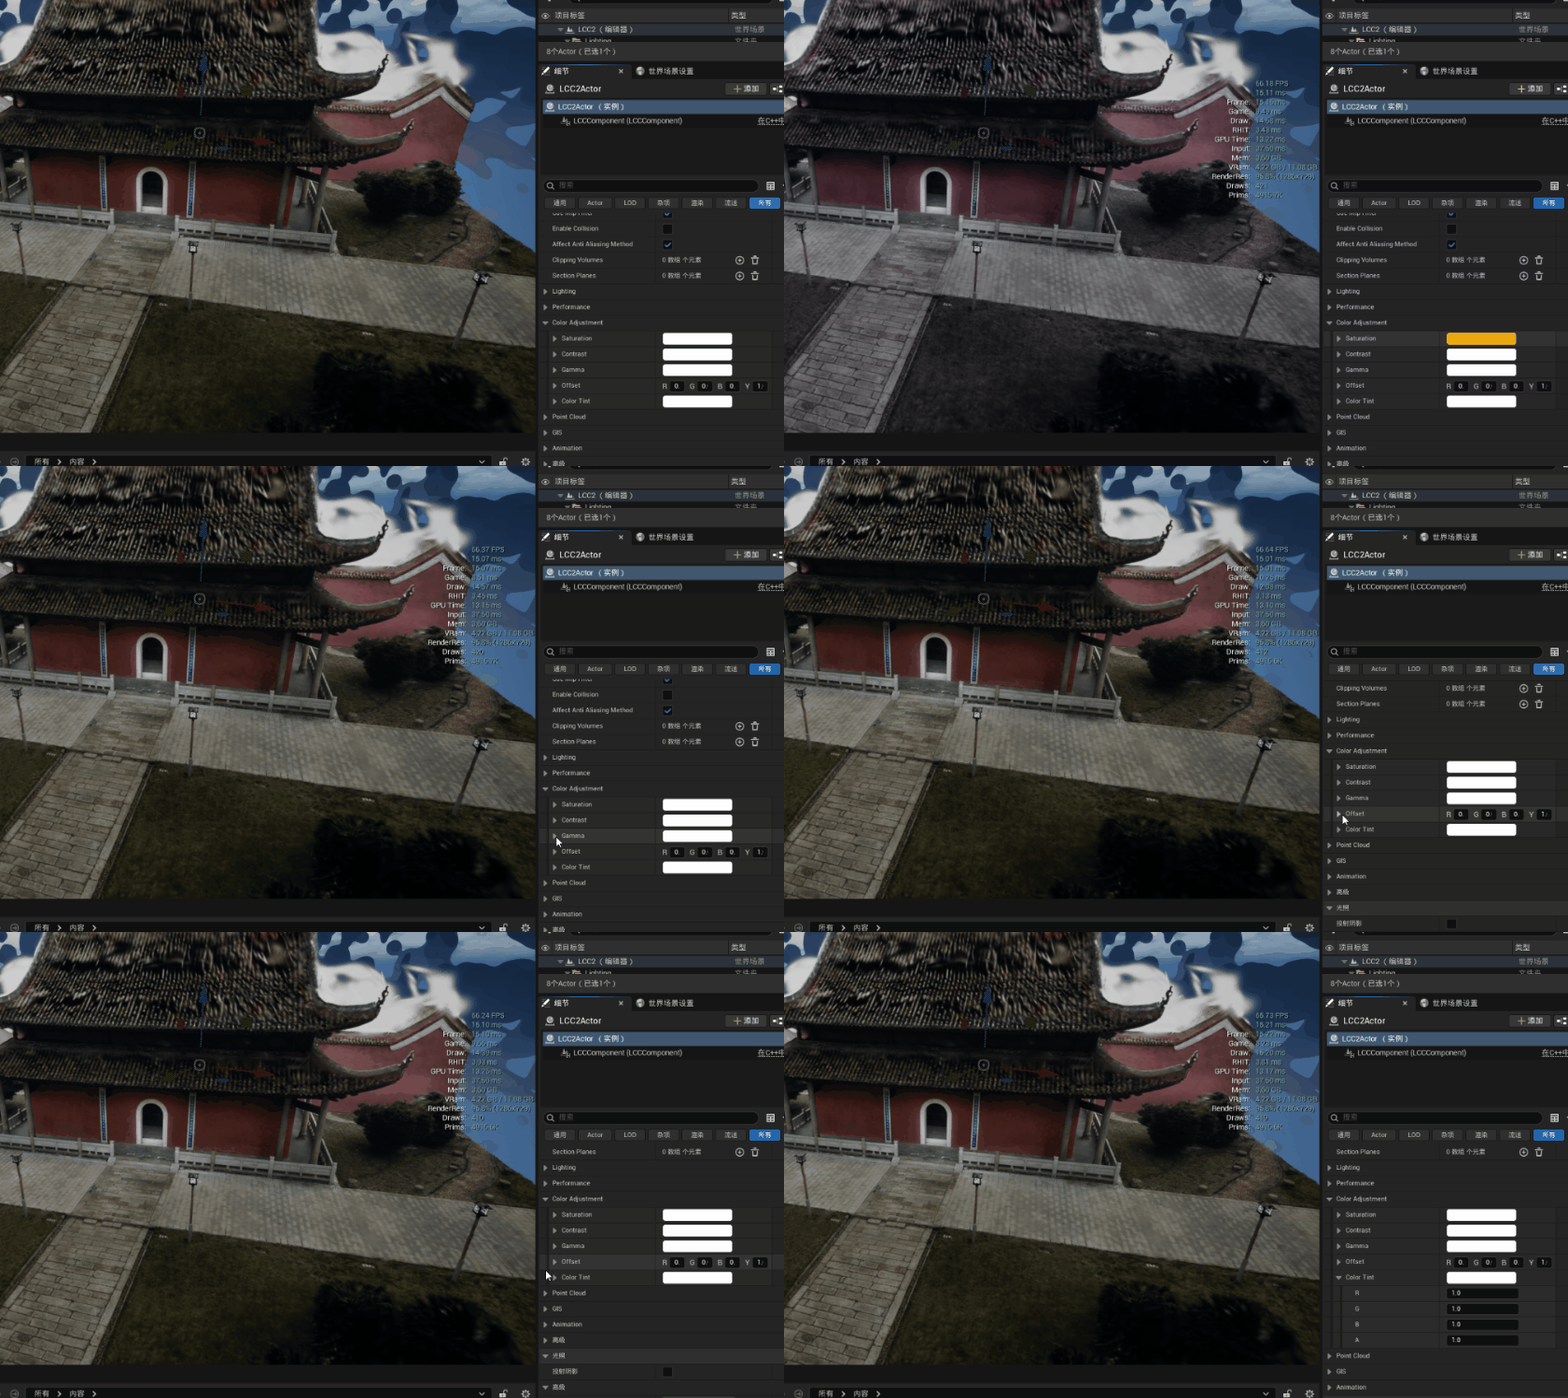
The image after adjusting the color parameters dynamically
Anti-aliasing
With bAffectAntiAliasingMethod enabled, the plugin manages the anti-aliasing method automatically:
| Configuration | Default method |
|---|---|
| LCC1 Splat | FXAA |
| LCC2 Splat | TSR |
| LCC1 Point Cloud | MSAA |
| LCC2 Point Cloud | TSR |
The defaults can be changed in ProjectSettings > Plugins > LCC4Unreal.
Note: the anti-aliasing method is a view-level global setting. When Actors from both the LCC pipeline and the LCC2 pipeline exist in the same scene, each sets the anti-aliasing method according to its own configuration, so which one takes effect depends on execution order and the result is undetermined. In such scenes, configure the anti-aliasing method of both pipelines to the same value manually.
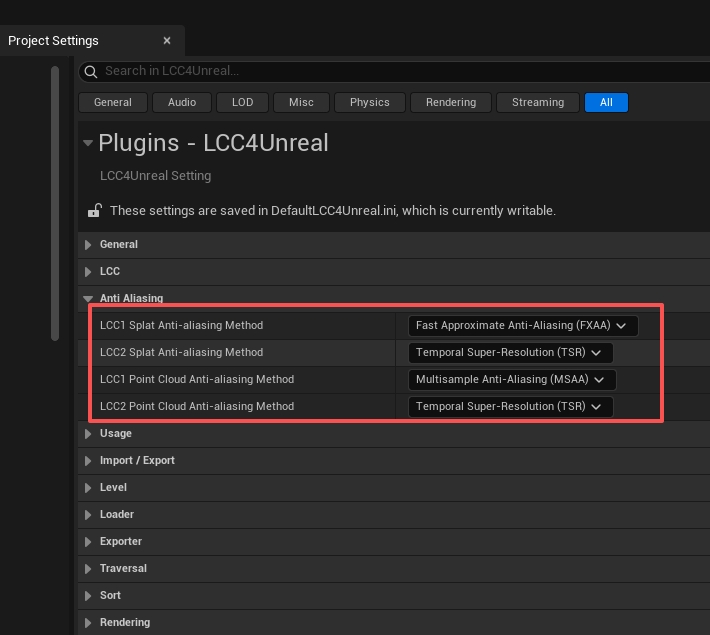
Configuring the default anti-aliasing method of each LCC pipeline
Post-processing
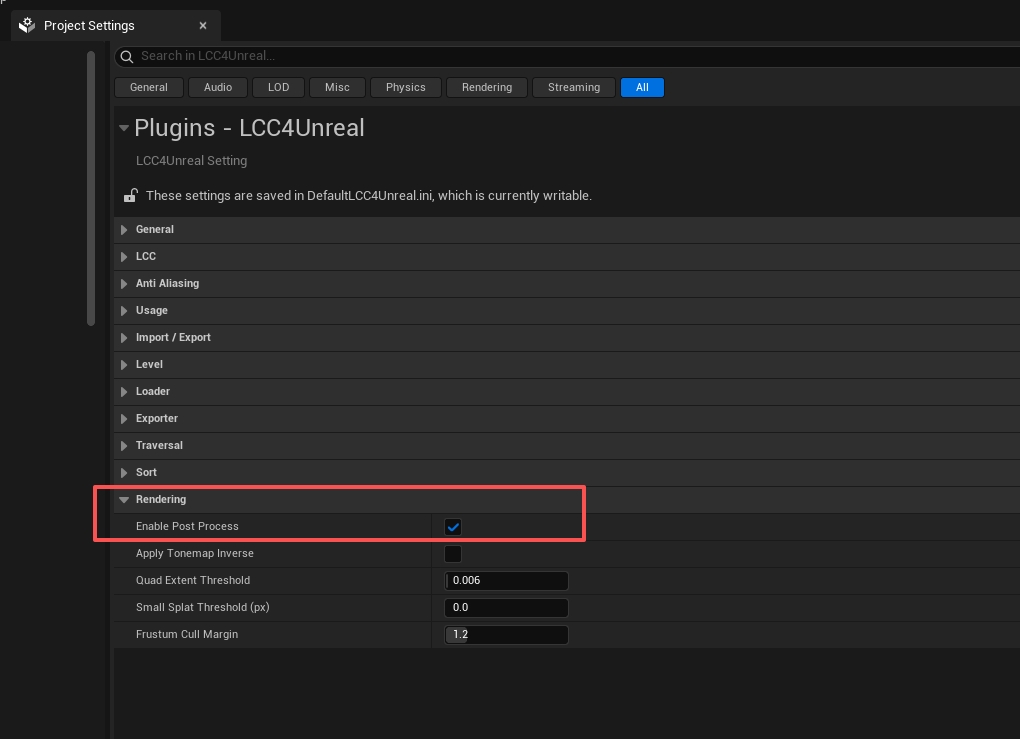
Configuring the LCC4Unreal post-processing and tone mapping options
| Setting | Default | Description |
|---|---|---|
| Enable Post Process | Enabled | Whether LCC pixels take part in the engine post-processing pipeline |
| Apply Tonemap Inverse | Disabled | Applies FilmToneMapInverse during the color space conversion so the original look of the data is restored after engine tone mapping |
These are global settings under ProjectSettings > Plugins > LCC4Unreal > Rendering and apply to both pipelines. All LCC components in a scene share the same mode, and it cannot be set per Actor.
Result of Disabling Enable Post Process
The two states are processed differently:
| State | Processing | Result |
|---|---|---|
| Enabled | Applies InverseACES to LCC pixels so they enter the engine post-processing pipeline | 3DGS receives tone mapping, Bloom, exposure, color grading, and other post-processing along with the regular objects in the scene |
| Disabled | Saves a snapshot before tone mapping and blends it back into the image by alpha after tone mapping completes | 3DGS keeps its original colors and is unaffected by tone mapping and every post-processing stage after it |
Disabling it suits cases that require a strict reproduction of the original data colors, such as color verification or comparison against a reference image. The cost is that 3DGS and the regular objects in the scene no longer look consistent, and overall post-processing effects such as Bloom and exposure do not apply to the 3DGS part.
Note: disabling Enable Post Process requires alpha channel output in the engine, otherwise the composite result is incorrect. Enable Alpha Output in ProjectSettings > Engine > Rendering (in UE 5.4 and earlier this corresponds to "Enable alpha channel support in post processing", which must be set to Linear color space only followed by an editor restart). The plugin shows a prompt when it detects that this option is off.
What Apply Tonemap Inverse Does
The colors of 3DGS data are finished colors that already went through tone mapping at capture time. Running such colors through engine tone mapping again compresses them a second time, usually showing up as lower contrast and grayish highlights.
With this option enabled, the plugin applies FilmToneMapInverse to LCC colors during the color space conversion stage to cancel the engine tone mapping that follows, so the final image restores the original look of the data.
| State | Use case |
|---|---|
| Disabled (default) | 3DGS and the regular objects in the scene share the same tone mapping for a consistent overall look |
| Enabled | 3DGS must show the original colors and contrast of the data |
This option applies to both pipelines and is only meaningful while Enable Post Process is enabled: once it is off, 3DGS no longer takes part in tone mapping, so there is nothing to cancel.
Parameters Specific to the LCC2 Pipeline
Depth Threshold
AlphaThreshold decides which layer of depth 3DGS writes into the depth buffer. 3DGS is composed of many layers of semi-transparent splats, and the plugin accumulates opacity from near to far. When the accumulated value reaches this threshold, the current depth is recorded as the representative depth of that pixel.
| Item | Value |
|---|---|
| Range | 0.01 ~ 0.99 |
| Default | 0.5 |
Lowering it biases the depth toward the camera, raising it biases the depth away from the camera. This depth takes part in lighting, occlusion tests, and depth-dependent post-processing, so surface response in Lit mode and mutual occlusion with regular meshes change with it.
LCC2Component->AlphaThreshold = 0.5f;
A typical case for lowering it: the data contains thin structures with very low opacity, such as insect or bird wings, mesh netting, or leaf edges. The splats in these areas never reach the default accumulated opacity of 0.5, so no depth is written. If the scene also has a sky box, fog, or another non-black background, these areas get blended with the background color because they lack depth, showing up as faded structures and lost detail. Lowering the threshold lets such areas write depth earlier and restores the detail.
Lower it step by step and observe. Too low a value pulls the whole depth toward the camera and affects occlusion relationships and depth-dependent post-processing.
Note: this property lives in the Advanced collapsed area of the Details panel, and the default value suits most scenes.
Parameters Specific to the LCC Pipeline
Shadow Receiving
LCCComponent->bReceiveShadows = true;
Note: requires the 3DGS render mode. Enabling it has a significant performance impact.
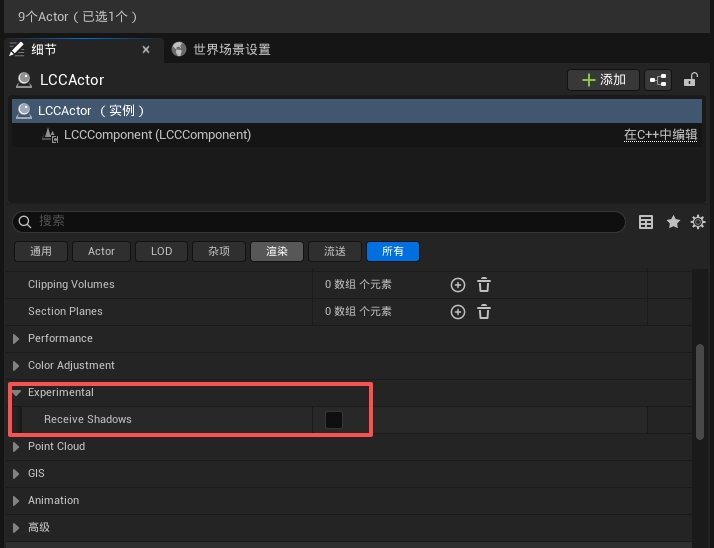
3DGS rendering with shadow receiving enabled
Seam Cutting
bEnableSeamCutting cuts the seams that chunked rendering produces at node boundaries. LCC data version 5.0 and above enables it automatically; enable it manually when visible seams appear in data from lower versions.
LCCComponent->bEnableSeamCutting = true;
Note: this property lives in the Advanced collapsed area of the Details panel.
Multi-Actor Translucency Sorting
The LCC pipeline outputs no depth, so several LCC Actors cannot get correct mutual occlusion through the depth test and can only approximate it through translucent draw order. bEnableMultipleLCCActorAutoSort (enabled by default) sets TranslucentSortPriority automatically by the distance from each Actor to the camera, so nearer Actors are drawn later, which gives a reasonable overlap result in most cases.
This sorting works at Actor granularity: each Actor takes part as a whole and is not subdivided down to splats. That brings inherent limitations:
- When the bounding boxes of two LCC Actors cross or interpenetrate in space, no single overall order can express the correct front-to-back relationship, and occlusion in the crossing area is wrong
- When a single Actor spans a large depth range internally, sorting by the distance to the Actor center may not match the actual front-to-back relationship
Switch to the LCC2 pipeline when several 3DGS datasets must occlude each other correctly. Disable this option when the overlap order must be specified manually, and set TranslucentSortPriority on each Actor instead.
The LCC2 pipeline does not offer this property: its data is merged into a single Buffer, sorted globally per splat, and outputs depth to take part in occlusion tests, so no intervention is needed.