
Render a 3DGS Scene on Windows
Render a 3DGS scene in Unreal Engine 5, starting from scratch.
Environment Setup
Step 1: Install Unreal Engine
- Download and install the Epic Games Launcher
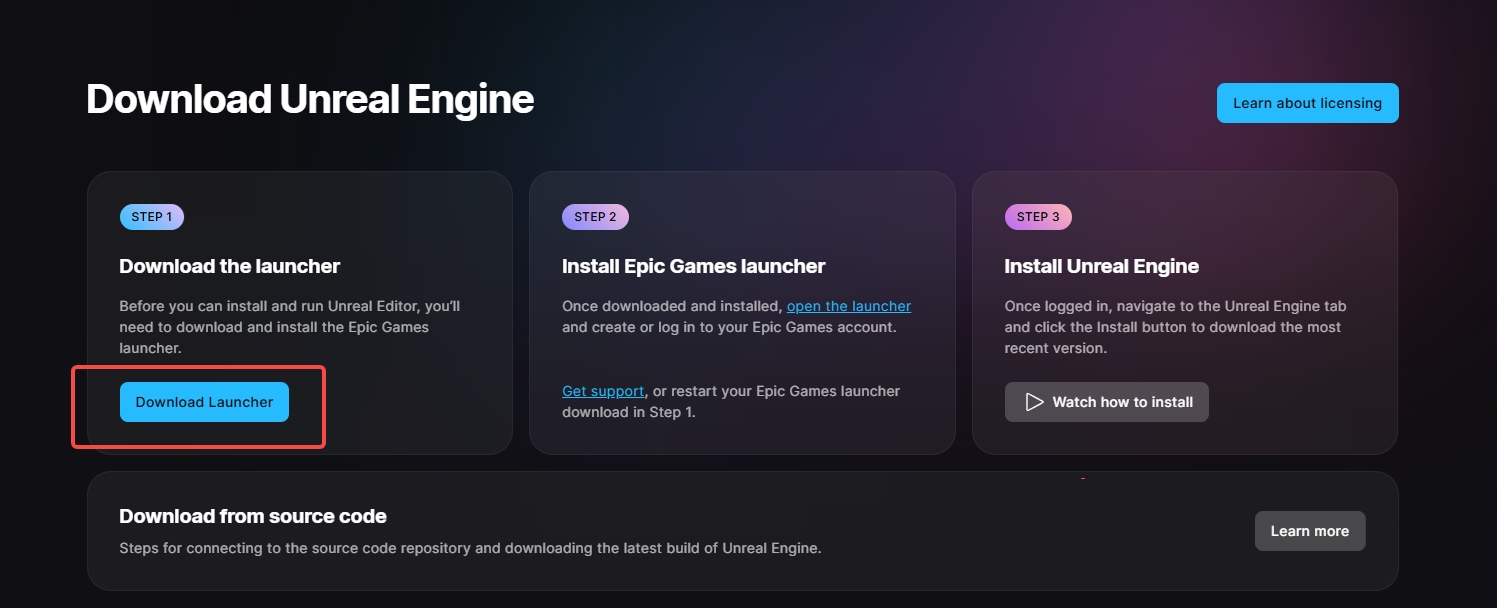
Download and install the Epic Games Launcher from the official site
- Start Epic Games, select Unreal Engine, and click Library
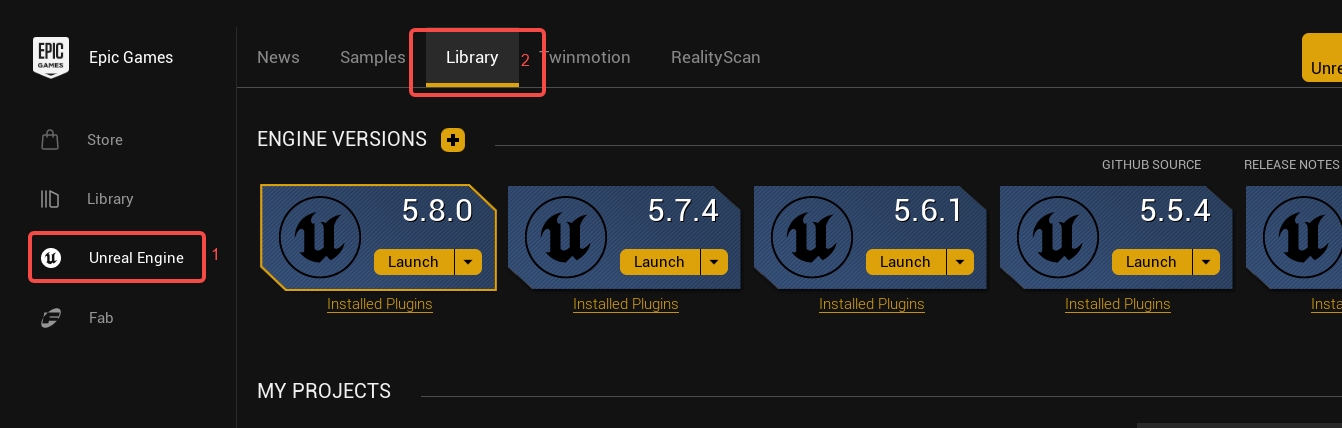
Open the Unreal Engine library in the Epic Games Launcher
- Click "+", select an engine version, and click Install to start the installation
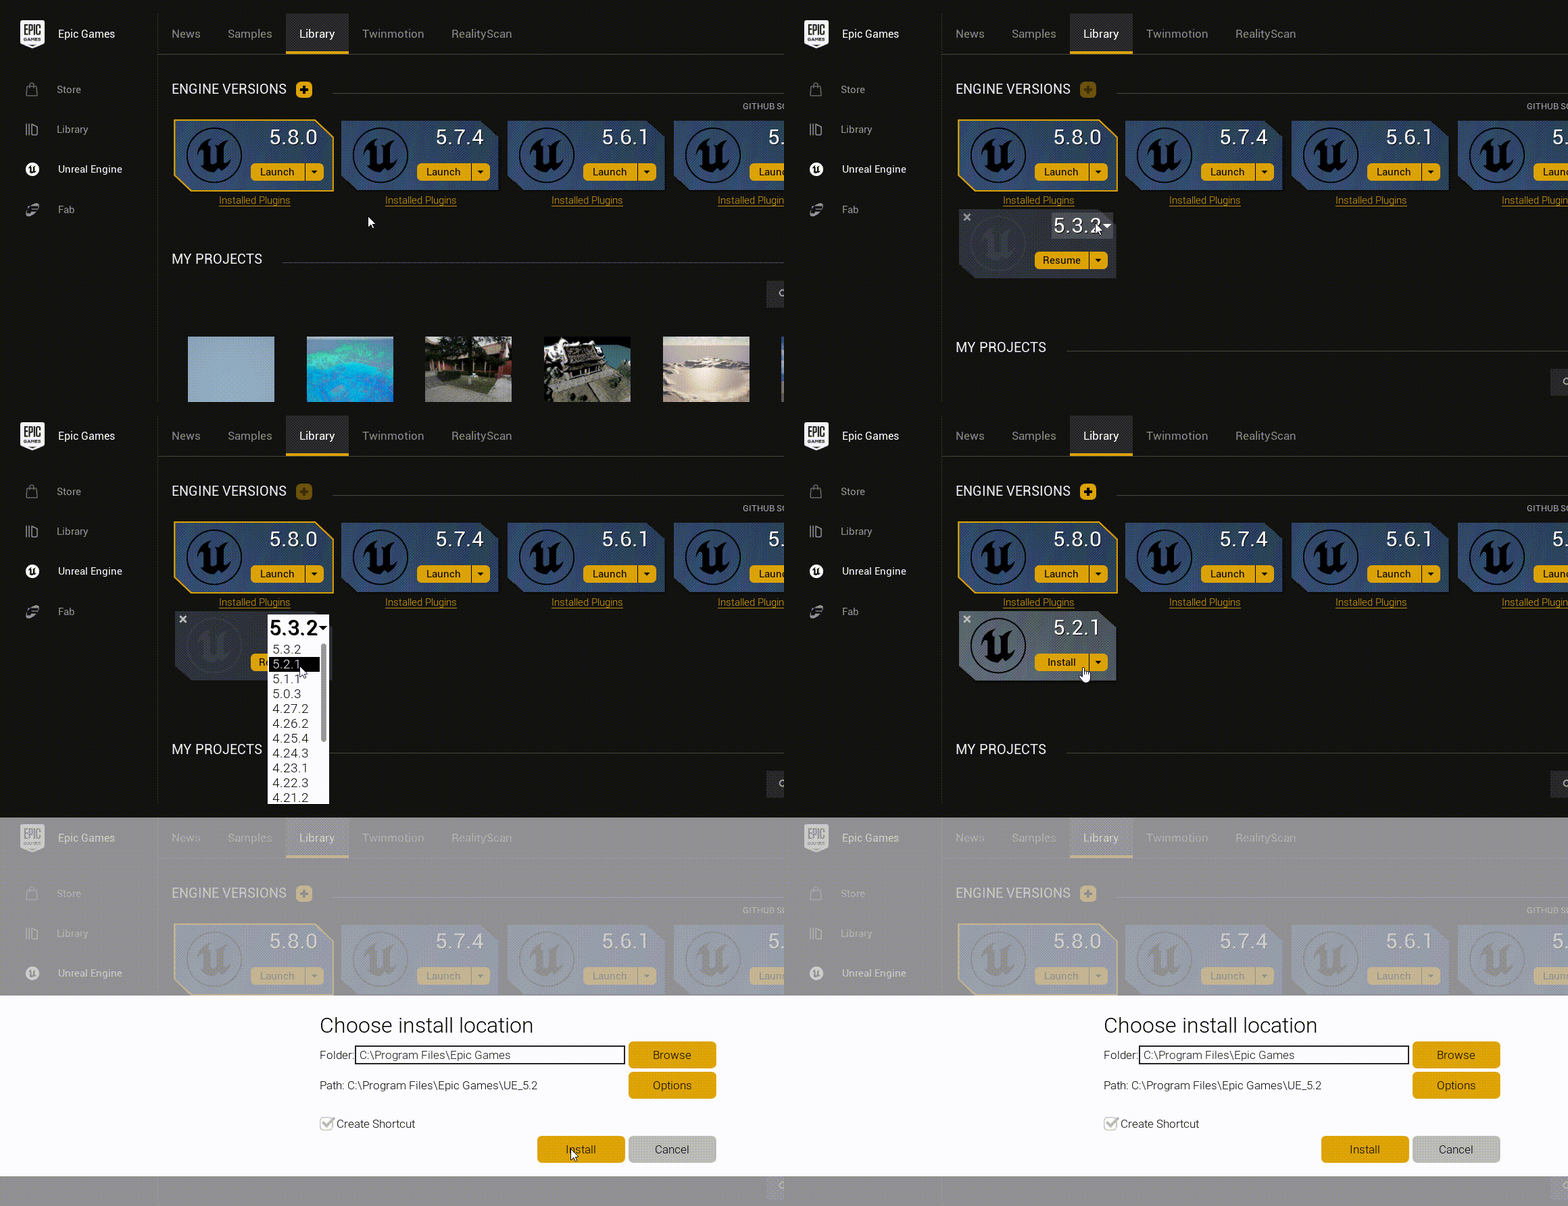
Select an engine version and install Unreal Engine
Step 2: Install Visual Studio (required for C++ projects)
Install Visual Studio when creating a C++ project or building a Shipping package:
Blueprint-only projects do not require Visual Studio, so this step can be skipped. Packaging still requires a C++ project.
Step 3: Create a Project
- Start Unreal Engine and click new project
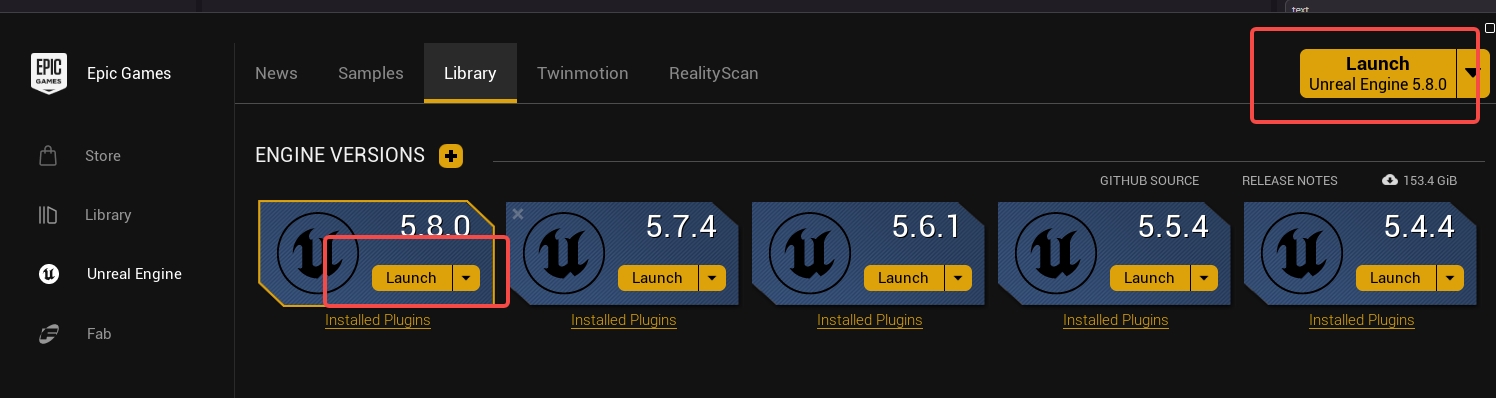
Start Unreal Engine and create a new project
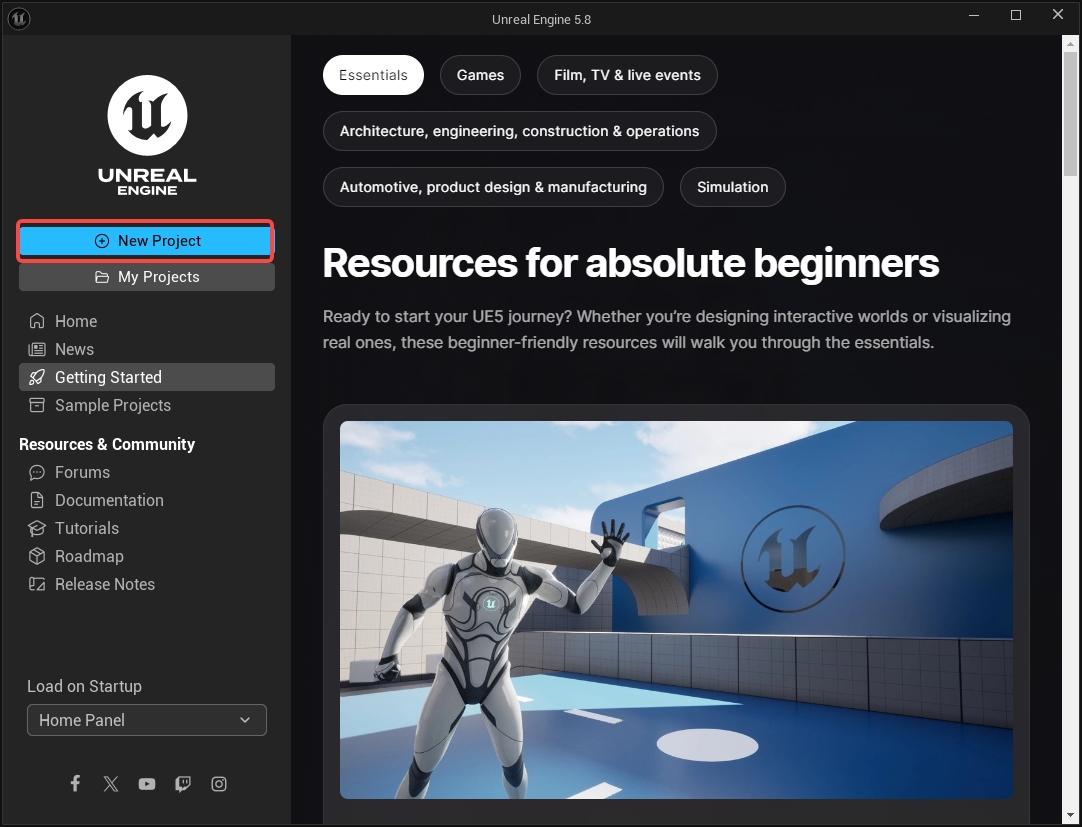
Create a new project in the Unreal Engine project browser
Select a template
Select the C++ or Blueprint project type
Select the project directory and click Create
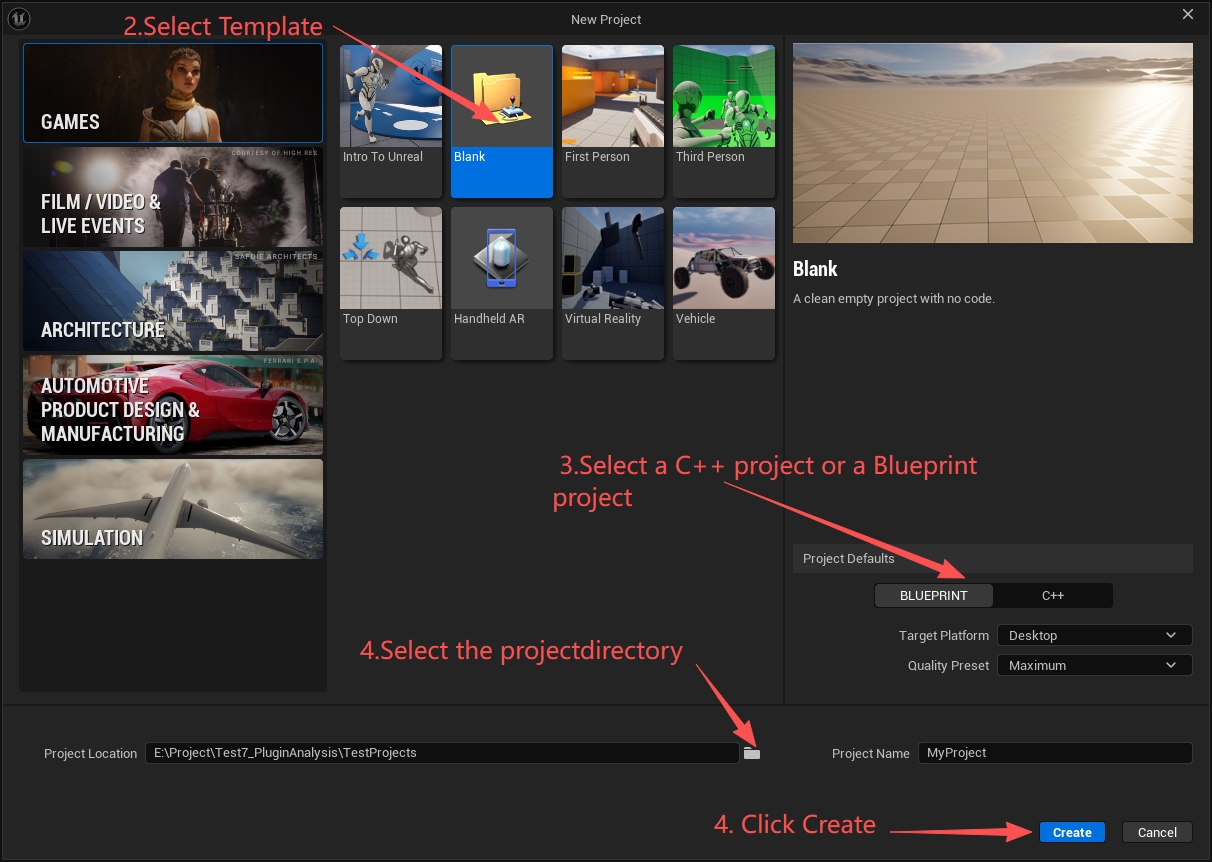
Configure project type, name, and save directory
- Some templates do not support C++ projects.
- With the LCC Unreal Plugin, Blueprint projects work in the editor only and cannot be packaged.
- Use English characters for the C++ project path and name.
- For a C++ project, wait until the Visual Studio project files are generated
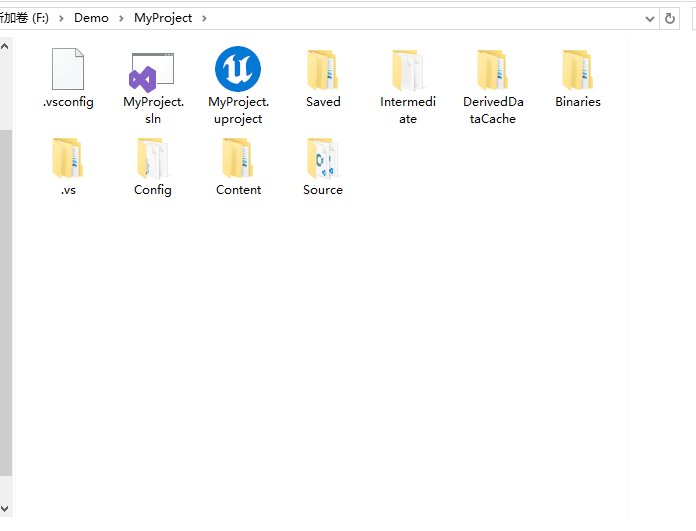
Project directory structure after C++ project generation
Step 4: Install the Plugin
- Close the editor
- Create a
Pluginsfolder in the project root (skip if it already exists) - Copy the entire downloaded LCC4Unreal plugin folder into
Plugins/
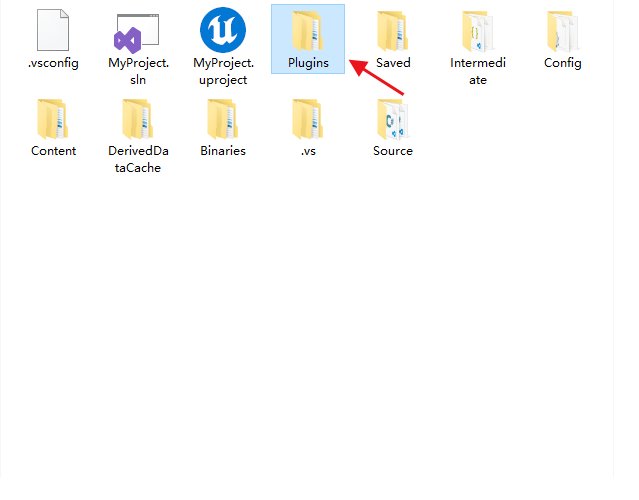
Copy the LCC4Unreal plugin into the project Plugins directory
- Restart the editor
- Confirm the plugin is enabled: Edit > Plugins > search for "LCC4Unreal"
- C++ project note: on the first startup after adding the plugin, the engine detects the new module and prompts for a rebuild. If startup fails, do the following:
- In Visual Studio, right-click the project → Generate Project Files → rebuild
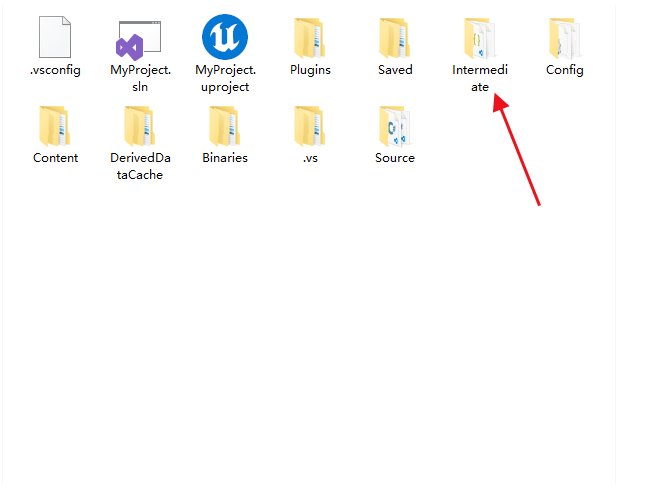
Regenerate project files after deleting the Intermediate directory
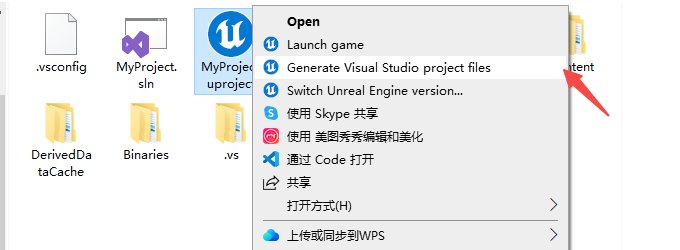
Regenerate the Visual Studio project files
Hardware Requirements
| Hardware | Recommended |
|---|---|
| CPU | Intel i7 6th generation or AMD Ryzen 5 1600 and above |
| GPU | NVIDIA GTX 2060 and above (DX11/SM5 support required) |
| Memory | 16GB DDR4 3200MHz and above |
| Video memory | 4GB and above (8GB+ recommended for large scenes) |
| Disk | SSD recommended |
Register an App Key
Register an App Key before using Pro edition features. Skip this step when using only free edition features. See Editions and Licensing.
Workflow
Step 1: Place the Actor
Quick Add panel:
- Click the LCC button on the toolbar to open the panel
- Select "LCC2Actor" in the Quick Add area
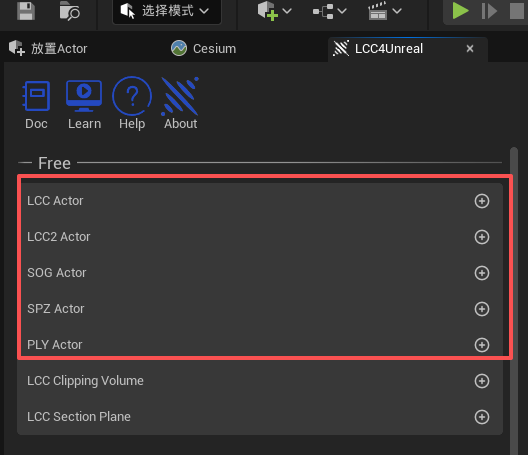
Add LCC2Actor through the Quick Add panel
Step 2: Load Data
- Select the Actor
- Click Load under the Actions category in the Details panel, then select the data file in the file dialog
DefaultLoadPathcan also be set directly:- Absolute path:
D:\data\scene\meta.lcc2 - Relative path (relative to the Content directory):
Scenes/Tower/meta.lcc2
- Absolute path:
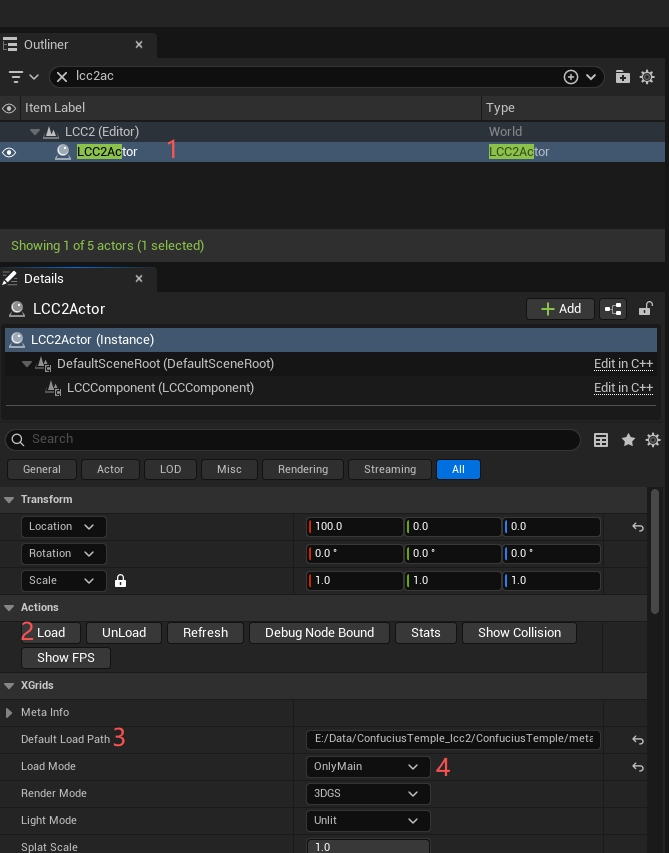
Set the LCC data load path in the Details panel
Load Through Blueprint
LCC2Actor->Load("D:/data/scene/meta.lcc2")
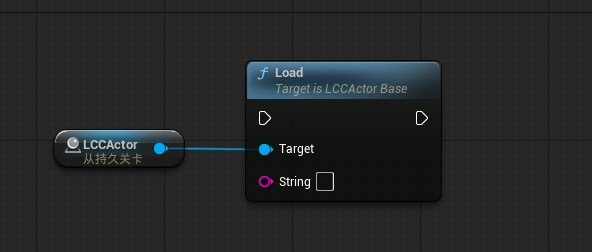
Load LCC data with the Blueprint Load node
Load in C++
Add the module dependency in build.cs:
PublicDependencyModuleNames.Add("LCC4UnrealRuntime");
#include "LCCActorBase.h"
#include "LCC2Component.h"

MyActor->Load(TEXT("D:/data/scene/meta.lcc2"));
Unload Data
MyActor->UnLoad();
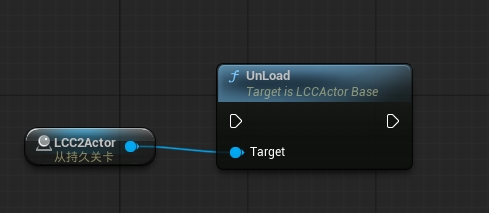
Unload LCC data through the Blueprint UnLoad node
Unloading releases all memory and video memory resources held by the Actor.
Step 3: Adjust Display
| Property | Default | Description |
|---|---|---|
| RenderMode | 3DGS | 3DGS (default) or Point Cloud |
| LightMode | Unlit | Unlit (default) or Lit |
| SplatScale | 1.0 | Splat size, 0.001~1.0 |
| GlobalAlpha | 1.0 | 3DGS opacity, 0.0~1.0 |
Step 4: Run
Press Play (Alt+P) to render in real time.
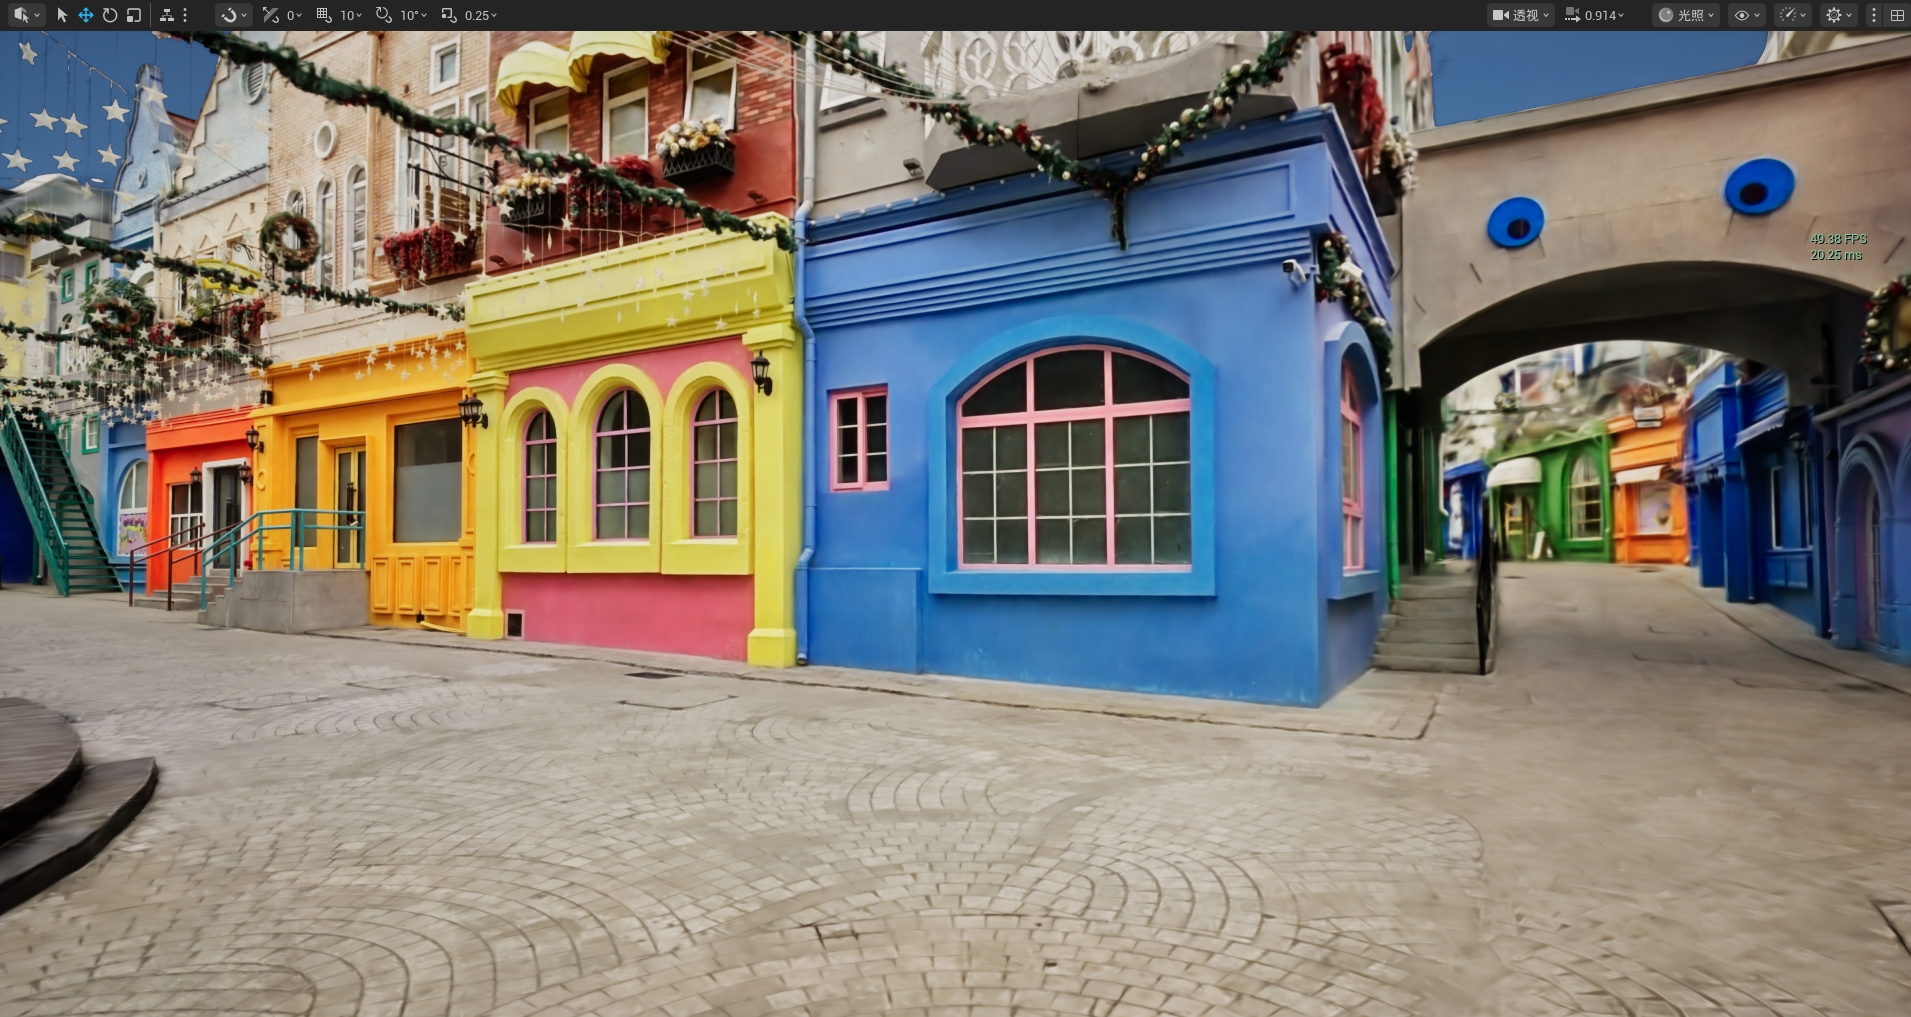
Real-time 3DGS scene rendering after running the project
Release Packaging
Configure Packaging
- Set the startup level
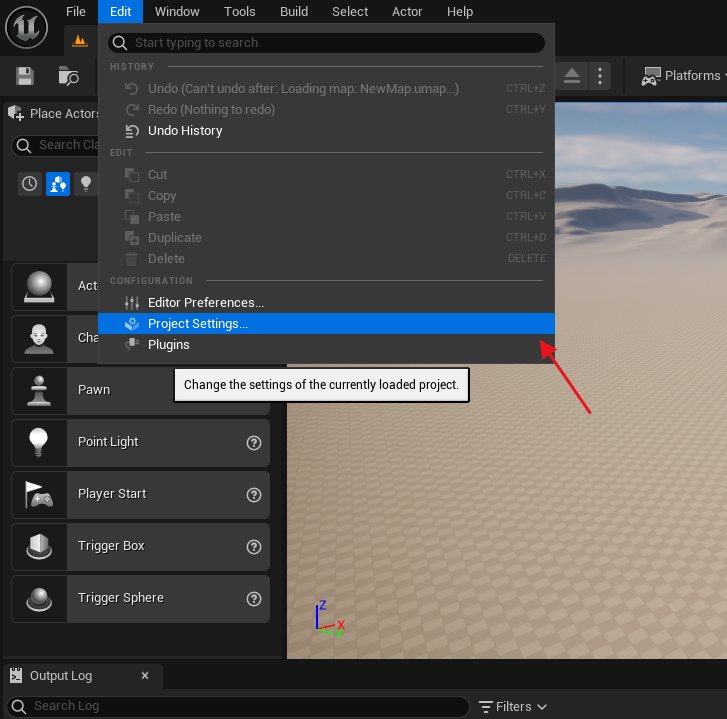
Open the default map settings in the project settings
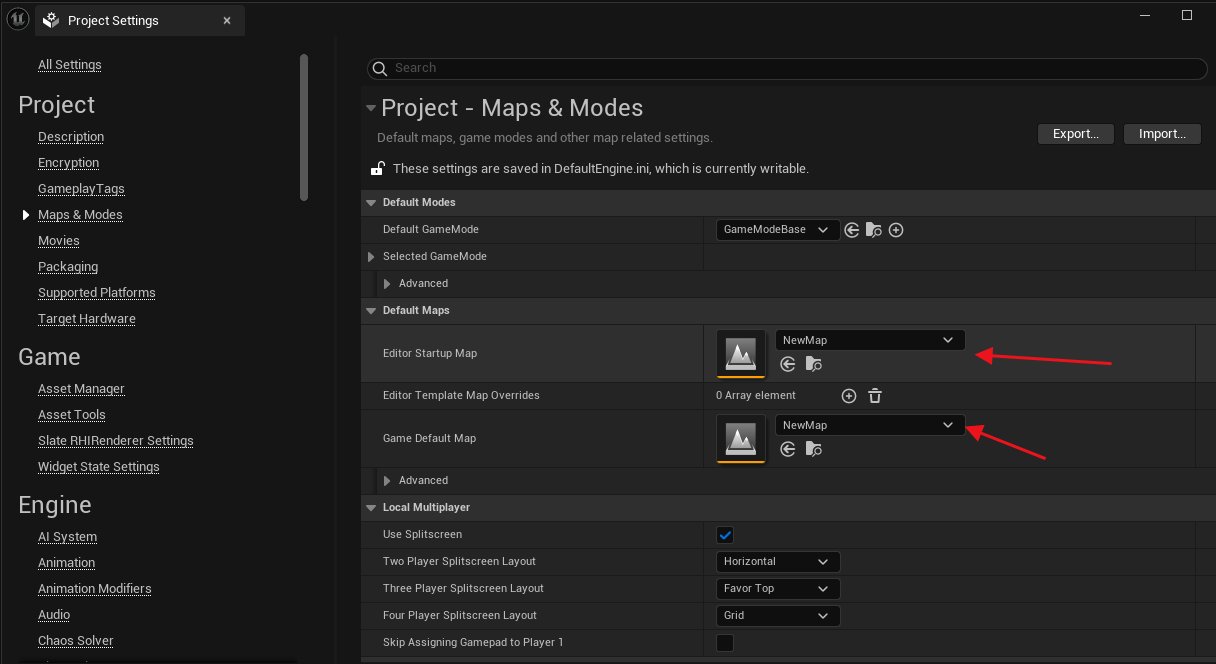
Select the startup levels used by the editor and the game
- Select a build configuration
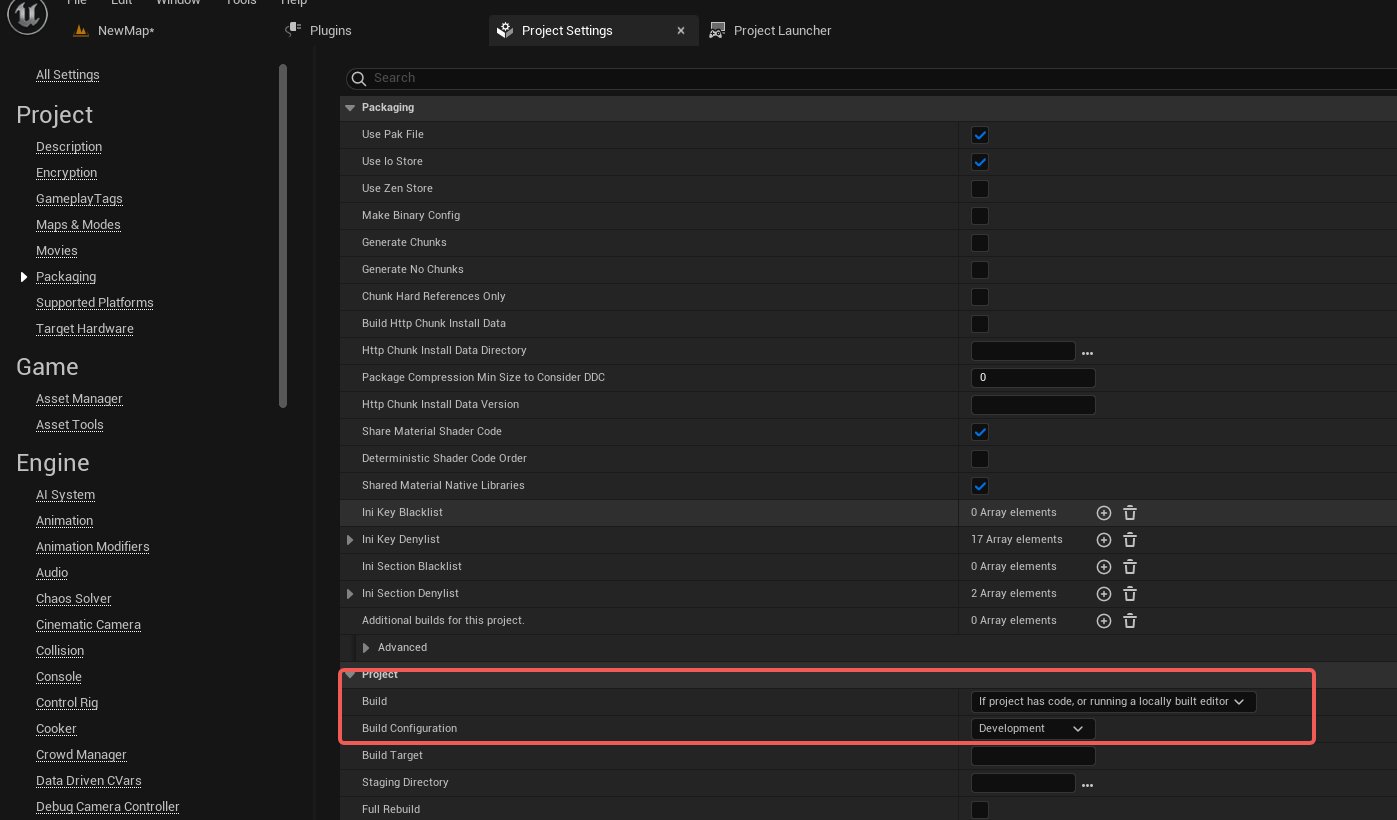
Select the Development or Shipping build configuration
| Configuration | Use case |
|---|---|
| Development | Development and debugging, keeps logs and statistics |
| Shipping | Final delivery, best size and performance |
- Configure the data directory (when using relative paths)
Add the LCC data directory under ProjectSettings > Packaging. Two settings are available, chosen by distribution method:
| Setting | Data form | Use case |
|---|---|---|
Additional Non-Asset Directories To Copy | Copied into the packaged output as plain files | Data stays visible and replaceable in the output directory |
Additional Non-Asset Directories To Package | Packed into the pak file | Data ships inside the pak instead of being exposed as separate files |
Note: when using
Additional Non-Asset Directories To Packageto pack data into the pak file, collision data cannot be loaded correctly. This is a known issue in the current version and will be fixed in the next release. UseAdditional Non-Asset Directories To Copywhen collision is needed.The value to enter is a top-level directory name under Content (e.g.
LCCData), not a file path. Do not includeContent/prefix or specific file names.
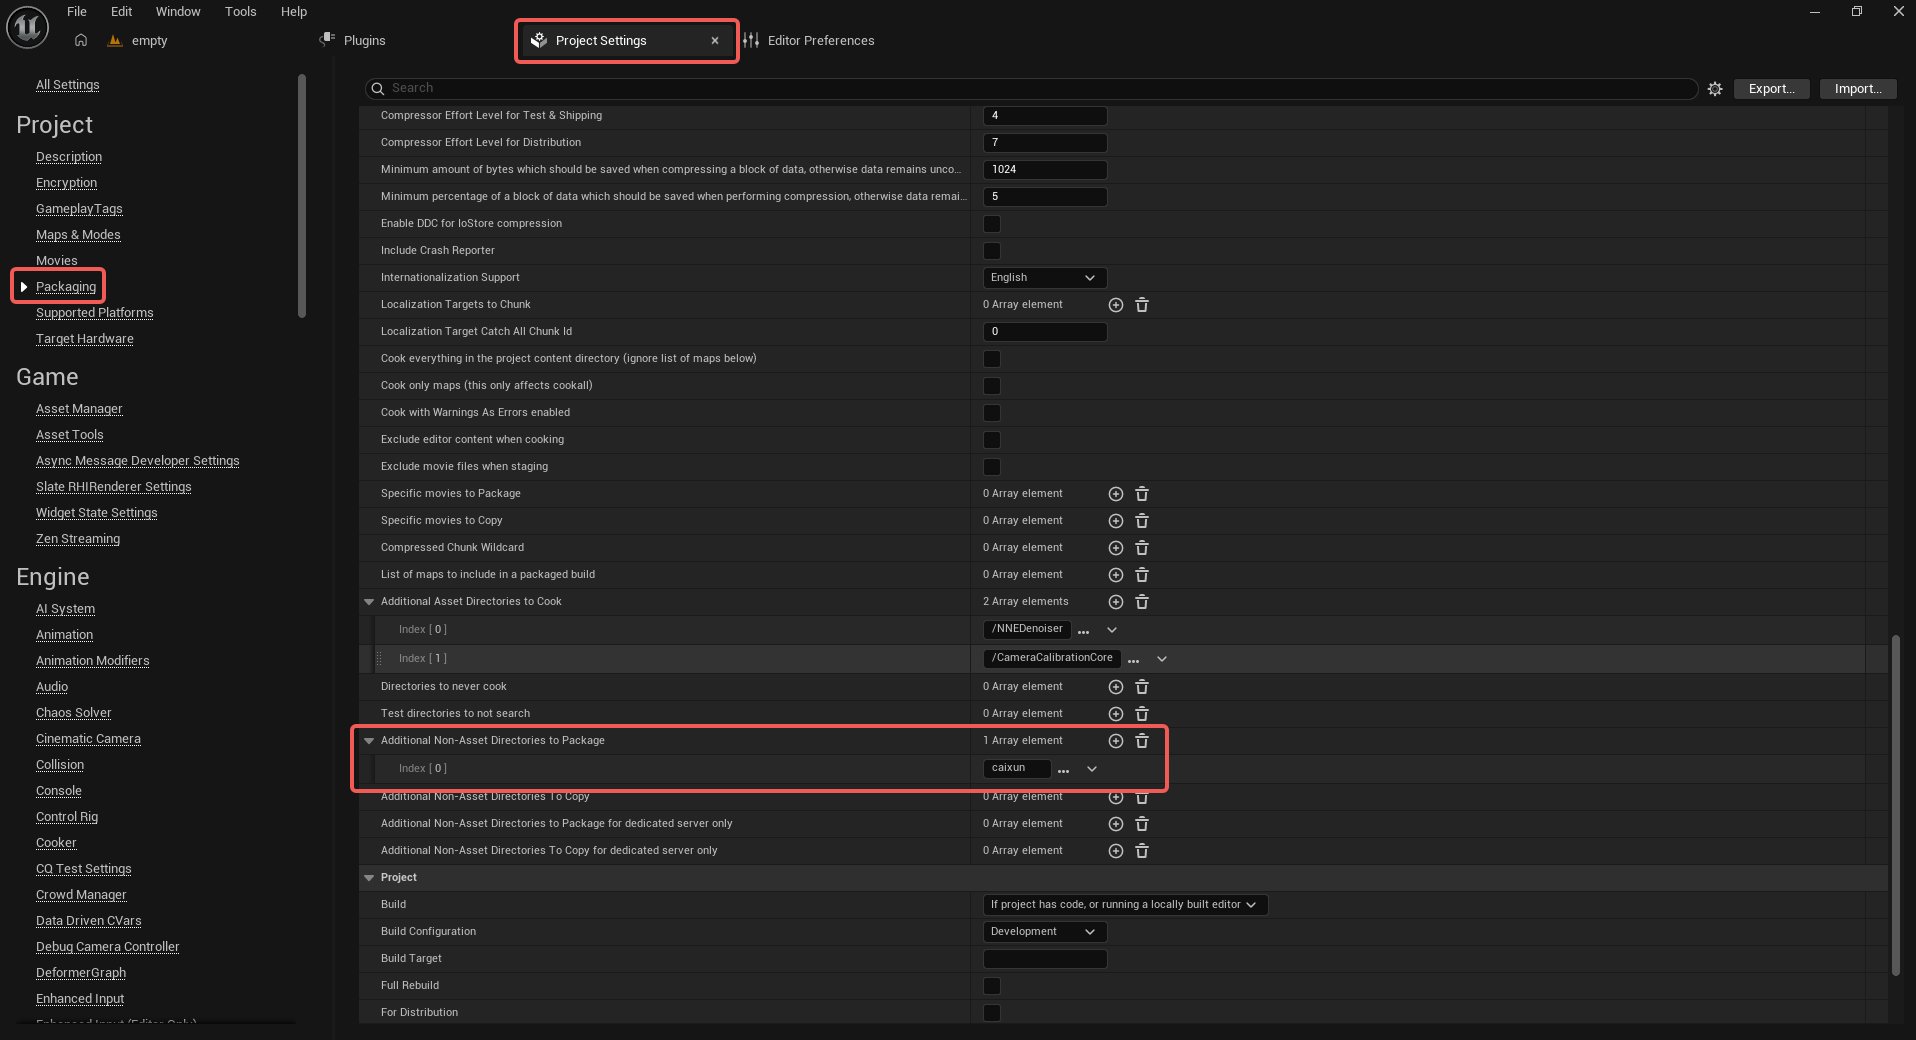
Add the LCC data directory to the non-asset copy list
When neither is configured, the packaged output contains no LCC data and runtime loading fails.
- Run packaging
Platforms > Windows > Package Project
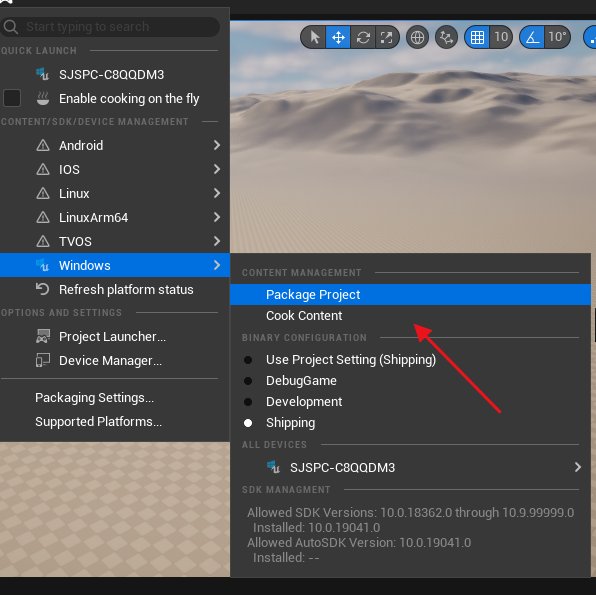
Run Windows project packaging from the Platforms menu
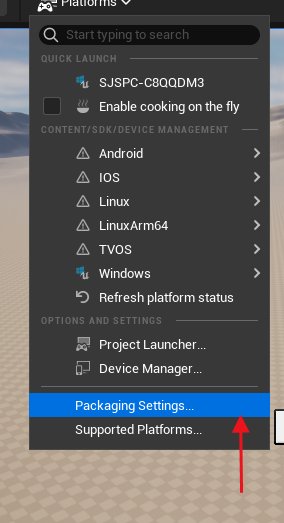
Select the packaging output directory for the Windows project
Notes
Full Rebuild in the project settings and Rebuild in Visual Studio are not supported for packaging.
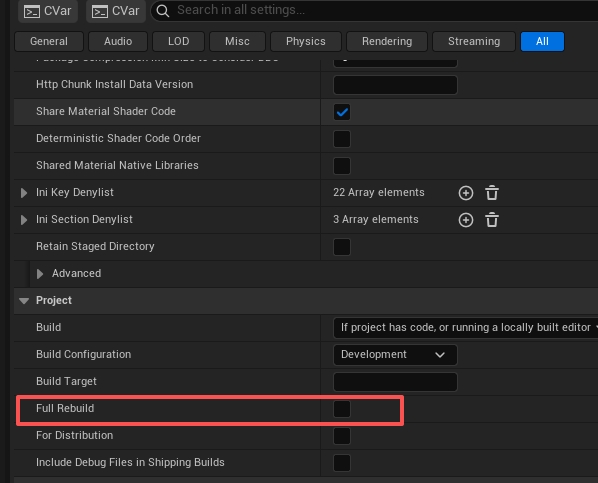
Do not enable Full Rebuild or run Rebuild when packaging
Linux Platform
See Quick Start - Linux.
VR (Quest3 Streaming)
See Quick Start - Quest3.