
Global Toolbar
The Global Toolbar is located at the top-right of the 3D viewport, providing quick access to scene display and commonly used features.
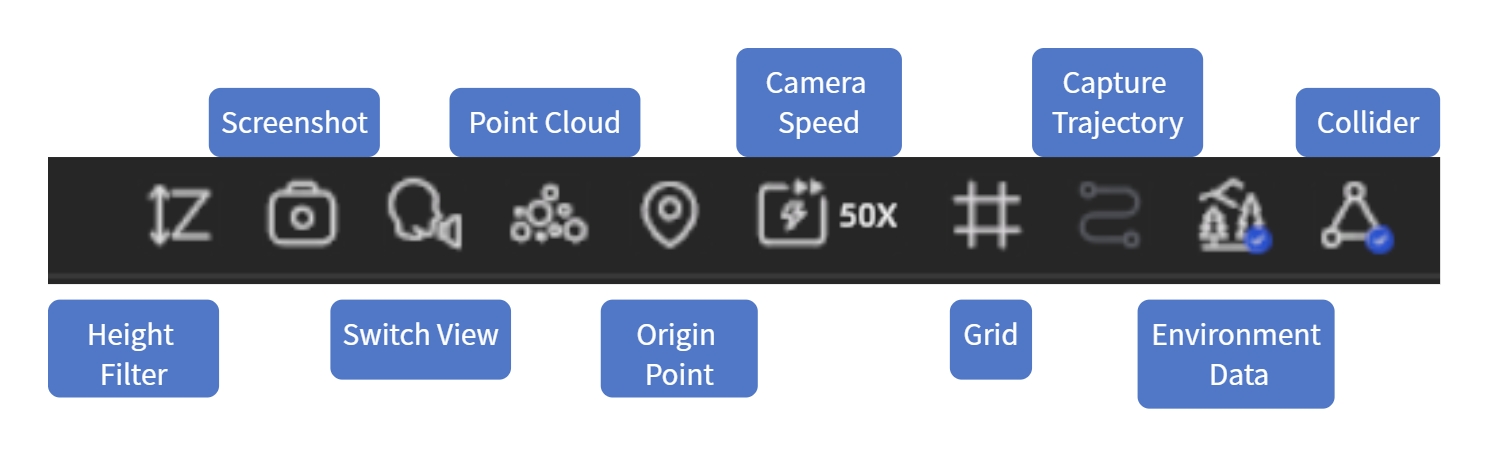
Global Toolbar
Undo / Redo (New in V2.1)
The toolbar now includes Undo and Redo buttons with intuitive operation state feedback:
- Active state: Buttons display normally; click to perform undo/redo
- Greyed out state: No operations available to undo/redo, or currently in a mode that does not support undo (Preview Mode/video rendering, etc.)
Shortcuts: Ctrl+Z (Undo), Ctrl+Y / Ctrl+Shift+Z (Redo)
Collision
When enabled, roaming in the scene simulates a real walking experience — you are blocked by walls, floors, and other objects and cannot pass through them. When disabled, you can freely move through all objects.
Environment Data
Show or hide the environmental lighting information included with the model. When enabled, the scene displays more realistic lighting effects.
Note: Only one model's environment data can be active in a scene at a time. When Skybox is enabled, environment data is automatically disabled.
Scanning Path
Show or hide the scanning device's capture route, making it easy to see which areas have been scanned.
Grid
Display a reference grid at the bottom of the model to help judge model position and scale.
Camera Speed
Adjust the speed of movement in the scene. Increase speed for large scenes; decrease for detailed inspection.
Adjustment methods:
- Drag the speed slider on the toolbar (1–100)
- Shortcut:
Ctrl+ mouse scroll wheel
Note: Speed settings are saved automatically and persist across all projects.
Origin Point
The Origin Point is the starting position each time you enter the scene. Click to quickly return to the origin point location.
You can reset the Origin Point at any time by right-clicking in the Assets panel:
Steps:
- In Edit mode, navigate to the desired position and orientation
- Select Origin Point in the Assets panel
- Right-click → "Set Origin Point"
- The system sets the current camera position and orientation as the new origin point
- An origin point marker appears in the 3D viewport
- Takes effect after saving the project; reopening will start from the new origin point
- After publishing, visitors will also enter the scene from the new origin point
Notes:
- If you close without saving, origin point changes will be lost
- If the origin point is set outside the model, the system prompts "Origin point may not be inside the model"
Point Cloud
Switch the scene from normal rendering to Point Cloud display mode, making it easy to inspect data distribution and scan density. Click again to switch back to normal display.
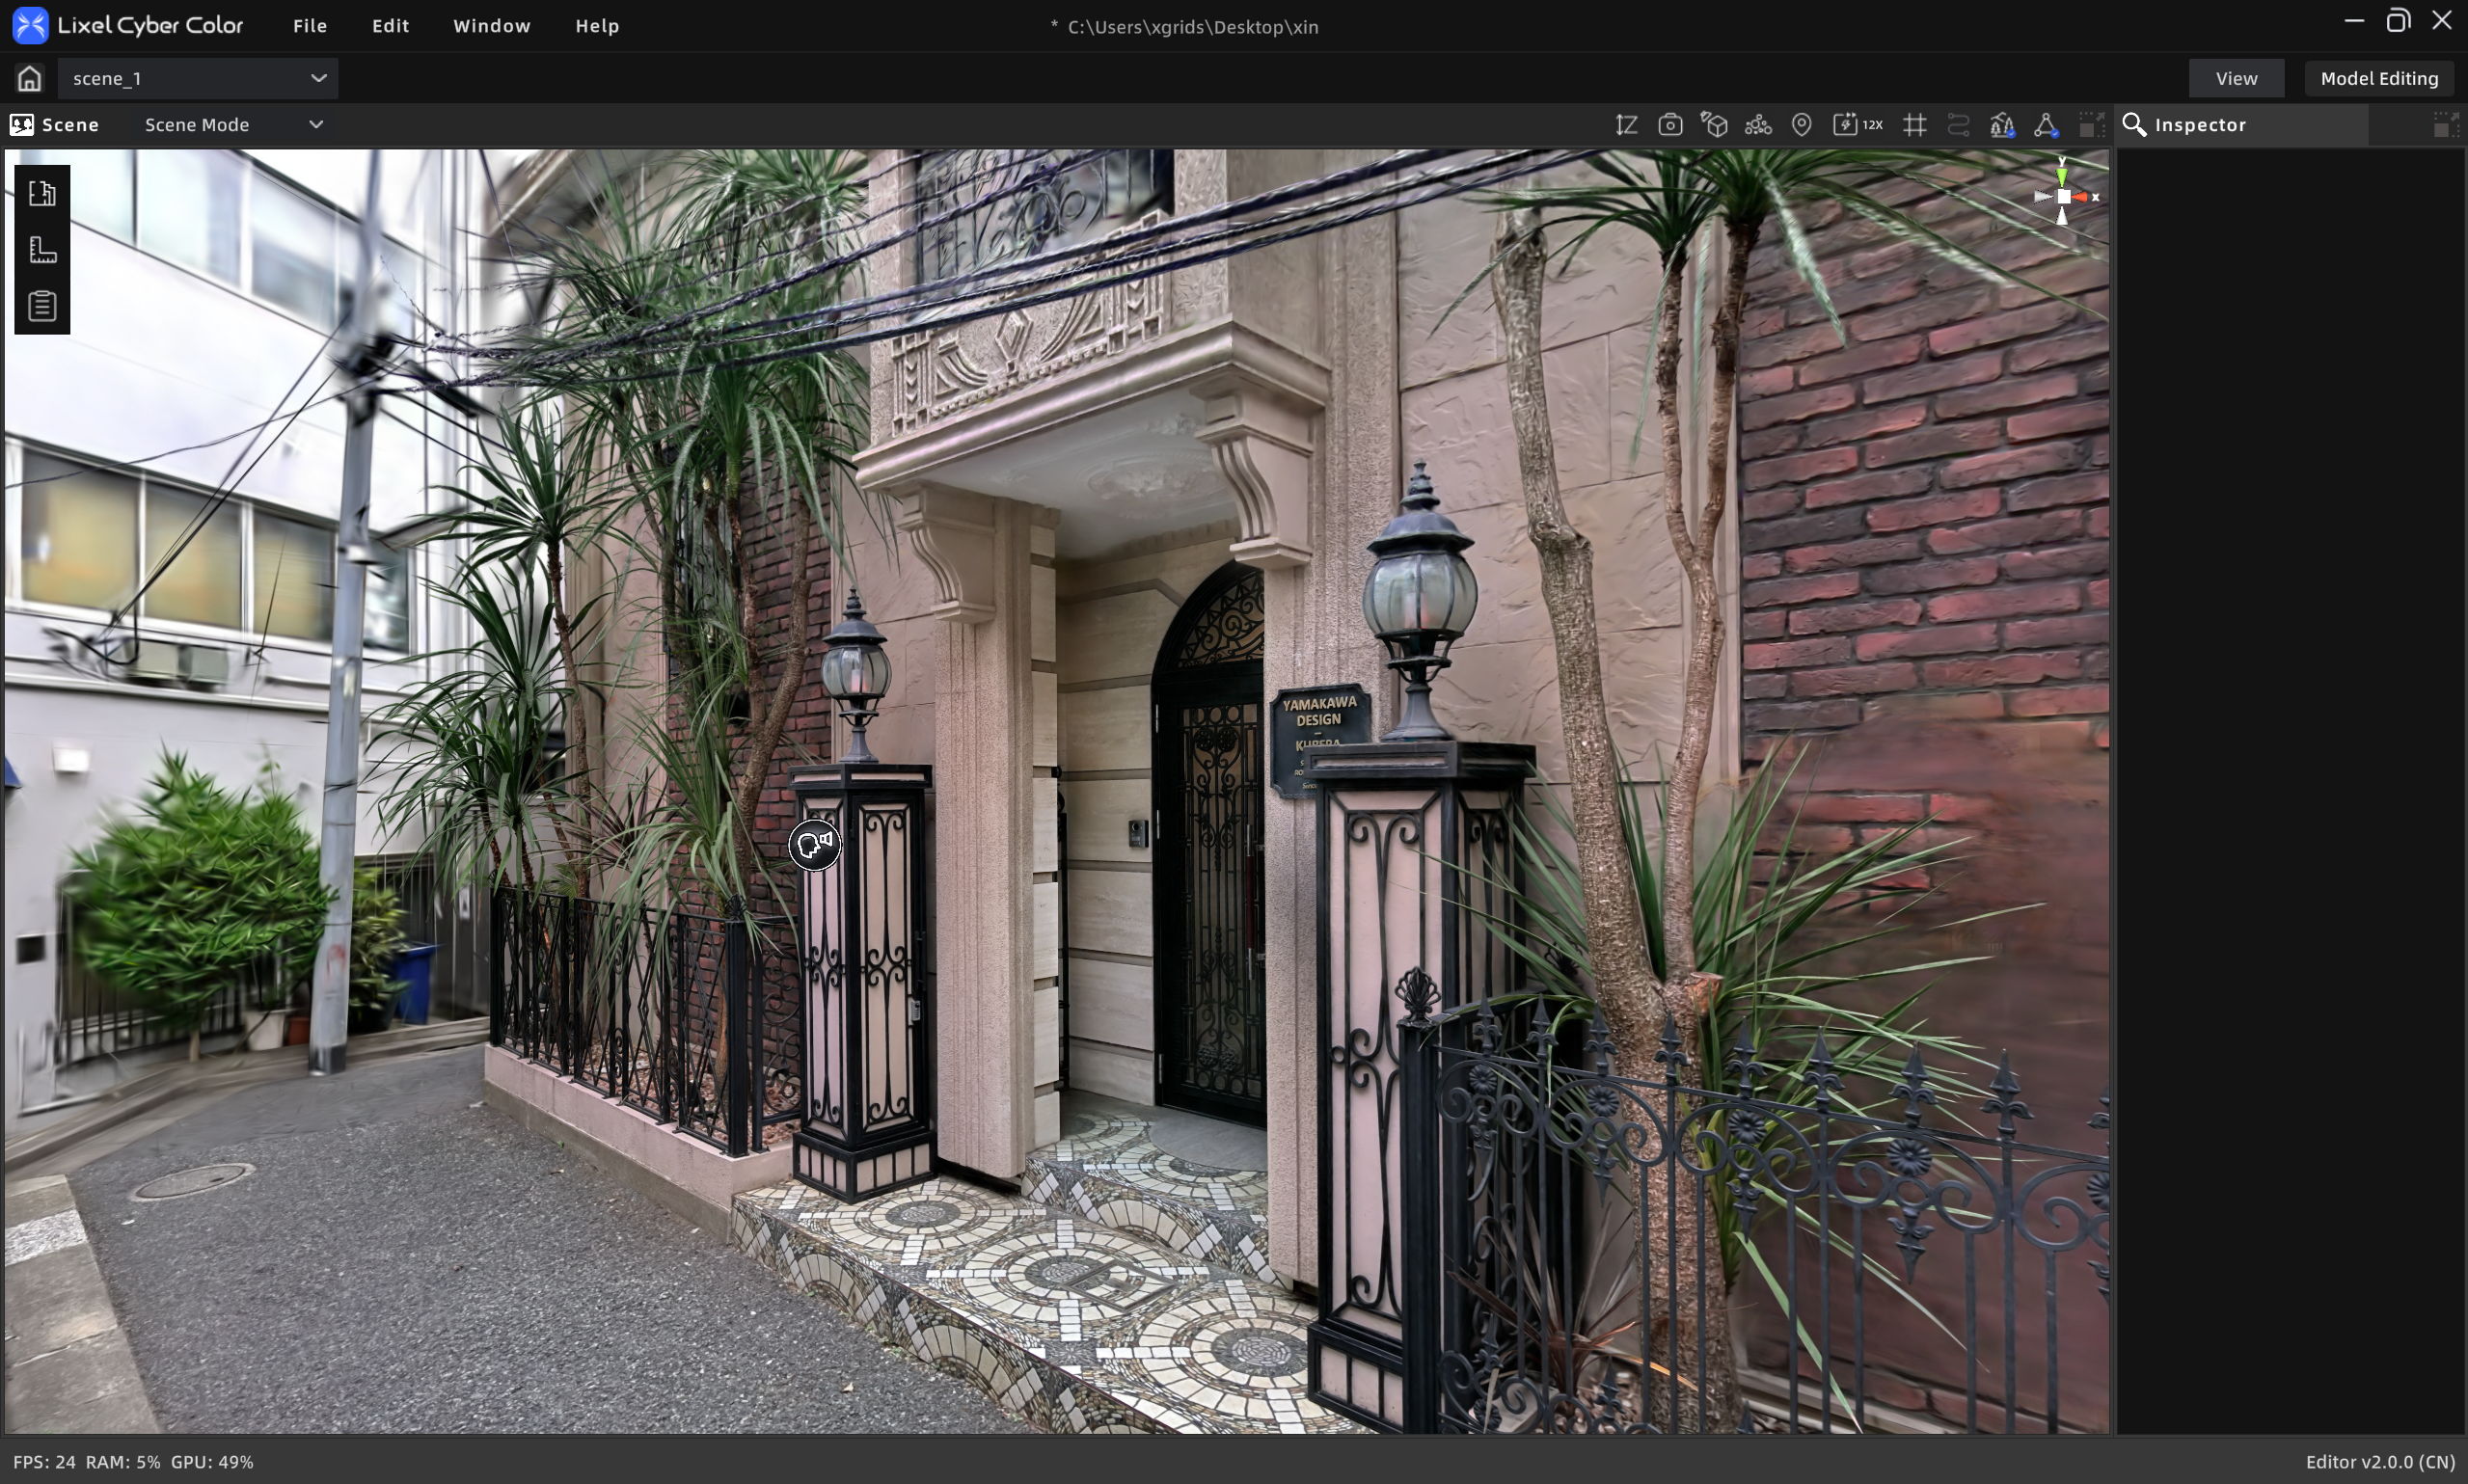
Normal display
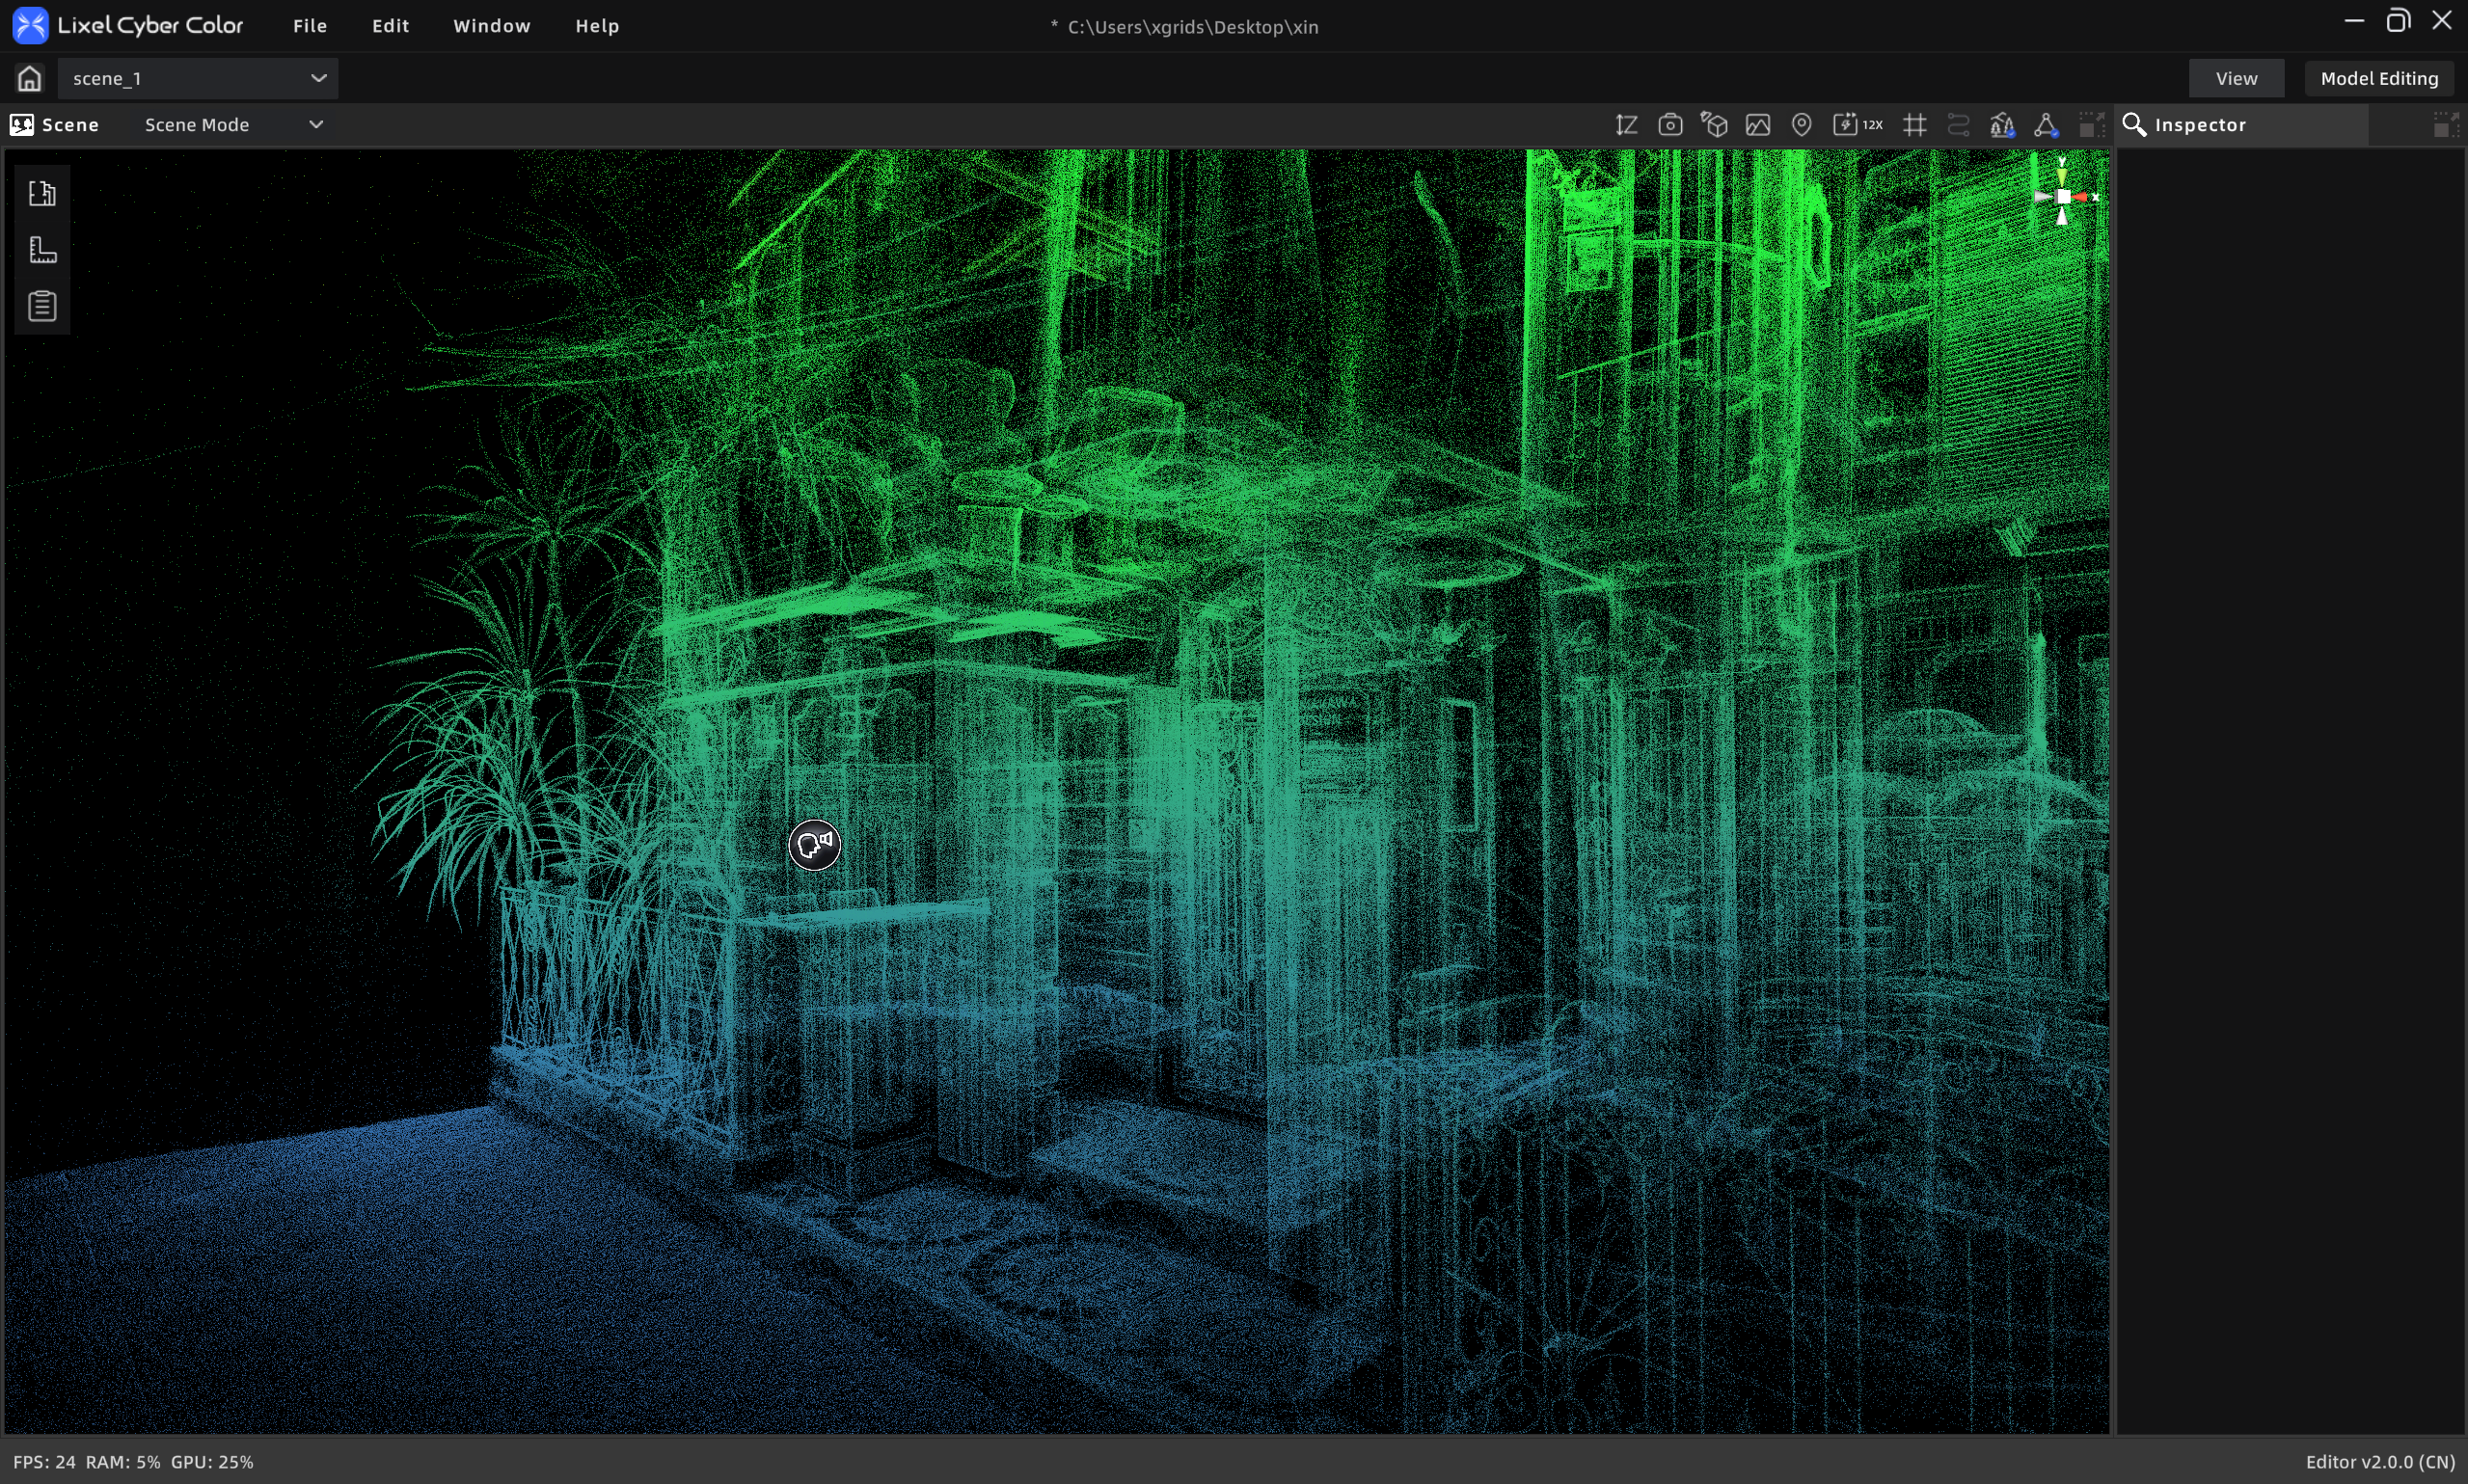
Point Cloud display
View Switch
Switch between different scene browsing modes:
| Mode | Suitable For | Controls |
|---|---|---|
| First-person mode | Immersive browsing, simulating walking | W A S D to move, mouse to control direction |
| Pivot Mode | Observing details by orbiting a point | Left-click to rotate, right-click to pan, scroll to zoom |
| Digital human mode | Walking around as a virtual character | Click the ground to move, auto-navigate |
Photo
Save the current view as an image for reports or sharing.
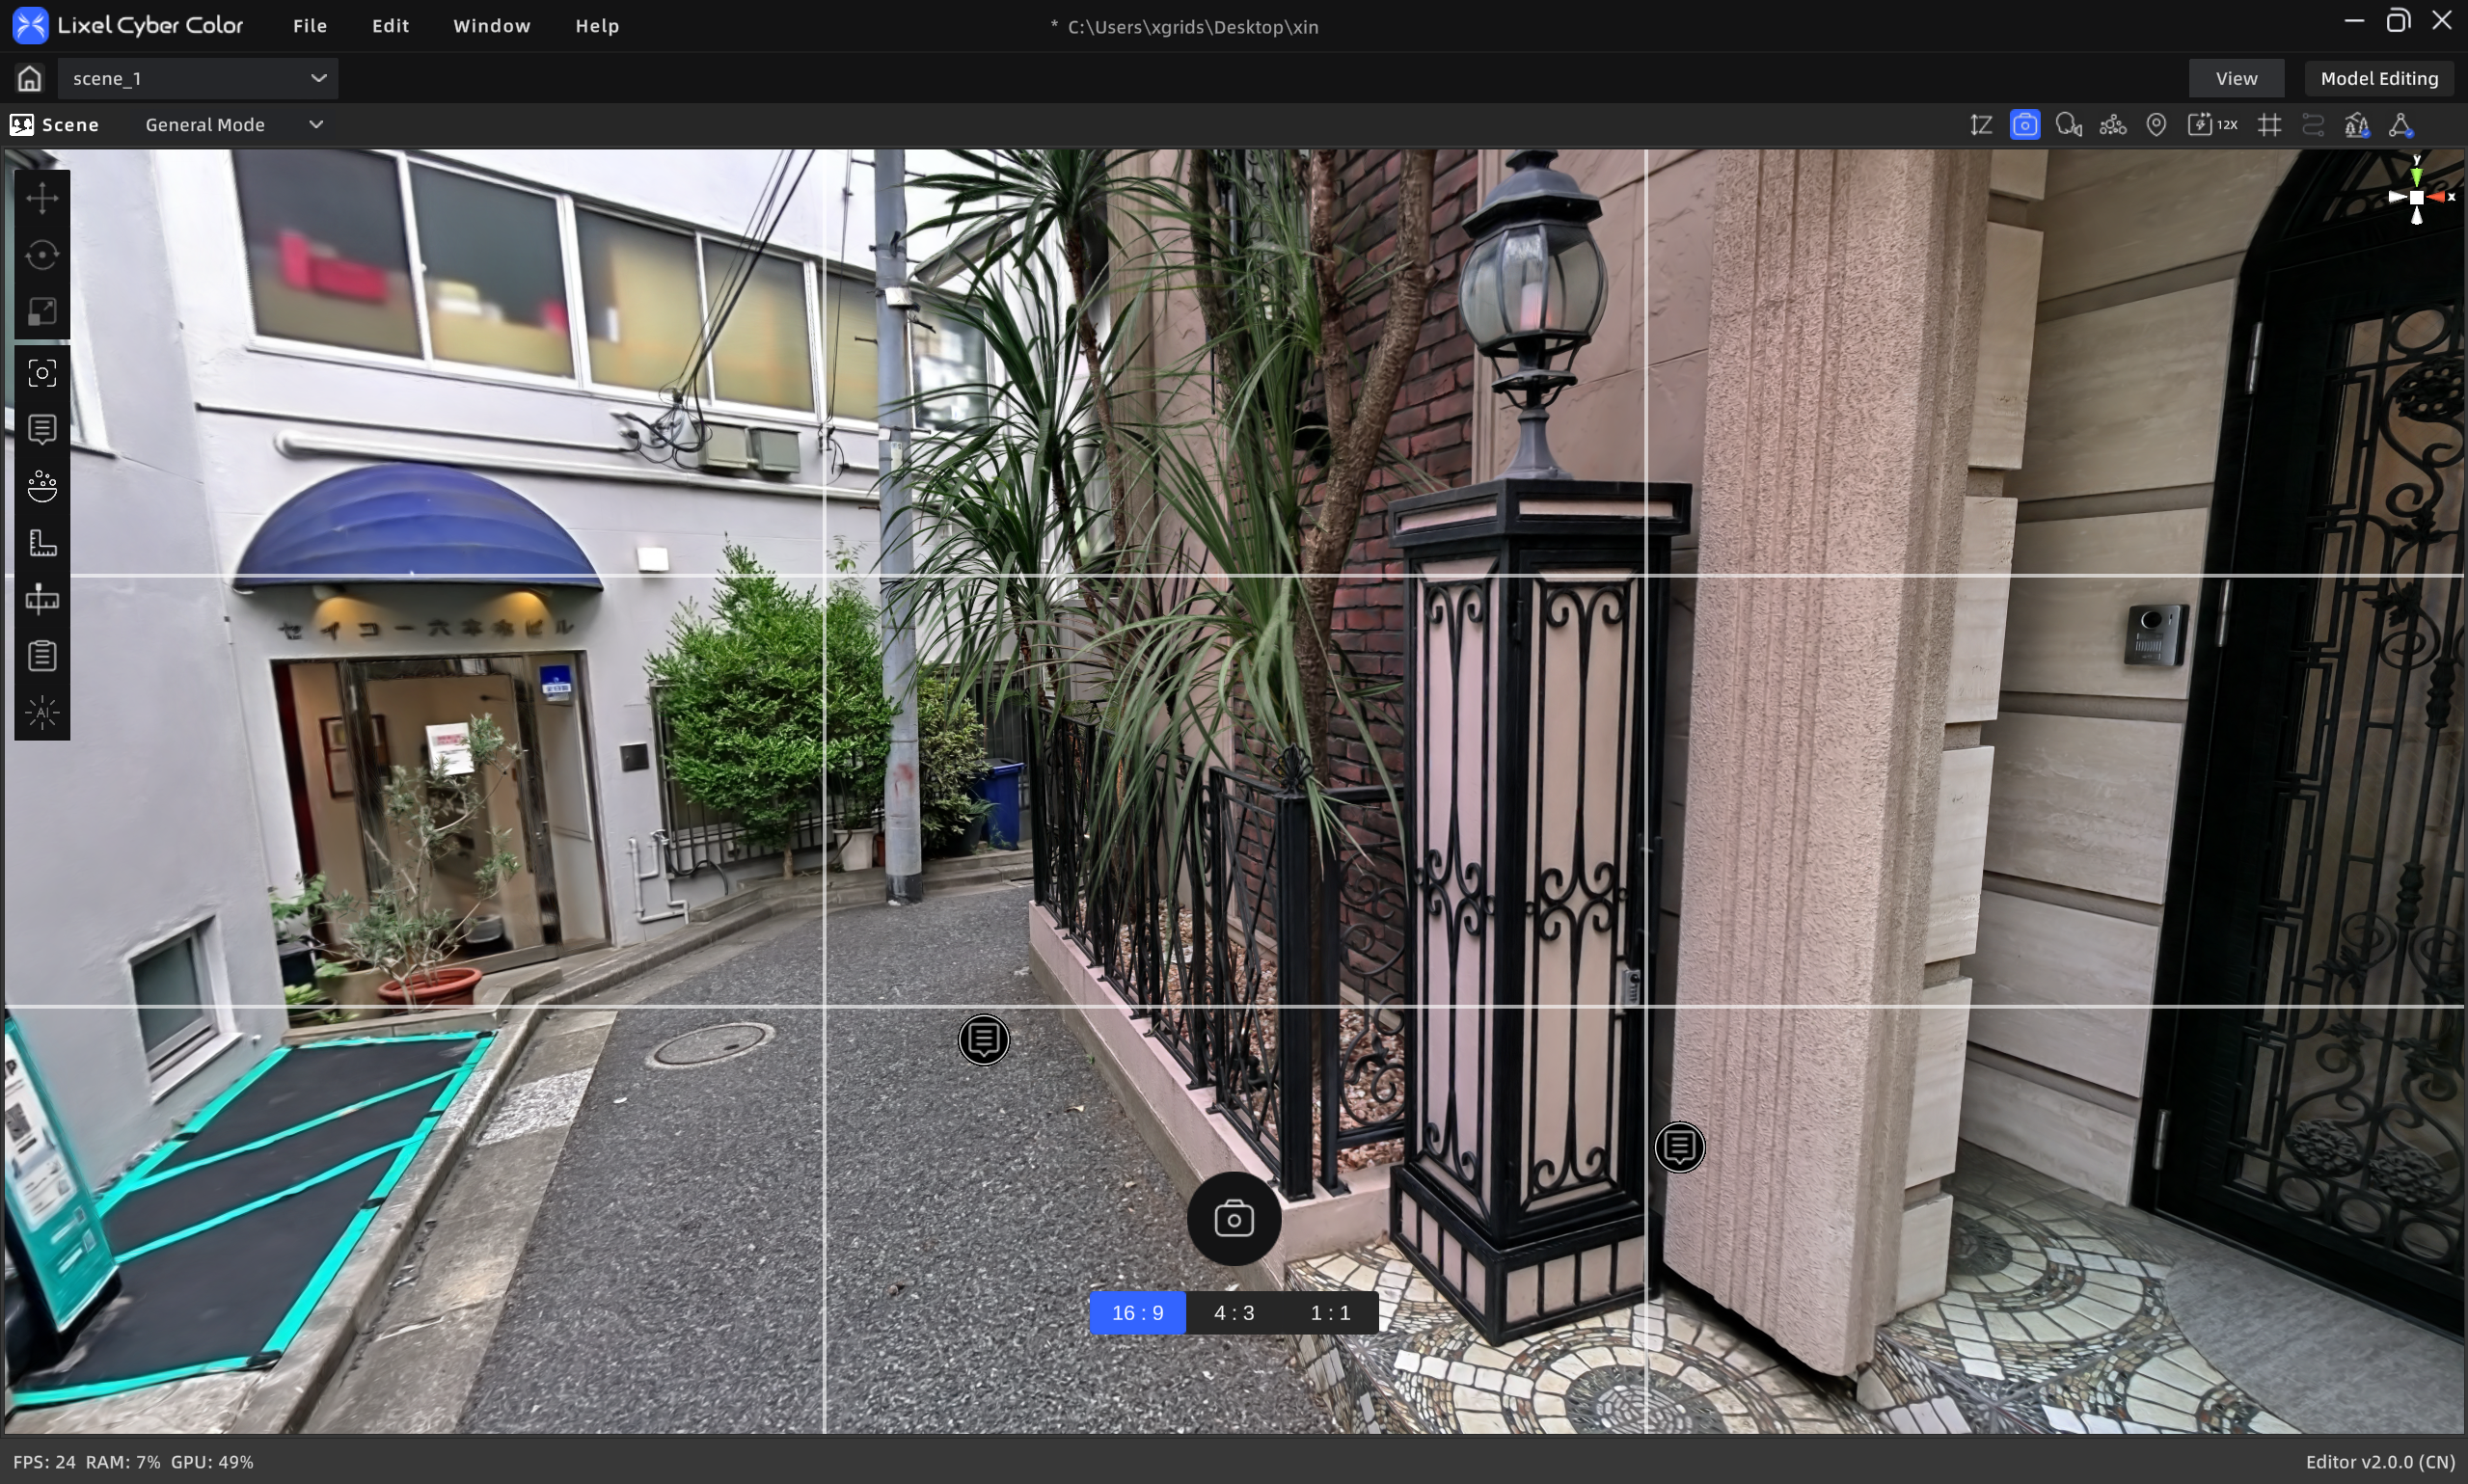
Photo tool
Steps:
- Click the Photo button
- Select the aspect ratio
- Adjust your view, then click capture
- Photos are automatically saved to the media folder in the Assets list; right-click to export
Height Filter
Hide content at specific heights in the scene by adjusting the height range, making it easy to view individual floors or areas.
Steps:
- Click the Height Filter button
- Drag the top/bottom sliders to adjust the visible height range
- Click the button again to exit
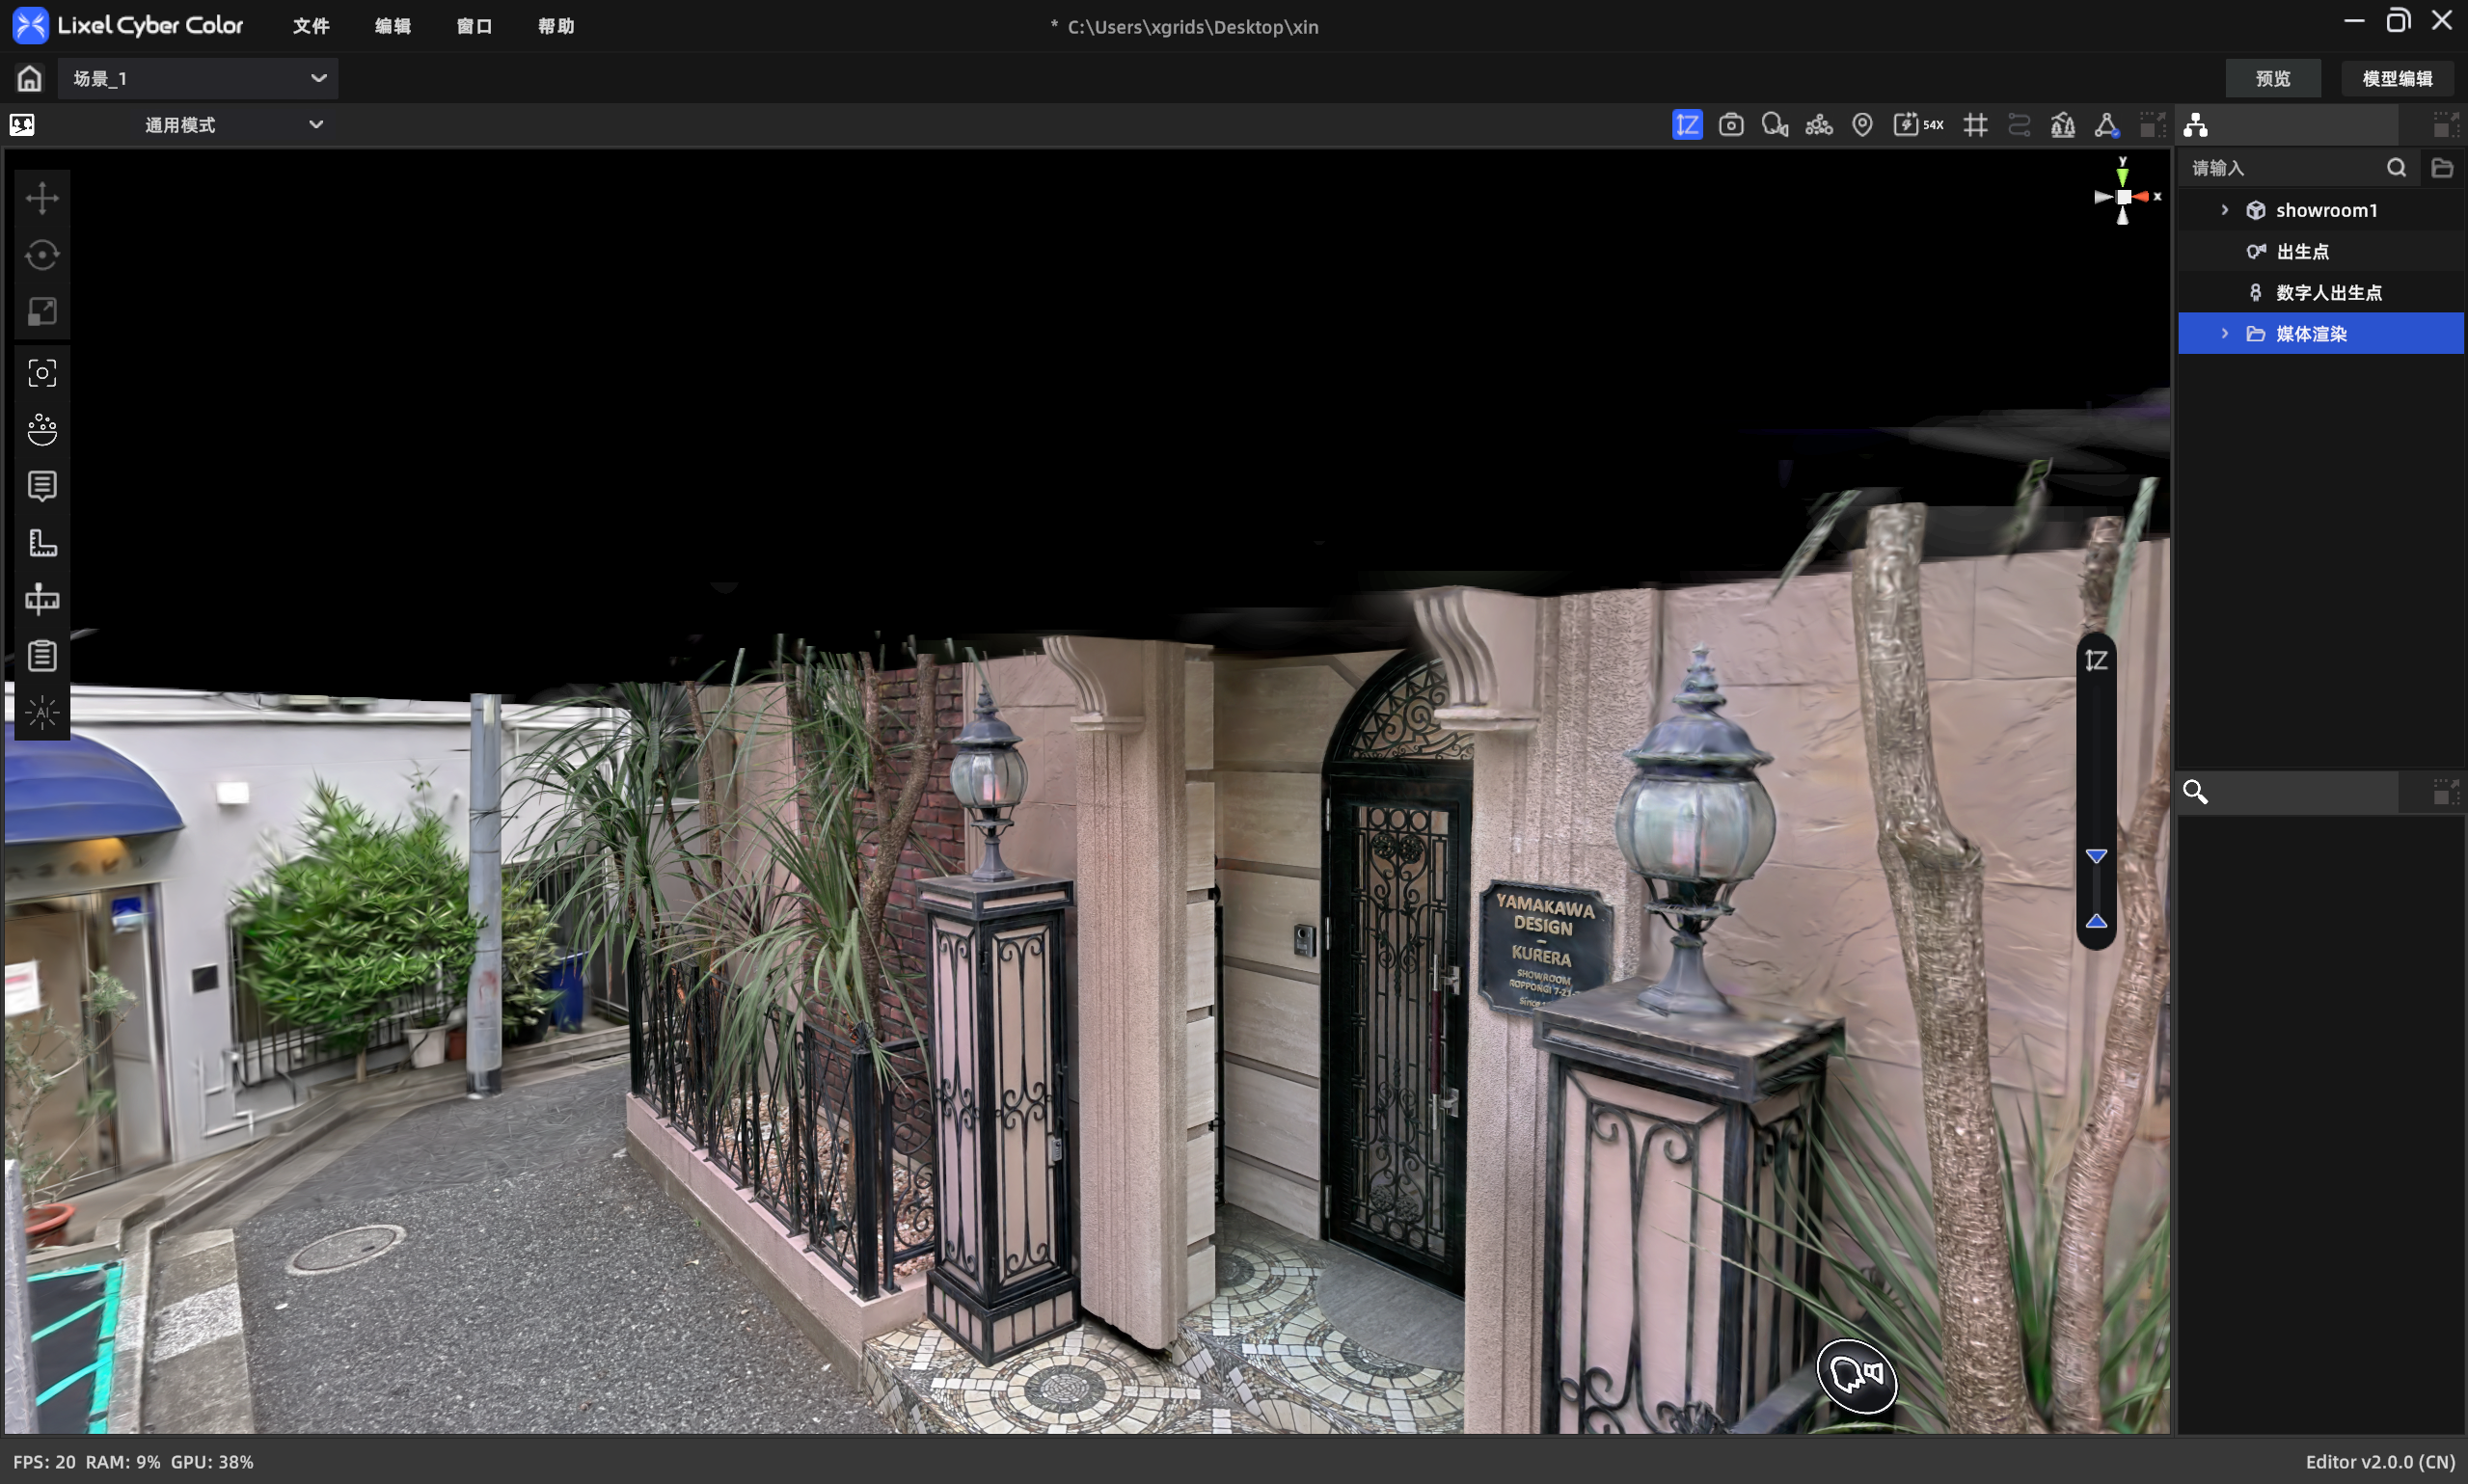
Height Filter